Mantieni tutto organizzato con le raccolte
Salva e classifica i contenuti in base alle tue preferenze.
Con un'app Next.js o Angular esistente (Next.js versioni 13.5.x+
o Angular 18.2.x+)
in un repository GitHub, iniziare a utilizzare App Hosting può essere semplice come
creare un backend App Hosting e poi avviare un
rollout con un push al ramo live. Se non hai un'app, utilizza una delle nostre app di esempio per seguire i passaggi descritti in questa guida.
Prima di iniziare
Prima di poter configurare Firebase App Hosting, devi creare un progetto Firebase (se non ne hai già uno) ed eseguire l'upgrade al piano Blaze.
(Facoltativo) Passaggio 0: crea un repository GitHub e un'app web
Se non hai già un'app web in un repository GitHub o se preferisci provare il flusso con un'app di esempio, inizia inizializzando uno dei nostri esempi per Next.js o Angular:
npm init @apphosting
Puoi eseguire l'app di esempio localmente utilizzando next dev o ng start. Per continuare,
crea un nuovo repository GitHub
e trasferisci il codice campione appena inizializzato.
Passaggio 1: crea un backend App Hosting
Un backend App Hosting è la raccolta di risorse gestite che App Hosting crea per compilare ed eseguire la tua app web.
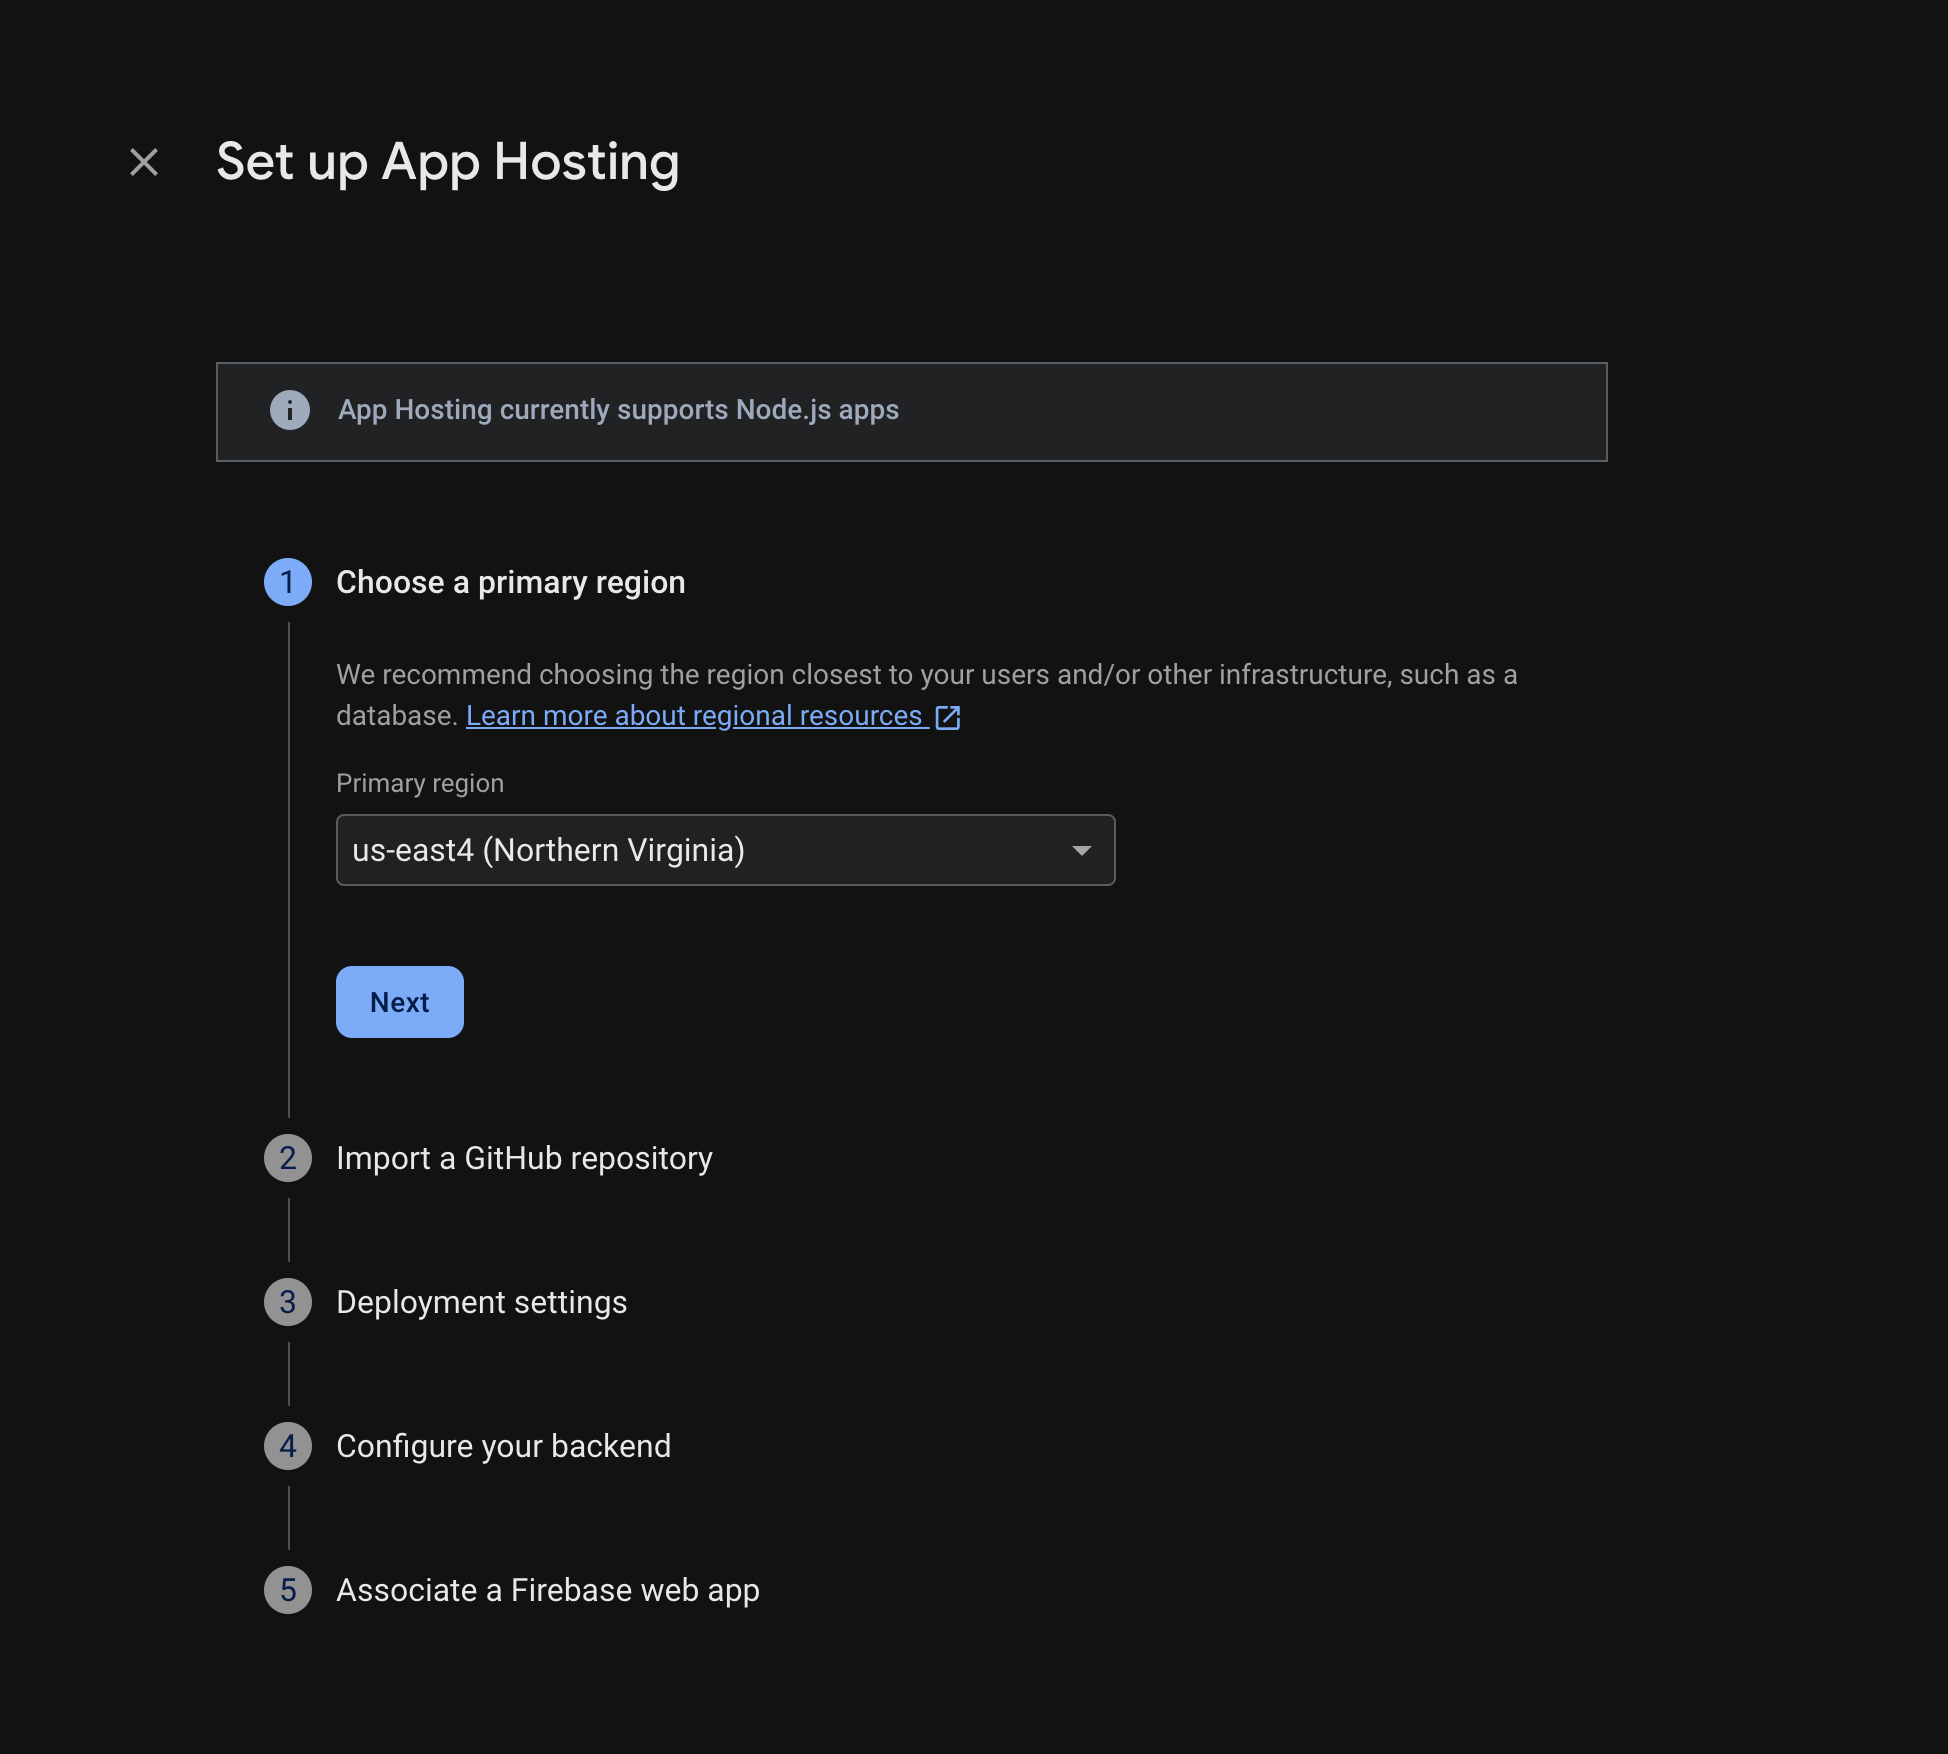
Console Firebase: dal menu Build, seleziona App Hosting e poi
Inizia.
CLI: (versione 13.15.4 o successive) Per creare un backend, esegui il seguente comando dalla radice della directory del progetto locale, fornendo il tuo projectID come argomento:
Per la console o l'interfaccia a riga di comando, segui le istruzioni per scegliere una
regione, configurare una
connessione GitHub
e configurare queste impostazioni di deployment di base:
Imposta la directory principale dell'app (il valore predefinito è /)
Di solito è qui che si trova il file package.json.
Impostare il ramo live
Questo è il ramo del repository GitHub di cui viene eseguito il deployment nell'URL live. Spesso è il ramo in cui vengono uniti i rami delle funzionalità o di sviluppo.
Accettare o rifiutare le implementazioni automatiche
Le implementazioni automatiche sono abilitate per impostazione predefinita. Al termine della creazione del backend,
puoi scegliere di eseguire immediatamente il deployment della tua app su App Hosting.
Assegna un nome al backend.
Passaggio 2: visualizza l'app di cui è stato eseguito il deployment
Quando crei un backend, Firebase ti offre un sottodominio senza costi aggiuntivi in cui gli utenti finali possono visitare la tua app web. Il suo formato è backend-id--project-id.us-central1.hosted.app.
Per visualizzare l'URL della tua app web, controlla la console Firebase o esegui il seguente comando
CLI:
Passaggio 3: attiva un rollout eseguendo il push di una modifica
Una volta creato il backend e ottenuto un URL attivo, puoi
attivare l'implementazione di una nuova versione della tua app web ogni volta che esegui il push
delle modifiche nel branch attivo del tuo repository GitHub. Per eseguire un test della configurazione di App Hosting:
In GitHub, invia una modifica al branch live dell'app web.
Apri la
scheda App Hosting nella
console Firebase e seleziona Visualizza dashboard per il tuo backend.
L'elenco delle tabelle mostra il commit specifico associato al rollout
attivato dalla modifica.
Passaggi successivi
Scopri di più: segui un codelab Firebase che integra un'app
ospitata con Firebase Authentication e le funzionalità di Google AI:
Next.js |
Angular
[null,null,["Ultimo aggiornamento 2025-08-27 UTC."],[],[],null,["\u003cbr /\u003e\n\nWith an existing Next.js or Angular app (Next.js versions 13.5.x+\nor Angular 18.2.x+)\nin a GitHub repository, getting started with App Hosting can be as\nstraightforward as creating an App Hosting backend and then starting a\nrollout with a push to your live branch. If you don't have an app, use one of\nour sample apps to walk through the steps described in this guide.\n\nBefore you begin\n\nBefore you can set up Firebase App Hosting, you'll need to create a Firebase\nproject (if you don't already have one) and upgrade to the Blaze plan.\n\nTo create a project:\n\nNew to Firebase or Cloud\n\n\nFollow these steps if you're new to Firebase or Google Cloud. \n\nYou can also follow these steps if you want to create a wholly new\nFirebase project (and its underlying Google Cloud project).\n\n1. Sign into the [Firebase console](//console.firebase.google.com/).\n2. Click the button to create a new Firebase project.\n3. In the text field, enter a **project name**.\n\n If you're part of a Google Cloud org, you can optionally select which\n folder you create your project in.\n | Your project name is used as a display name in Firebase interfaces, and Firebase auto-creates a unique project ID based on this project name. Note that you can optionally click the **Edit** icon now to set your preferred project ID, but you cannot change this ID after project creation. Learn about [how Firebase uses the\n | project ID](/docs/projects/learn-more#project-id).\n4. If prompted, review and accept the [Firebase terms](/terms), then click **Continue**.\n5. *(Optional)* Enable AI assistance in the Firebase console (called \"Gemini in Firebase\"), which can help you get started and streamline your development process.\n6. *(Optional)* Set up Google Analytics for your project,\n which enables an optimal experience using these Firebase products:\n [Firebase A/B Testing](/docs/ab-testing),\n [Cloud Messaging](/docs/cloud-messaging),\n [Crashlytics](/docs/crashlytics),\n [In-App Messaging](/docs/in-app-messaging), and\n [Remote Config](/docs/remote-config)\n (including\n [Personalization](/docs/remote-config/personalization)).\n\n Either select an existing\n [Google Analytics account](//support.google.com/analytics/answer/1009618)\n or create a new account. If you create a new account, select your\n [Analytics reporting location](/docs/projects/locations),\n then accept the data sharing settings and Google Analytics terms\n for your project.\n | You can always set up Google Analytics later in the [*Integrations* tab](//console.firebase.google.com/project/_/settings/integrations) of your settings *Project settings*.\n7. Click **Create project**.\n\nFirebase creates your project, provisions some initial resources, and\nenables important APIs. When the process completes, you'll be taken to the\noverview page for your Firebase project in the Firebase console.\n\nExisting Cloud project\n\n\nFollow these steps if you want to start using Firebase with an existing\nGoogle Cloud project. Learn more about\n[\"adding\nFirebase\" to an existing Google Cloud project](/docs/projects/use-firebase-with-existing-cloud-project).\n\n1. Sign into the [Firebase console](//console.firebase.google.com/) with the account that gives you access to the existing Google Cloud project.\n2. Click the button to create a new Firebase project.\n3. At the bottom of the page, click **Add Firebase to Google Cloud project**.\n4. In the text field, start entering the **project name** of the existing project, and then select the project from the displayed list.\n5. Click **Open project**.\n6. If prompted, review and accept the [Firebase terms](/terms), then click **Continue**.\n7. *(Optional)* Enable AI assistance in the Firebase console (called \"Gemini in Firebase\"), which can help you get started and streamline your development process.\n8. *(Optional)* Set up Google Analytics for your project,\n which enables an optimal experience using these Firebase products:\n [Firebase A/B Testing](/docs/ab-testing),\n [Cloud Messaging](/docs/cloud-messaging),\n [Crashlytics](/docs/crashlytics),\n [In-App Messaging](/docs/in-app-messaging), and\n [Remote Config](/docs/remote-config)\n (including\n [Personalization](/docs/remote-config/personalization)).\n\n Either select an existing\n [Google Analytics account](//support.google.com/analytics/answer/1009618)\n or create a new account. If you create a new account, select your\n [Analytics reporting location](/docs/projects/locations),\n then accept the data sharing settings and Google Analytics terms\n for your project.\n | You can always set up Google Analytics later in the [*Integrations* tab](//console.firebase.google.com/project/_/settings/integrations) of your settings *Project settings*.\n9. Click **Add Firebase**.\n\nFirebase\n[adds\nFirebase to your existing project](/docs/projects/use-firebase-with-existing-cloud-project#faq_what-happens-when-add-firebase).\nWhen the process completes, you'll be taken to the overview page for your\nFirebase project in the Firebase console.\n\nStep 0 (optional): Create a GitHub repository and web app\n\nIf you don't already have a web app residing in a GitHub repository, or if you'd\nrather try the flow with a sample app, start by initializing one of our samples,\nfor either Next.js or Angular: \n\n npm init @apphosting\n\nYou can run the sample app locally using `next dev` or `ng start`. To continue,\n[create a new GitHub repository](https://docs.github.com/en/repositories/creating-and-managing-repositories/creating-a-new-repository)\nand push the newly-initialized sample code to it.\n\nStep 1: Create an App Hosting backend\n\nAn App Hosting backend is the collection of managed resources that\nApp Hosting creates to build and run your web app.\n| A project Owner must create the *first* App Hosting backend. After this initial setup, App Hosting Admins can also create and manage additional backends. To see all your organization's repositories, ensure you have the **Organization Admin** role in GitHub. A standard member role only shows repositories you've personally created. For details, see [Firebase App Hosting IAM roles](/docs/projects/iam/roles-predefined-product#app-hosting).\n\n**Firebase console** : From the **Build** menu, select **App Hosting** and then\n**Get started**.\n\n**CLI:** (Version 13.15.4 or later) To create a backend, run the following\ncommand from the root of your local project directory, supplying your\n[projectID](/docs/projects/learn-more#project-id) as an argument: \n\n firebase apphosting:backends:create --project \u003cvar label=\"project ID\" translate=\"no\"\u003ePROJECT_ID\u003c/var\u003e\n\nFor both console or CLI, follow the prompts to choose a\n[region](/docs/app-hosting/about-app-hosting#locations), set up a\n[GitHub connection](/docs/app-hosting/about-app-hosting#repo-integration),\nand configure these basic deployment settings:\n\n- Set **your app's root directory** (defaults to `/`)\n\n This is usually where your `package.json` file is located.\n\n\u003c!-- --\u003e\n\n- Set the **live branch**\n\n This is the branch of your GitHub repository that gets deployed to your\n live URL. Often, it's the branch into which feature branches or development\n branches are merged.\n- Accept or decline **automatic rollouts**\n\n Automatic rollouts are enabled by default. At completion of backend creation,\n you can choose for your app to be deployed to App Hosting immediately.\n- Assign a name to your backend.\n\nStep 2: View the deployed app\n\nWhen you create a backend, Firebase gives you a no-cost subdomain where end\nusers can visit your web app. Its format\nis \u003cvar translate=\"no\"\u003ebackend-id\u003c/var\u003e`--`\u003cvar translate=\"no\"\u003eproject-id\u003c/var\u003e`.us-central1.hosted.app`.\n\nTo view your web app's URL, check the Firebase console, or run the following CLI\ncommand: \n\n firebase apphosting:backends:get --project \u003cvar translate=\"no\"\u003ePROJECT_ID\u003c/var\u003e \u003cvar translate=\"no\"\u003e{BACKEND_ID}\u003c/var\u003e\n\n| **Note:** After creating your backend, it may take around five minutes for your app's URL to work.\n\nStep 3: Trigger a rollout by pushing a change\n\nOnce your backend is created and you have a live URL, you can\ntrigger the rollout of a new version of your web app whenever you push\nchanges into the live branch of your GitHub repository. To perform a\ntest of your App Hosting setup:\n\n1. In GitHub, push a change to the live branch of the web app.\n2. Open the [App Hosting tab](//console.firebase.google.com/project/_/apphosting) in the Firebase console and select **View dashboard** for your backend. The table list displays the specific commit associated with the rollout triggered by your change.\n\nNext steps\n\n- Go deeper: walk through a Firebase codelab that integrates a hosted app with Firebase Authentication and Google AI features: [Next.js](https://firebase.google.com/codelabs/firebase-nextjs) \\| [Angular](https://firebase.google.com/codelabs/firebase-web)\n- [Connect a custom domain](/docs/app-hosting/custom-domain).\n- [Configure your backend](/docs/app-hosting/configure)---set environment variables, store secret parameters, and more.\n- [Monitor rollouts, site usage, and logs](/docs/app-hosting/rollouts)."]]