
FirebaseUI 是以 Firebase Authentication SDK 為基礎建構的程式庫,提供可直接使用的 UI 流程,方便您在應用程式中使用。FirebaseUI 具有下列優點:
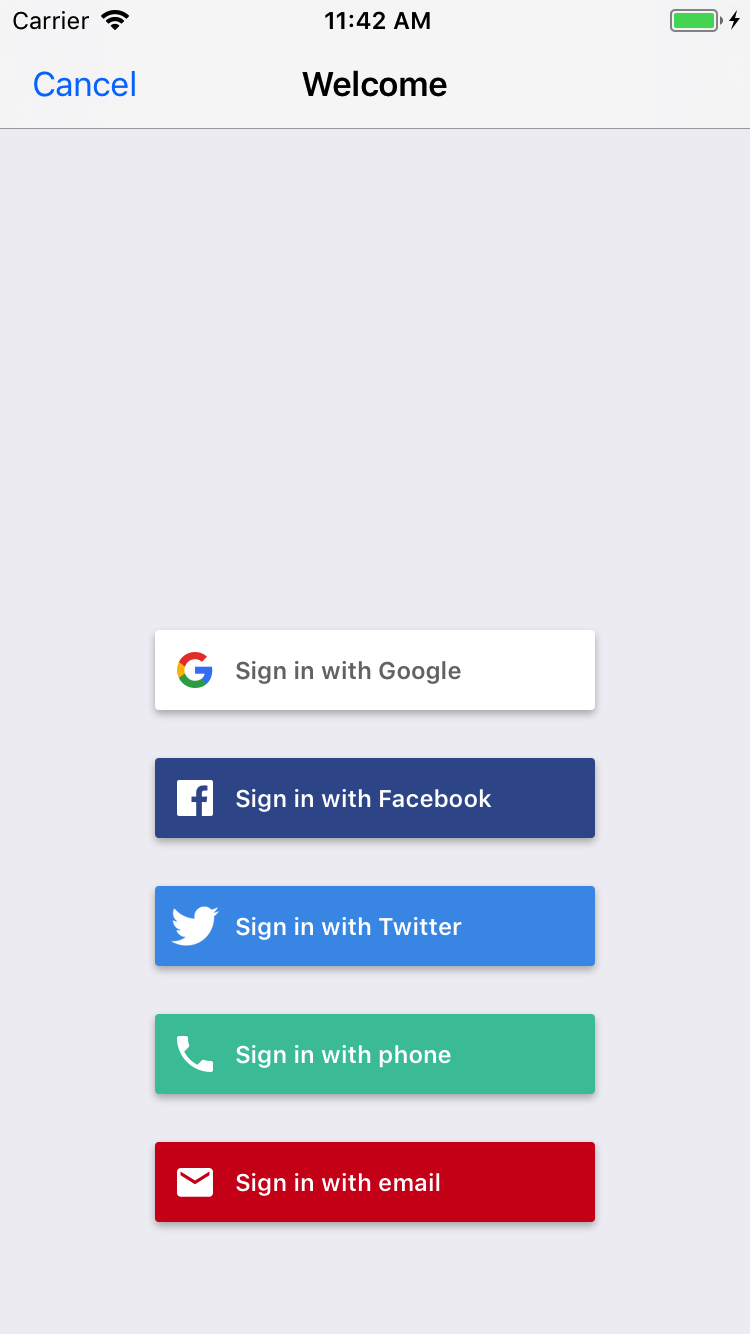
- 多個供應商:電子郵件/密碼、電子郵件連結、電話驗證、Google 登入、Facebook 登入和 Twitter 登入的登入流程。
- 帳戶管理:處理帳戶管理工作的流程,例如建立帳戶和重設密碼。
- 匿名帳戶連結:自動將匿名帳戶連結至身分識別提供者的流程。
- 可自訂:自訂 FirebaseUI 的外觀,讓它與應用程式風格一致。此外,由於 FirebaseUI 是開放原始碼,您可以將專案分叉,並根據需求進行自訂。
事前準備
將 FirebaseUI 新增至 Podfile:
pod 'FirebaseUI'如要只新增 Auth 元件和想使用的供應商,請執行下列操作:
pod 'FirebaseUI/Auth'

pod 'FirebaseUI/Google'
pod 'FirebaseUI/Facebook'
pod 'FirebaseUI/OAuth' # Used for Sign in with Apple, Twitter, etc
pod 'FirebaseUI/Phone'
如果尚未將應用程式連結至 Firebase 專案,請從 Firebase 控制台進行連結。
設定登入方式
如要使用 Firebase 登入使用者,請務必啟用並設定要支援的登入方式。
電子郵件地址和密碼
在 Firebase 控制台中,開啟「驗證」部分,然後啟用電子郵件和密碼驗證。
透過電子郵件連結驗證
在 Firebase 控制台中,開啟「驗證」部分。在「登入方式」分頁中,啟用「電子郵件地址/密碼」供應商。注意:如要使用電子郵件連結登入,必須啟用電子郵件或密碼登入功能。
在同一專區中,啟用「電子郵件連結 (不需要密碼即可登入)」登入方法,然後按一下「儲存」。
如要啟用電子郵件連結登入功能,請使用
FIREmailLinkAuthSignInMethod初始化FUIEmailAuth執行個體。您也需要提供有效的FIRActionCodeSettings物件,並將handleCodeInApp設為 true。
Swift
var actionCodeSettings = ActionCodeSettings()
actionCodeSettings.url = URL(string: "https://example.firebasestorage.app")
actionCodeSettings.handleCodeInApp = true
actionCodeSettings.setAndroidPackageName("com.firebase.example", installIfNotAvailable: false, minimumVersion: "12")

let provider = FUIEmailAuth(authUI: FUIAuth.defaultAuthUI()!,
                            signInMethod: FIREmailLinkAuthSignInMethod,
                            forceSameDevice: false,
                            allowNewEmailAccounts: true,
                            actionCodeSetting: actionCodeSettings)
Objective-C
FIRActionCodeSettings *actionCodeSettings = [[FIRActionCodeSettings alloc] init];
actionCodeSettings.URL = [NSURL URLWithString:@"https://example.firebasestorage.app"];
actionCodeSettings.handleCodeInApp = YES;
[actionCodeSettings setAndroidPackageName:@"com.firebase.example"
                    installIfNotAvailable:NO
                           minimumVersion:@"12"];

id<FUIAuthProvider> provider = [[FUIEmailAuth alloc] initWithAuthUI:[FUIAuth defaultAuthUI]
                                                       signInMethod:FIREmailLinkAuthSignInMethod
                                                    forceSameDevice:NO
                                              allowNewEmailAccounts:YES
                                                  actionCodeSetting:actionCodeSettings];
此外,您需要將傳遞至初始設定程式的網址加入許可清單。 您可以在 Firebase 控制台開啟「驗證」部分,在「登入方式」分頁中,於「已授權網域」下方新增網址。
擷取深層連結後,您需要將其傳遞至驗證 UI,以便處理。
Swift
FUIAuth.defaultAuthUI()!.handleOpen(url, sourceApplication: sourceApplication)
Objective-C
[[FUIAuth defaultAuthUI] handleOpenURL:url sourceApplication:sourceApplication];
- FirebaseUI-iOS 中的電子郵件連結登入功能與 FirebaseUI-Android 和 FirebaseUI-web 相容,也就是說,使用者可以從 FirebaseUI-Android 啟動流程,然後開啟連結並透過 FirebaseUI-web 完成登入。反向流程也是如此。
Apple
請參閱 Firebase「使用 Apple 登入」指南中的「開始前準備」和「遵守 Apple 匿名資料規定」章節。
在權利檔案中新增「使用 Apple 登入」功能。
初始化為「使用 Apple 帳戶登入」設定的 OAuth 供應商例項:
Swift
provider = FUIOAuth.appleAuthProvider()
Objective-C
FUIOAuth *provider = [FUIOAuth appleAuthProvider];
- 按照這篇教學課程設定 Google 登入功能
按照 Facebook 的入門頁面設定 Facebook 登入 SDK。
在 Firebase 控制台中,開啟「驗證」部分,然後啟用 Facebook。如要啟用 Facebook 登入功能,您必須提供 Facebook 應用程式 ID 和應用程式密鑰,這些資訊可在 Facebook 開發人員控制台中取得。
在 Xcode 專案的「Project Settings > Capabilities」畫面中,啟用鑰匙圈分享功能。
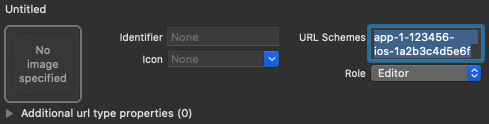
在 Xcode 專案中將
fbFACEBOOK_APP_ID新增為網址通訊協定。將 Facebook 應用程式 ID 和顯示名稱新增至
Info.plist檔案:鍵 值 FacebookAppID FACEBOOK_APP_ID(例如1234567890)FacebookDisplayName 應用程式名稱 初始化 Facebook 提供者執行個體:
Swift
provider = FUIFacebookAuth(authUI: FUIAuth.defaultAuthUI())
Objective-C
FUIFacebookAuth *provider = [[FUIFacebookAuth alloc] initWithAuthUI:[FUIAuth defaultAuthUI]];
如要使用 Facebook Limited Login,請在
FUIFacebookAuth執行個體上設定useLimitedLogin屬性。Swift
provider.useLimitedLogin = true
Objective-C
provider.useLimitedLogin = YES;
在 Firebase 控制台中,開啟「驗證」部分,然後啟用 Twitter。如要啟用 Twitter 登入功能,您必須提供 Twitter API 消費者金鑰和密鑰,這些資訊可在 Twitter 應用程式管理控制台中取得。
初始化為 Twitter 登入設定的 OAuth 提供者執行個體:
Swift
provider = FUIOAuth.twitterAuthProvider()
Objective-C
FUIOAuth *provider = [FUIOAuth twitterAuthProvider];
電話號碼
在 Firebase 控制台中,開啟「驗證」部分,然後啟用電話號碼登入功能。
Firebase 必須能夠驗證電話號碼登入要求是否來自您的應用程式。其中一種做法是透過 APNs 通知。詳情請參閱「啟用應用程式驗證」。
如要啟用 APNs 通知以搭配 Firebase Authentication 使用,請按照下列步驟操作:
在 Xcode 中,為專案啟用推播通知。
將 APNs 驗證金鑰上傳至 Firebase。 如果沒有 APNs 驗證金鑰,請務必在 Apple 開發人員會員中心建立。
-
在 Firebase 控制台的專案中,依序選取齒輪圖示、「專案設定」和「Cloud Messaging」分頁標籤。
-
在「iOS 應用程式設定」下方的「APN 驗證金鑰」中,按一下「上傳」按鈕,上傳開發或正式版驗證金鑰,或兩者都上傳。至少須提供一個。
-
瀏覽至您儲存金鑰的位置,選取金鑰,然後按一下「開啟」。新增金鑰的 ID (可在 Apple Developer Member Center 中取得),然後按一下「上傳」。
如果您已有 APNs 憑證,可以改為上傳該憑證。
-
如果裝置無法接收 APNs 通知,Firebase 會使用 reCAPTCHA 驗證要求。
如要啟用 reCAPTCHA 驗證,請在 Xcode 中執行下列操作:
選用:Firebase 會使用方法調換,自動取得應用程式的 APNs 權杖、處理 Firebase 傳送至應用程式的無聲推播通知,以及在驗證期間自動攔截 reCAPTCHA 驗證頁面的自訂結構定義重新導向。
如果您不想使用 Swizzling,請參閱 Firebase SDK 驗證文件中的「附錄:不使用 Swizzling 進行電話號碼登入」。
登入
如要啟動 FirebaseUI 登入流程,請先初始化 FirebaseUI:
Swift
import FirebaseAuthUI

/* ... */

FirebaseApp.configure()
let authUI = FUIAuth.defaultAuthUI()
// You need to adopt a FUIAuthDelegate protocol to receive callback
authUI.delegate = self
Objective-C
@import FirebaseAuthUI;

...

[FIRApp configure];
FUIAuth *authUI = [FUIAuth defaultAuthUI];
// You need to adopt a FUIAuthDelegate protocol to receive callback
authUI.delegate = self;
接著,請設定 FirebaseUI,以便使用要支援的登入方法:
Swift
import FirebaseAuthUI
import FirebaseFacebookAuthUI
import FirebaseGoogleAuthUI
import FirebaseOAuthUI
import FirebasePhoneAuthUI

let providers: [FUIAuthProvider] = [
  FUIGoogleAuth(),
  FUIFacebookAuth(),
  FUITwitterAuth(),
  FUIPhoneAuth(authUI:FUIAuth.defaultAuthUI()),
]
self.authUI.providers = providers
Objective-C
@import FirebaseAuthUI;
@import FirebaseFacebookAuthUI;
@import FirebaseGoogleAuthUI;
@import FirebaseOAuthUI;
@import FirebasePhoneAuthUI;

...

NSArray<id<FUIAuthProvider>> *providers = @[
  [[FUIGoogleAuth alloc] init],
  [[FUIFacebookAuth alloc] init],
  [[FUITwitterAuth alloc] init],
  [[FUIPhoneAuth alloc] initWithAuthUI:[FUIAuth defaultAuthUI]]
];
_authUI.providers = providers;
如果您已啟用 Google 或 Facebook 登入功能,請為 Google 和 Facebook 註冊流程的結果實作處理常式:
Swift
func application(_ app: UIApplication, open url: URL,
    options: [UIApplicationOpenURLOptionsKey : Any]) -> Bool {
  let sourceApplication = options[UIApplicationOpenURLOptionsKey.sourceApplication] as! String?
  if FUIAuth.defaultAuthUI()?.handleOpen(url, sourceApplication: sourceApplication) ?? false {
    return true
  }
  // other URL handling goes here.
  return false
}
Objective-C
- (BOOL)application:(UIApplication *)app
            openURL:(NSURL *)url
            options:(NSDictionary *)options {
  NSString *sourceApplication = options[UIApplicationOpenURLOptionsSourceApplicationKey];
  return [[FUIAuth defaultAuthUI] handleOpenURL:url sourceApplication:sourceApplication];
}
最後,從 FUIAuth 取得 AuthViewController 的執行個體。然後,您可以將其做為應用程式的第一個檢視區塊控制器,或從應用程式中的另一個檢視區塊控制器呈現。
Swift
如要顯示登入方式選擇工具,請按照下列步驟操作:
let authViewController = authUI.authViewController()
如果您只使用電話號碼登入,可以直接顯示電話號碼登入畫面:
let phoneProvider = FUIAuth.defaultAuthUI().providers.first as! FUIPhoneAuth
phoneProvider.signIn(withPresenting: currentlyVisibleController, phoneNumber: nil)
Objective-C
如要顯示登入方式選擇工具,請按照下列步驟操作:
UINavigationController *authViewController = [authUI authViewController];
如果您只使用電話號碼登入,可以直接顯示電話號碼登入畫面:
FUIPhoneAuth *phoneProvider = [FUIAuth defaultAuthUI].providers.firstObject;
[phoneProvider signInWithPresentingViewController:currentlyVisibleController phoneNumber:nil];
顯示驗證畫面並讓使用者登入後,結果會透過 didSignInWithUser:error: 方法傳回 FirebaseUI Auth 委派:
Swift
func authUI(_ authUI: FUIAuth, didSignInWith user: FIRUser?, error: Error?) {
  // handle user and error as necessary
}
Objective-C
   - (void)authUI:(FUIAuth *)authUI
didSignInWithUser:(nullable FIRUser *)user
            error:(nullable NSError *)error {
  // Implement this method to handle signed in user or error if any.
}
登出
FirebaseUI 提供便利的方法,可登出 Firebase 驗證和所有社群識別資訊提供者:
Swift
authUI.signOut()
Objective-C
[authUI signOut];
自訂
您可以將 FirebaseUI 的檢視畫面控制器設為子類別,並在 FUIAuth 的委派方法中指定這些控制器,藉此自訂登入畫面:
Swift
func authPickerViewController(forAuthUI authUI: FUIAuth) -> FUIAuthPickerViewController {
  return FUICustomAuthPickerViewController(nibName: "FUICustomAuthPickerViewController",
                                           bundle: Bundle.main,
                                           authUI: authUI)
}

func emailEntryViewController(forAuthUI authUI: FUIAuth) -> FUIEmailEntryViewController {
  return FUICustomEmailEntryViewController(nibName: "FUICustomEmailEntryViewController",
                                           bundle: Bundle.main,
                                           authUI: authUI)
}

func passwordRecoveryViewController(forAuthUI authUI: FUIAuth, email: String) -> FUIPasswordRecoveryViewController {
  return FUICustomPasswordRecoveryViewController(nibName: "FUICustomPasswordRecoveryViewController",
                                                 bundle: Bundle.main,
                                                 authUI: authUI,
                                                 email: email)
}

func passwordSignInViewController(forAuthUI authUI: FUIAuth, email: String) -> FUIPasswordSignInViewController {
  return FUICustomPasswordSignInViewController(nibName: "FUICustomPasswordSignInViewController",
                                               bundle: Bundle.main,
                                               authUI: authUI,
                                               email: email)
}

func passwordSignUpViewController(forAuthUI authUI: FUIAuth, email: String) -> FUIPasswordSignUpViewController {
  return FUICustomPasswordSignUpViewController(nibName: "FUICustomPasswordSignUpViewController",
                                               bundle: Bundle.main,
                                               authUI: authUI,
                                               email: email)
}

func passwordVerificationViewController(forAuthUI authUI: FUIAuth, email: String, newCredential: AuthCredential) -> FUIPasswordVerificationViewController {
  return FUICustomPasswordVerificationViewController(nibName: "FUICustomPasswordVerificationViewController",
                                                     bundle: Bundle.main,
                                                     authUI: authUI,
                                                     email: email,
                                                     newCredential: newCredential)
}
Objective-C
- (FUIAuthPickerViewController *)authPickerViewControllerForAuthUI:(FUIAuth *)authUI {
  return [[FUICustomAuthPickerViewController alloc] initWithNibName:@"FUICustomAuthPickerViewController"
                                                             bundle:[NSBundle mainBundle]
                                                             authUI:authUI];
}

- (FUIEmailEntryViewController *)emailEntryViewControllerForAuthUI:(FUIAuth *)authUI {
  return [[FUICustomEmailEntryViewController alloc] initWithNibName:@"FUICustomEmailEntryViewController"
                                                             bundle:[NSBundle mainBundle]
                                                             authUI:authUI];

}

- (FUIPasswordSignInViewController *)passwordSignInViewControllerForAuthUI:(FUIAuth *)authUI
                                                                     email:(NSString *)email {
  return [[FUICustomPasswordSignInViewController alloc] initWithNibName:@"FUICustomPasswordSignInViewController"
                                                                 bundle:[NSBundle mainBundle]
                                                                 authUI:authUI
                                                                  email:email];

}

- (FUIPasswordSignUpViewController *)passwordSignUpViewControllerForAuthUI:(FUIAuth *)authUI
                                                                     email:(NSString *)email {
  return [[FUICustomPasswordSignUpViewController alloc] initWithNibName:@"FUICustomPasswordSignUpViewController"
                                                                 bundle:[NSBundle mainBundle]
                                                                 authUI:authUI
                                                                  email:email];

}

- (FUIPasswordRecoveryViewController *)passwordRecoveryViewControllerForAuthUI:(FUIAuth *)authUI
                                                                         email:(NSString *)email {
  return [[FUICustomPasswordRecoveryViewController alloc] initWithNibName:@"FUICustomPasswordRecoveryViewController"
                                                                   bundle:[NSBundle mainBundle]
                                                                   authUI:authUI
                                                                    email:email];

}

- (FUIPasswordVerificationViewController *)passwordVerificationViewControllerForAuthUI:(FUIAuth *)authUI
                                                                                 email:(NSString *)email
                                                                         newCredential:(FIRAuthCredential *)newCredential {
  return [[FUICustomPasswordVerificationViewController alloc] initWithNibName:@"FUICustomPasswordVerificationViewController"
                                                                       bundle:[NSBundle mainBundle]
                                                                       authUI:authUI
                                                                        email:email
                                                                newCredential:newCredential];
}
您可以自訂應用程式服務條款的網址,該網址會連結至帳戶建立畫面:
Swift
let kFirebaseTermsOfService = URL(string: "https://example.com/terms")!
authUI.tosurl = kFirebaseTermsOfService
Objective-C
authUI.TOSURL = [NSURL URLWithString:@"https://example.com/terms"];
最後,您可以指定自訂套件,自訂向使用者顯示的訊息和提示:
Swift
authUI.customStringsBundle = NSBundle.mainBundle() // Or any custom bundle.
Objective-C
authUI.customStringsBundle = [NSBundle mainBundle]; // Or any custom bundle.
後續步驟
- 如要進一步瞭解如何使用及自訂 FirebaseUI,請參閱 GitHub 上的 README 檔案。
- 如果您發現 FirebaseUI 有問題並想回報,請使用 GitHub Issue Tracker。