
本頁說明如何在應用程式中使用多個 Firebase 專案。
許多應用程式只需要一個 Firebase 專案,以及「開始使用」指南中說明的預設設定。以下舉例說明使用多個 Firebase 專案的實用性:
- 設定開發環境,根據建構類型或目標使用不同的 Firebase 專案。
- 在應用程式中存取多個 Firebase 專案的內容。
支援不同環境
常見的用途是為開發和正式環境提供個別的 Firebase 專案。
您可以直接將值傳遞至初始化函式,設定 Web 和 Admin SDK。對於這些 SDK,您可以使用執行階段檢查來選取開發或正式環境的設定變數。
Android 和 Apple 平台 (以及其 Unity 和 C++ 包裝函式) 通常會從設定檔載入設定:Apple 平台為 GoogleService-Info.plist,Android 平台為 google-services.json。這些檔案會讀取至選項物件 (FIROption 或 FirebaseOptions),並由 Firebase 應用程式物件 (FIRApp 或 FirebaseApp) 參照。
在這些平台上,環境切換通常會實作為建構時間決策,方法是為每個環境使用不同的設定檔。
在 Apple 應用程式中支援多個環境
根據預設,FirebaseApp.configure() 會載入與應用程式一併封裝的 GoogleService-Info.plist 檔案。如果開發和正式環境在 Xcode 中設定為個別目標,您可以:
- 下載這兩個
GoogleService-Info.plist檔案 - 將這兩個檔案儲存在不同目錄中
- 將兩者都新增至 Xcode 專案
- 使用「目標成員資格」面板,將不同檔案與不同目標建立關聯:
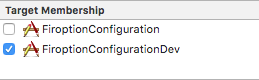
如果建構作業屬於單一目標,最佳做法是為兩個設定檔指定專屬名稱 (例如 GoogleService-Info-Free.plist 和 GoogleService-Info-Paid.plist),然後在執行階段選擇要載入的 plist。例如:
// Load a named file.
guard
  let filePath = Bundle.main.path(forResource: "MyGoogleService", ofType: "plist"),
  let fileOptions = FirebaseOptions(contentsOfFile: filePath)
else { fatalError("Couldn't load config file.") }
FirebaseApp.configure(options: fileOptions)
在 Android 應用程式中支援多個環境
在 Android 中,Google 服務 Gradle 外掛程式會將 google-services.json 檔案處理為 Android 字串資源。如要瞭解建立的資源,請參閱 Google 服務外掛程式說明文件中的「處理 JSON 檔案」。
您可以將 google-services.json 檔案放在應用程式模組根目錄下,並以各個變數命名專屬目錄,為不同的建構變數設定多個 google-services.json 檔案。舉例來說,如果您有「開發」和「發布」建構變種版本,可以按照以下方式分類設定:
app/
    google-services.json
    src/development/google-services.json
    src/release/google-services.json
    ...
詳情請參閱「新增 JSON 檔案」一文,瞭解 Google 服務外掛程式。
這些資源隨後會由 FirebaseInitProvider 載入,該供應器會在應用程式程式碼執行前執行,並使用這些值初始化 Firebase API。
由於這個供應商只會讀取名稱已知的資源,因此除了使用 Google 服務 Gradle 外掛程式,您也可以直接將字串資源新增至應用程式。方法如下:
- 從根
build.gradle中移除google-services外掛程式 - 從專案中刪除
google-services.json - 直接新增字串資源
- 正在從應用程式「
build.gradle」中刪除「apply plugin: 'com.google.gms.google-services'」
在應用程式中使用多個專案
有時您需要使用相同的 API 存取不同的專案,例如存取多個資料庫執行個體。在大多數情況下,會有一個中央 Firebase 應用程式物件,負責管理所有 Firebase API 的設定。這個物件會在正常設定程序中初始化。不過,如要從單一應用程式存取多個專案,您需要個別參照每個專案,因此必須使用不同的 Firebase 應用程式物件。是否要初始化這些其他例項,取決於您。
無論是哪種情況,您都必須先建立 Firebase 選項物件,以保存 Firebase 應用程式的設定資料。如需選項的完整說明文件,請參閱下列類別的 API 參考文件:
- Swift:
FirebaseOptions(googleAppID:gcmSenderID:) - Android:
FirebaseOptions.Builder - 網頁版:
initializeApp() - C++:
firebase::App::Create - Unity:
FirebaseApp.Create - Node.js:
initializeApp - Java:
FirebaseOptions.Builder
下列範例說明如何在應用程式中使用這些類別來支援多個專案:
Swift
// Configure with manual options. Note that projectID and apiKey, though not // required by the initializer, are mandatory. let secondaryOptions = FirebaseOptions(googleAppID: "1:27992087142:ios:2a4732a34787067a", gcmSenderID: "27992087142") secondaryOptions.apiKey = "AIzaSyBicqfAZPvMgC7NZkjayUEsrepxuXzZDsk" secondaryOptions.projectID = "projectid-12345" // The other options are not mandatory, but may be required // for specific Firebase products. secondaryOptions.bundleID = "com.google.firebase.devrel.FiroptionConfiguration" secondaryOptions.clientID = "27992087142-ola6qe637ulk8780vl8mo5vogegkm23n.apps.googleusercontent.com" secondaryOptions.databaseURL = "https://myproject.firebaseio.com" secondaryOptions.storageBucket = "myproject.appspot.com" secondaryOptions.deepLinkURLScheme = "myapp://" secondaryOptions.storageBucket = "projectid-12345.appspot.com" secondaryOptions.appGroupID = nil
Kotlin
// Manually configure Firebase Options. The following fields are REQUIRED: // - Project ID // - App ID // - API Key val options = FirebaseOptions.Builder() .setProjectId("my-firebase-project") .setApplicationId("1:27992087142:android:ce3b6448250083d1") .setApiKey("AIzaSyADUe90ULnQDuGShD9W23RDP0xmeDc6Mvw") // .setDatabaseUrl(...) // .setStorageBucket(...) .build()
Java
// Manually configure Firebase Options. The following fields are REQUIRED: // - Project ID // - App ID // - API Key FirebaseOptions options = new FirebaseOptions.Builder() .setProjectId("my-firebase-project") .setApplicationId("1:27992087142:android:ce3b6448250083d1") .setApiKey("AIzaSyADUe90ULnQDuGShD9W23RDP0xmeDc6Mvw") // setDatabaseURL(...) // setStorageBucket(...) .build();
網頁
// The following fields are REQUIRED: // - Project ID // - App ID // - API Key const secondaryAppConfig = { projectId: "<PROJECT_ID>", appId: "<APP_ID>", apiKey: "<API_KEY>", // databaseURL: "...", // storageBucket: "...", };
C++
firebase::AppOptions secondary_app_options;

// API key, app ID, and project ID are always required.
secondary_app_options.set_api_key("<API_KEY>");
secondary_app_options.set_app_id("<GOOGLE_APP_ID>");
secondary_app_options.set_project_id("<PROJECT_ID>");

// The following options are specific to individual Firebase products
// and may not always be required.
secondary_app_options.set_database_url("<DATABASE_URL>");
secondary_app_options.set_messaging_sender_id("<SENDER_ID>");
secondary_app_options.set_storage_bucket("<STORAGE_BUCKET>");
Unity
Firebase.AppOptions secondaryAppOptions = new Firebase.AppOptions {
  ApiKey = "<API_KEY>",
  AppId = "<GOOGLE_APP_ID>",
  ProjectId = "<PROJECT_ID>"
};
Node.js
const secondaryServiceAccount = require('./path/to/serviceAccountKey.json'); // All required options are specified by the service account, // add service-specific configuration like databaseURL as needed. const secondaryAppConfig = { credential: cert(secondaryServiceAccount), // databaseURL: 'https://<DATABASE_NAME>.firebaseio.com' };
Java
FileInputStream serviceAccount = new FileInputStream("path/to/serviceAccountKey.json");

FirebaseOptions secondaryAppConfig = new FirebaseOptions.Builder()
  .setCredential(FirebaseCredentials.fromCertificate(serviceAccount))
  .setDatabaseUrl("https://<DATABASE_NAME>.firebaseio.com/")
  .build();
初始化這個選項物件後,您可以使用該物件設定其他 Firebase 應用程式例項。請注意,在下方顯示的所有範例中,我們都使用 secondary 字串。這個名稱用於擷取應用程式例項,並與其他例項 (包括名為 [DEFAULT] 的預設例項) 區別。請根據其他 Firebase 專案的預期用途,選擇適當的字串。
下列程式碼片段示範如何連線至替代 Realtime Database (其他 Firebase 功能的 API 遵循相同模式)。
Swift
// Configure an alternative FIRApp. FirebaseApp.configure(name: "secondary", options: secondaryOptions) // Retrieve a previous created named app. guard let secondary = FirebaseApp.app(name: "secondary") else { fatalError("Could not retrieve secondary app") } // Retrieve a Real Time Database client configured against a specific app. let secondaryDb = Database.database(app: secondary)
Kotlin
// Initialize secondary FirebaseApp. Firebase.initialize(context = this, options, "secondary") // Retrieve secondary FirebaseApp. val secondary = Firebase.app("secondary") // Get the database for the other app. val secondaryDatabase = Firebase.database(secondary)
Java
// Initialize with secondary app FirebaseApp.initializeApp(this /* Context */, options, "secondary"); // Retrieve secondary FirebaseApp FirebaseApp secondary = FirebaseApp.getInstance("secondary");
網頁
// Initialize another app with a different config const secondaryApp = firebase.initializeApp(secondaryAppConfig, "secondary"); // Access services, such as the Realtime Database // secondaryApp.database();
C++
firebase::App* secondary_app = firebase::App::Create(secondary_app_options, "Secondary");
firebase::database::Database* secondary_database = firebase::database::Database::GetInstance(secondary_app);
Unity
var secondaryApp = Firebase.FirebaseApp.Create(secondaryAppOptions, "Secondary"));
var secondaryDatabase = Firebase.Database.FirebaseDatabase.getInstance(secondaryApp);
Node.js
// Initialize another app with a different config const secondary = initializeApp(secondaryAppConfig, 'secondary'); // Access services, such as the Realtime Database // const secondaryDatabase = secondary.database();
Java
// Initialize another app with a different config
FirebaseApp secondaryApp = FirebaseApp.initializeApp(secondaryAppConfig, "secondary");

// Retrieve the database.
FirebaseDatabase secondaryDatabase = FirebaseDatabase.getInstance(secondaryApp);
確保「Analytics」的報表資料準確無誤
Google Analytics 會在應用程式啟動流程的早期階段收集事件,有時甚至會在主要 Firebase 應用程式執行個體設定完成前收集。在這些情況下,Firebase 會參照 Android 資源或 Apple 平台上的 GoogleService-Info.plist,尋找正確的 Google 應用程式 ID 來儲存事件。因此,我們建議您盡可能使用預設設定方法。
如需執行階段設定,請注意下列注意事項:
- 如果您使用 AdMob,並按照建議在啟動時請求廣告,未使用資源型設定方法時,可能會遺漏部分與行動廣告相關的 Analytics 資料。
- 在應用程式的每個發布變化版本中,請只提供一個 Google 應用程式 ID。
舉例來說,如果您發布應用程式第 1 版,並在設定中加入特定
GOOGLE_APP_ID,然後上傳第 2 版並使用不同 ID,可能會導致分析資料遺失。 - 在 Apple 平台上,如果您在執行階段提供不同的設定,請勿將 GoogleService-Info.plist 新增至專案,否則可能會導致
GOOGLE_APP_ID發生明顯變化,進而導致 Analytics 資料遺失。