1. 總覽
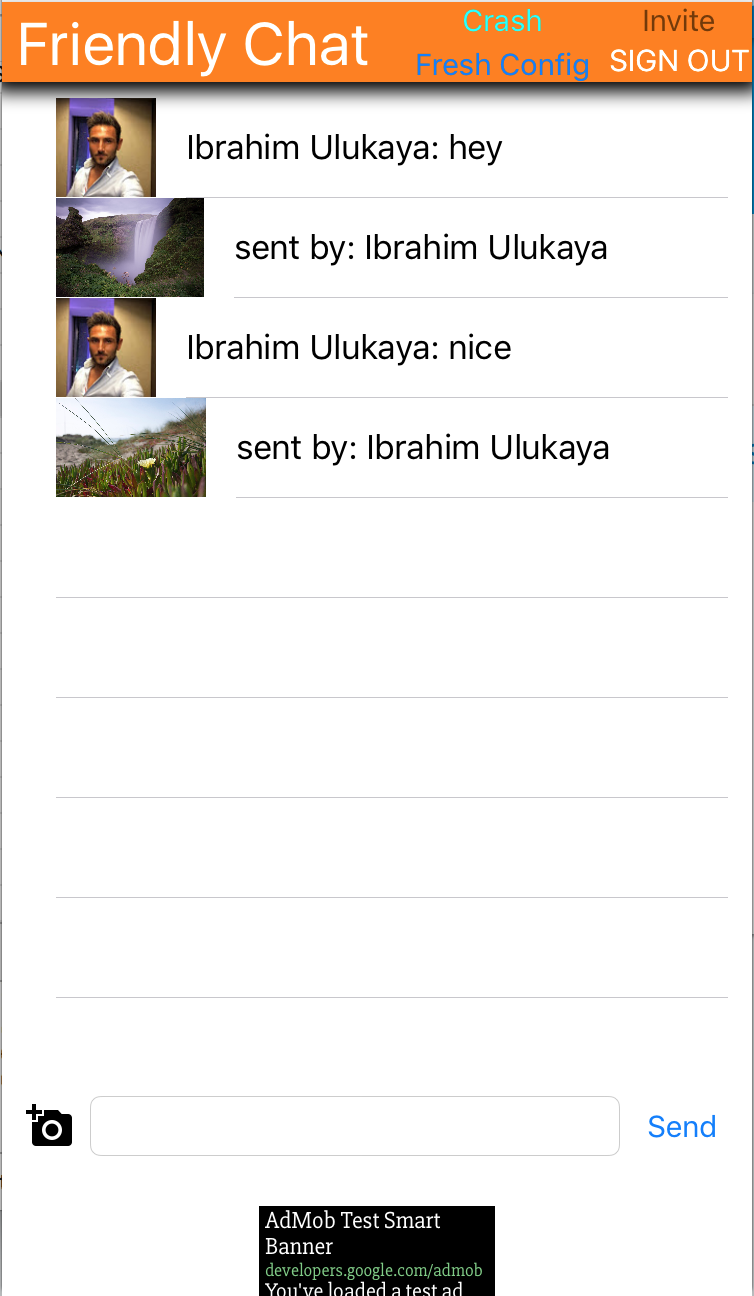
歡迎參加 Friendly Chat 程式碼研究室。在本程式碼研究室中,您將瞭解如何使用 Firebase 平台建立 iOS 應用程式。您將實作即時通訊用戶端,並使用 Firebase 監控其效能。
課程內容
- 允許使用者登入。
- 使用 Firebase 即時資料庫同步處理資料。
- 在 Firebase Storage 中儲存二進位檔案。
軟硬體需求
- Xcode
- CocoaPods
- 搭載 iOS 8.0 以上版本的測試裝置或模擬器
您會如何使用本教學課程?
您對建構 iOS 應用程式的體驗滿意嗎?
2. 取得程式碼範例
從指令列複製 GitHub 存放區。
$ git clone https://github.com/firebase/codelab-friendlychat-ios
3. 建構範例應用程式
如要建構範例應用程式,請按照下列步驟操作:
- 在終端機視窗中,前往已下載範例程式碼的

ios-starter/swift-starter目錄 - 執行
pod install --repo-update - 開啟 FriendlyChatSwift.xcworkspace 檔案,在 Xcode 中開啟專案。
- 按一下「執行」
 按鈕。
按鈕。
幾秒後,您應該會看到 Friendly Chat 主畫面。畫面上應會顯示 UI。不過,此時您無法登入、收發郵件。在完成下一個步驟之前,應用程式會因例外狀況而中止。
4. 設定 Firebase 專案
建立新的 Firebase 專案
- 使用 Google 帳戶登入 Firebase 控制台。
- 按一下按鈕建立新專案,然後輸入專案名稱 (例如
FriendlyChat)。
- 按一下「繼續」。
- 如果系統提示,請詳閱並接受 Firebase 條款,然後按一下「繼續」。
- (選用) 在 Firebase 控制台中啟用 AI 輔助功能 (稱為「Gemini in Firebase」)。
- 本程式碼研究室不需要 Google Analytics,因此請關閉 Google Analytics 選項。
- 按一下「建立專案」,等待專案佈建完成,然後按一下「繼續」。
升級 Firebase 定價方案
如要使用 Cloud Storage for Firebase,Firebase 專案必須採用即付即用 (Blaze) 定價方案,也就是連結至 Cloud Billing 帳戶。
- Cloud Billing 帳戶需要付款方式,例如信用卡。
- 如果您剛開始使用 Firebase 和 Google Cloud,請確認是否符合 $300 美元抵免額和免費試用 Cloud Billing 帳戶的資格。
- 如果您是在活動中進行這項程式碼研究室,請詢問主辦單位是否有可用的 Cloud 抵免額。
如要將專案升級至 Blaze 方案,請按照下列步驟操作:
- 在 Firebase 控制台中,選取「升級方案」。
- 選取 Blaze 方案。按照畫面上的指示,將 Cloud Billing 帳戶連結至專案。
如果你在升級過程中需要建立 Cloud Billing 帳戶,可能需要返回 Firebase 控制台的升級流程,才能完成升級。
連結 iOS 應用程式
- 在新的專案總覽畫面中,按一下「將 Firebase 新增至您的 iOS 應用程式」。
- 輸入軟體包 ID,例如「
com.google.firebase.codelab.FriendlyChatSwift」。 - 輸入 App Store ID,格式為「
123456」。 - 按一下「註冊應用程式」。
將 GoogleService-Info.plist 檔案新增至應用程式
在第二個畫面中,按一下「Download GoogleService-Info.plist」下載設定檔,其中包含應用程式所需的所有 Firebase 中繼資料。將該檔案複製到應用程式,並新增至 FriendlyChatSwift 目標。
現在可以點選彈出式視窗右上角的「x」關閉視窗,略過步驟 3 和 4,因為您將在此執行這些步驟。
匯入 Firebase 模組
首先,請確認已匯入 Firebase 模組。
AppDelegate.swift、FCViewController.swift
import Firebase
在 AppDelegate 中設定 Firebase
在應用程式的 application:didFinishLaunchingWithOptions 函式中,使用 FirebaseApp 內的「configure」方法,從 .plist 檔案設定基礎 Firebase 服務。
AppDelegate.swift
  func application(_ application: UIApplication, didFinishLaunchingWithOptions
      launchOptions: [UIApplicationLaunchOptionsKey: Any]?) -> Bool {
  FirebaseApp.configure()
  GIDSignIn.sharedInstance().delegate = self
  return true
}
5. 識別使用者
使用規則限制只有已驗證的使用者可以存取
現在我們要新增規則,規定必須先驗證身分,才能讀取或寫入任何訊息。為此,我們會在訊息資料物件中加入下列規則。在 Firebase 主控台的「資料庫」專區中,選取「Realtime Database」,然後按一下「規則」分頁標籤。然後更新規則,使其如下所示:
{
  "rules": {
    "messages": {
      ".read": "auth != null",
      ".write": "auth != null"
    }
  }
}
如要進一步瞭解運作方式 (包括「auth」變數的說明文件),請參閱 Firebase 安全性說明文件。
設定驗證 API
應用程式必須先啟用這項功能,才能代表使用者存取 Firebase 驗證 API
- 前往 Firebase 控制台,然後選取專案
- 選取「驗證」
- 選取「登入方式」分頁標籤
- 將「Google」切換鈕設為啟用 (藍色)
- 在結果對話方塊中按一下「儲存」
如果在本程式碼研究室的後續步驟中發生錯誤,並收到「CONFIGURATION_NOT_FOUND」訊息,請返回這個步驟,仔細檢查您的工作。
確認 Firebase Auth 依附元件
確認 Podfile 檔案中是否有 Firebase Auth 依附元件。
Podfile
pod 'Firebase/Auth'
設定 Info.plist,以便使用 Google 登入。
您需要在 XCode 專案中新增自訂網址架構。
- 開啟專案設定:在左側樹狀檢視中按兩下專案名稱。在「目標」部分選取應用程式,然後選取「資訊」分頁,並展開「網址類型」部分。
- 按一下「+」按鈕,然後為反向用戶端 ID 新增網址架構。如要找出這個值,請開啟 GoogleService-Info.plist 設定檔,然後尋找 REVERSED_CLIENT_ID 金鑰。複製該金鑰的值,然後貼到設定頁面的「URL Schemes」(網址架構) 方塊中。將其他欄位留空。
- 完成後,您的設定應如下所示 (但會使用應用程式專屬值):

設定 Google 登入的 clientID
設定 Firebase 後,我們可以使用 clientID 在「didFinishLaunchingWithOptions:」方法中設定 Google 登入。
AppDelegate.swift
  func application(_ application: UIApplication, didFinishLaunchingWithOptions
      launchOptions: [UIApplicationLaunchOptionsKey: Any]?) -> Bool {
  FirebaseApp.configure()
  GIDSignIn.sharedInstance().clientID = FirebaseApp.app()?.options.clientID
  GIDSignIn.sharedInstance().delegate = self
  return true
}
新增登入處理常式
Google 登入成功後,請使用該帳戶向 Firebase 進行驗證。
AppDelegate.swift
  func sign(_ signIn: GIDSignIn!, didSignInFor user: GIDGoogleUser!, withError error: Error?) {
    if let error = error {
      print("Error \(error)")
      return
    }

    guard let authentication = user.authentication else { return }
    let credential = GoogleAuthProvider.credential(withIDToken: authentication.idToken,
                                                      accessToken: authentication.accessToken)
    Auth.auth().signIn(with: credential) { (user, error) in
      if let error = error {
        print("Error \(error)")
        return
      }
    }
  }
自動登入使用者。然後將監聽器新增至 Firebase Auth,讓使用者在成功登入後進入應用程式。並在 deinit 上移除監聽器。
SignInViewController.swift
  override func viewDidLoad() {
    super.viewDidLoad()
    GIDSignIn.sharedInstance().uiDelegate = self
    GIDSignIn.sharedInstance().signInSilently()
    handle = Auth.auth().addStateDidChangeListener() { (auth, user) in
      if user != nil {
        MeasurementHelper.sendLoginEvent()
        self.performSegue(withIdentifier: Constants.Segues.SignInToFp, sender: nil)
      }
    }
  }

  deinit {
    if let handle = handle {
      Auth.auth().removeStateDidChangeListener(handle)
    }
  }
登出
新增登出方法
FCViewController.swift
  @IBAction func signOut(_ sender: UIButton) {
    let firebaseAuth = Auth.auth()
    do {
      try firebaseAuth.signOut()
      dismiss(animated: true, completion: nil)
    } catch let signOutError as NSError {
      print ("Error signing out: \(signOutError.localizedDescription)")
    }
  }
以登入使用者身分測試讀取訊息
- 按一下「執行」
 按鈕。
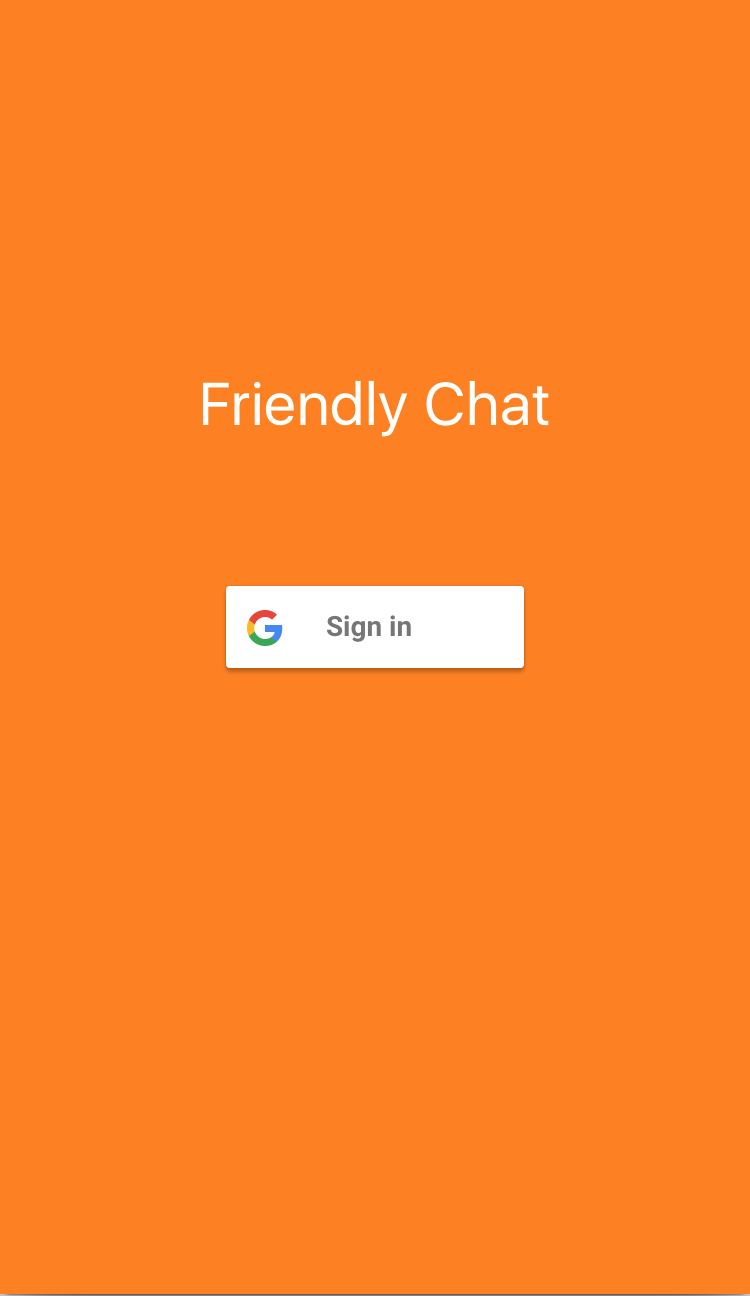
按鈕。 - 系統應會立即將你帶往登入畫面。輕觸「使用 Google 帳戶登入」按鈕。
- 如果一切正常,系統會將你導向訊息畫面。
6. 啟用即時資料庫

匯入訊息
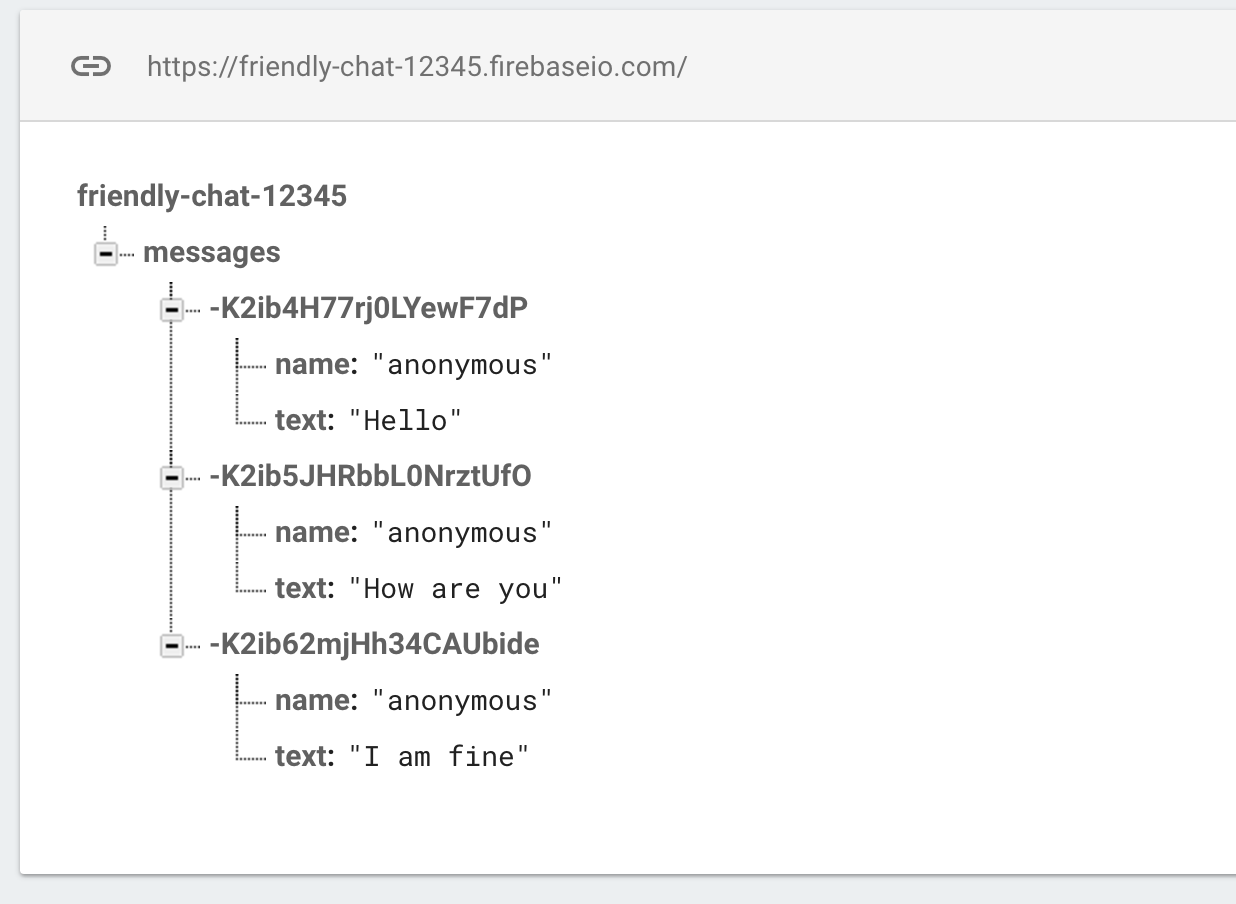
在 Firebase 主控台的專案中,選取左側導覽列的「資料庫」項目。在資料庫的溢位選單中,選取「Import JSON」。瀏覽至 friendlychat 目錄中的 initial_messages.json 檔案,選取該檔案,然後按一下「匯入」按鈕。這會取代資料庫中的所有現有資料。您也可以直接編輯資料庫,使用綠色 + 和紅色 x 新增及移除項目。
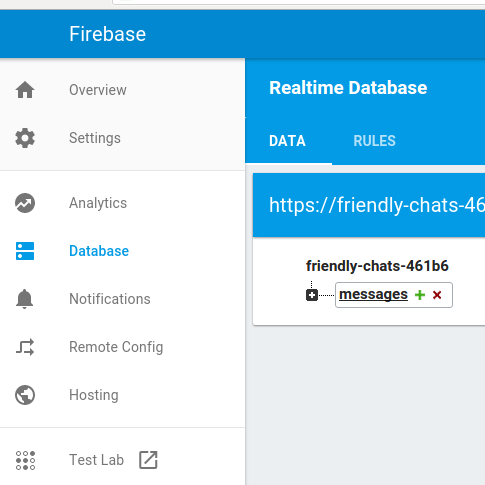
匯入後,資料庫應如下所示:
確認 Firebase 資料庫依附元件
在 Podfile 檔案的依附元件區塊中,確認是否包含 Firebase/Database。
Podfile
pod 'Firebase/Database'
同步處理現有訊息
新增程式碼,將新加入的訊息同步到應用程式 UI。
您在本節中新增的程式碼會執行下列動作:
- 初始化 Firebase 資料庫,並新增監聽器來處理資料庫的變更。
- 更新
DataSnapshot,系統就會顯示新訊息。
修改 FCViewController 的「deinit」、「configureDatabase」和「tableView:cellForRow indexPath:」方法,並替換為下方定義的程式碼:
FCViewController.swift
  deinit {
    if let refHandle = _refHandle {
      self.ref.child("messages").removeObserver(withHandle: _refHandle)
    }
  }


  func configureDatabase() {
    ref = Database.database().reference()
    // Listen for new messages in the Firebase database
    _refHandle = self.ref.child("messages").observe(.childAdded, with: { [weak self] (snapshot) -> Void in
      guard let strongSelf = self else { return }
      strongSelf.messages.append(snapshot)
      strongSelf.clientTable.insertRows(at: [IndexPath(row: strongSelf.messages.count-1, section: 0)], with: .automatic)
    })
  }


  func tableView(_ tableView: UITableView, cellForRowAt indexPath: IndexPath) -> UITableViewCell {
    // Dequeue cell
    let cell = self.clientTable.dequeueReusableCell(withIdentifier: "tableViewCell", for: indexPath)
    // Unpack message from Firebase DataSnapshot
    let messageSnapshot = self.messages[indexPath.row]
    guard let message = messageSnapshot.value as? [String: String] else { return cell }
    let name = message[Constants.MessageFields.name] ?? ""
    let text = message[Constants.MessageFields.text] ?? ""
    cell.textLabel?.text = name + ": " + text
    cell.imageView?.image = UIImage(named: "ic_account_circle")
    if let photoURL = message[Constants.MessageFields.photoURL], let URL = URL(string: photoURL),
        let data = try? Data(contentsOf: URL) {
      cell.imageView?.image = UIImage(data: data)
    }
    return cell
  }
測試訊息同步
- 按一下「執行」
 按鈕。
按鈕。 - 按一下「登入以開始使用」按鈕,前往訊息視窗。
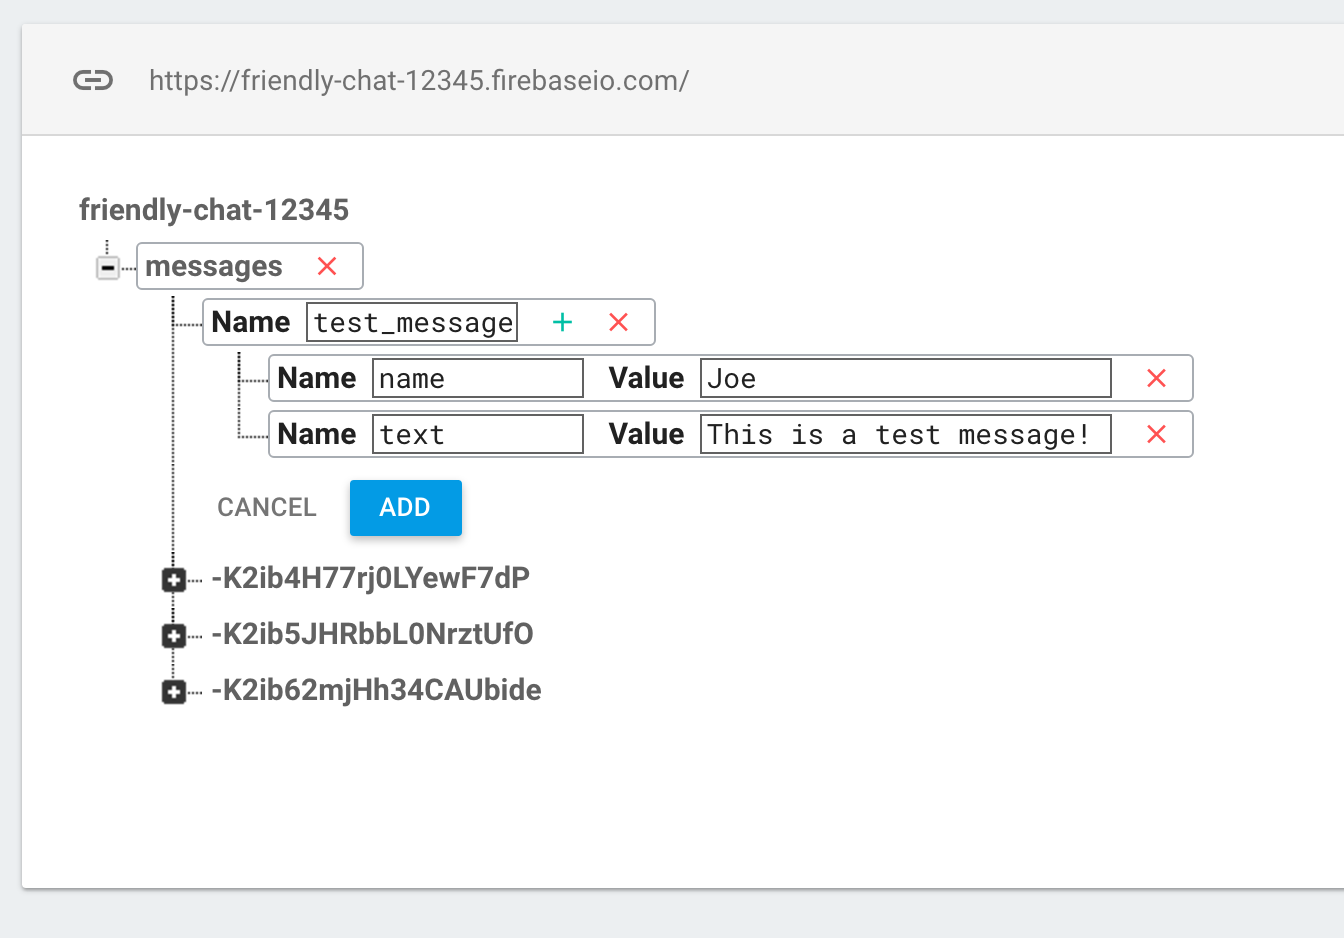
- 在 Firebase 控制台中,按一下「messages」項目旁的綠色 + 符號,然後新增類似下列的物件,即可直接新增訊息:
- 確認這些訊息是否顯示在 Friendly-Chat UI 中。
7. 傳送訊息
導入 Send Message
將值推送到資料庫。使用 push 方法將資料新增至 Firebase 即時資料庫時,系統會自動新增 ID。這些自動產生的 ID 是連續的,可確保新訊息會以正確順序新增。
修改 FCViewController 的「sendMessage:」方法,並替換為下列程式碼:
FCViewController.swift
  func sendMessage(withData data: [String: String]) {
    var mdata = data
    mdata[Constants.MessageFields.name] = Auth.auth().currentUser?.displayName
    if let photoURL = Auth.auth().currentUser?.photoURL {
      mdata[Constants.MessageFields.photoURL] = photoURL.absoluteString
    }

    // Push data to Firebase Database
    self.ref.child("messages").childByAutoId().setValue(mdata)
  }
測試傳送訊息
- 按一下「執行」
 按鈕。
按鈕。 - 按一下「登入」前往訊息視窗。
- 輸入訊息內容,然後按「傳送」。應用程式 UI 和 Firebase 控制台應會顯示新訊息。
8. 儲存及接收圖片
確認 Firebase Storage 依附元件
在 Podfile 的依附元件區塊中,確認已加入 Firebase/Storage。
Podfile
pod 'Firebase/Storage'
設定 Cloud Storage for Firebase
如要在 Firebase 專案中設定 Cloud Storage for Firebase,請按照下列步驟操作:
- 在 Firebase 主控台的左側面板中,展開「Build」,然後選取「Storage」。
- 按一下「開始使用」。
- 選取預設 Storage bucket 的位置。
位於US-WEST1、US-CENTRAL1和US-EAST1的 bucket 可享有 Google Cloud Storage 的「永久免費」方案。其他所有位置的值區均適用 Google Cloud Storage 定價和用量。 - 按一下「以測試模式啟動」。請詳閱安全性規則免責事項。
在本程式碼研究室的後續步驟中,您將新增安全性規則來保護資料。請勿在未為 Storage 值區新增安全規則的情況下,公開發布或公開應用程式。 - 點選「建立」。
設定 FirebaseStorage
FCViewController.swift
  func configureStorage() {
    storageRef = Storage.storage().reference()
  }
在現有訊息中接收圖片
新增從 Firebase Storage 下載圖片的程式碼。
修改 FCViewController 的「tableView: cellForRowAt indexPath:」方法,並替換為下列程式碼:
FCViewController.swift
  func tableView(_ tableView: UITableView, cellForRowAt indexPath: IndexPath) -> UITableViewCell {
    // Dequeue cell
    let cell = self.clientTable .dequeueReusableCell(withIdentifier: "tableViewCell", for: indexPath)
    // Unpack message from Firebase DataSnapshot
    let messageSnapshot: DataSnapshot! = self.messages[indexPath.row]
    guard let message = messageSnapshot.value as? [String:String] else { return cell }
    let name = message[Constants.MessageFields.name] ?? ""
    if let imageURL = message[Constants.MessageFields.imageURL] {
      if imageURL.hasPrefix("gs://") {
        Storage.storage().reference(forURL: imageURL).getData(maxSize: INT64_MAX) {(data, error) in
          if let error = error {
            print("Error downloading: \(error)")
            return
          }
          DispatchQueue.main.async {
            cell.imageView?.image = UIImage.init(data: data!)
            cell.setNeedsLayout()
          }
        }
      } else if let URL = URL(string: imageURL), let data = try? Data(contentsOf: URL) {
        cell.imageView?.image = UIImage.init(data: data)
      }
      cell.textLabel?.text = "sent by: \(name)"
    } else {
      let text = message[Constants.MessageFields.text] ?? ""
      cell.textLabel?.text = name + ": " + text
      cell.imageView?.image = UIImage(named: "ic_account_circle")
      if let photoURL = message[Constants.MessageFields.photoURL], let URL = URL(string: photoURL),
          let data = try? Data(contentsOf: URL) {
        cell.imageView?.image = UIImage(data: data)
      }
    }
    return cell
  }
9. 傳送圖片訊息
導入儲存及傳送圖片功能
上傳使用者的圖片,然後將這張圖片的儲存空間網址同步至資料庫,以便在訊息中傳送這張圖片。
修改 FCViewController 的「imagePickerController: didFinishPickingMediaWithInfo:」方法,並替換為下列程式碼:
FCViewController.swift
  func imagePickerController(_ picker: UIImagePickerController,
    didFinishPickingMediaWithInfo info: [String : Any]) {
      picker.dismiss(animated: true, completion:nil)
    guard let uid = Auth.auth().currentUser?.uid else { return }

    // if it's a photo from the library, not an image from the camera
    if #available(iOS 8.0, *), let referenceURL = info[UIImagePickerControllerReferenceURL] as? URL {
      let assets = PHAsset.fetchAssets(withALAssetURLs: [referenceURL], options: nil)
      let asset = assets.firstObject
      asset?.requestContentEditingInput(with: nil, completionHandler: { [weak self] (contentEditingInput, info) in
        let imageFile = contentEditingInput?.fullSizeImageURL
        let filePath = "\(uid)/\(Int(Date.timeIntervalSinceReferenceDate * 1000))/\((referenceURL as AnyObject).lastPathComponent!)"
        guard let strongSelf = self else { return }
        strongSelf.storageRef.child(filePath)
          .putFile(from: imageFile!, metadata: nil) { (metadata, error) in
            if let error = error {
              let nsError = error as NSError
              print("Error uploading: \(nsError.localizedDescription)")
              return
            }
            strongSelf.sendMessage(withData: [Constants.MessageFields.imageURL: strongSelf.storageRef.child((metadata?.path)!).description])
          }
      })
    } else {
      guard let image = info[UIImagePickerControllerOriginalImage] as? UIImage else { return }
      let imageData = UIImageJPEGRepresentation(image, 0.8)
      let imagePath = "\(uid)/\(Int(Date.timeIntervalSinceReferenceDate * 1000)).jpg"
      let metadata = StorageMetadata()
      metadata.contentType = "image/jpeg"
      self.storageRef.child(imagePath)
        .putData(imageData!, metadata: metadata) { [weak self] (metadata, error) in
          if let error = error {
            print("Error uploading: \(error)")
            return
          }
          guard let strongSelf = self else { return }
          strongSelf.sendMessage(withData: [Constants.MessageFields.imageURL: strongSelf.storageRef.child((metadata?.path)!).description])
      }
    }
  }
測試收發圖片訊息
- 按一下「執行」
 按鈕。
按鈕。 - 按一下「登入」前往訊息視窗。
- 按一下「新增相片」圖示,然後選擇相片。應用程式 UI 和 Firebase 控制台應會顯示附有相片的新訊息。
10. 恭喜!
您已使用 Firebase 輕鬆建構即時通訊應用程式。
涵蓋內容
- 即時資料庫
- 聯合登入
- 儲存空間


