
1. 准备工作
在此 Codelab 中,您将 Firebase Data Connect 与 Cloud SQL 数据库相集成,以构建电影评价 Web 应用。完成的应用将展示 Firebase Data Connect 如何简化构建 SQL 驱动的应用的过程。它包括以下功能:
- 身份验证:为应用的查询和突变实现自定义身份验证,确保只有已获授权的用户才能与您的数据互动。
- GraphQL 架构:使用灵活的 GraphQL 架构创建和管理数据结构,以满足电影评论 Web 应用的需求。
- SQL 查询和突变:使用由 GraphQL 提供支持的查询和突变,在 Cloud SQL 中检索、更新和管理数据。
- 使用部分字符串匹配进行高级搜索:使用过滤条件和搜索选项,根据标题、说明或标签等字段查找电影。
- (可选) 向量搜索集成:使用 Firebase Data Connect 的向量搜索功能添加内容搜索功能,根据输入内容和偏好设置提供丰富的用户体验。
前提条件
您需要对 JavaScript 有基本的了解。
学习内容
- 使用本地模拟器设置 Firebase Data Connect。
- 使用 Data Connect 和 GraphQL 设计数据架构。
- 为电影评论应用编写并测试各种查询和突变。
- 了解 Firebase Data Connect 如何在应用中生成和使用 SDK。
- 部署架构并高效管理数据库。
所需条件
- Git
- Visual Studio Code
- 使用 nvm-windows (Windows) 或 nvm (macOS/Linux) 安装 Node.js
- 如果您尚未创建 Firebase 项目,请在 Firebase 控制台中创建一个
- (可选)对于矢量搜索,请将您的项目升级为随用随付 Blaze 定价方案
2. 设置您的开发环境
在此 Codelab 阶段,您将学习如何设置环境,以便开始使用 Firebase Data Connect 构建电影影评应用。
- 克隆项目代码库并安装所需的依赖项:
git clone https://github.com/firebaseextended/codelab-dataconnect-web
cd codelab-dataconnect-web
cd ./app && npm i
npm run dev
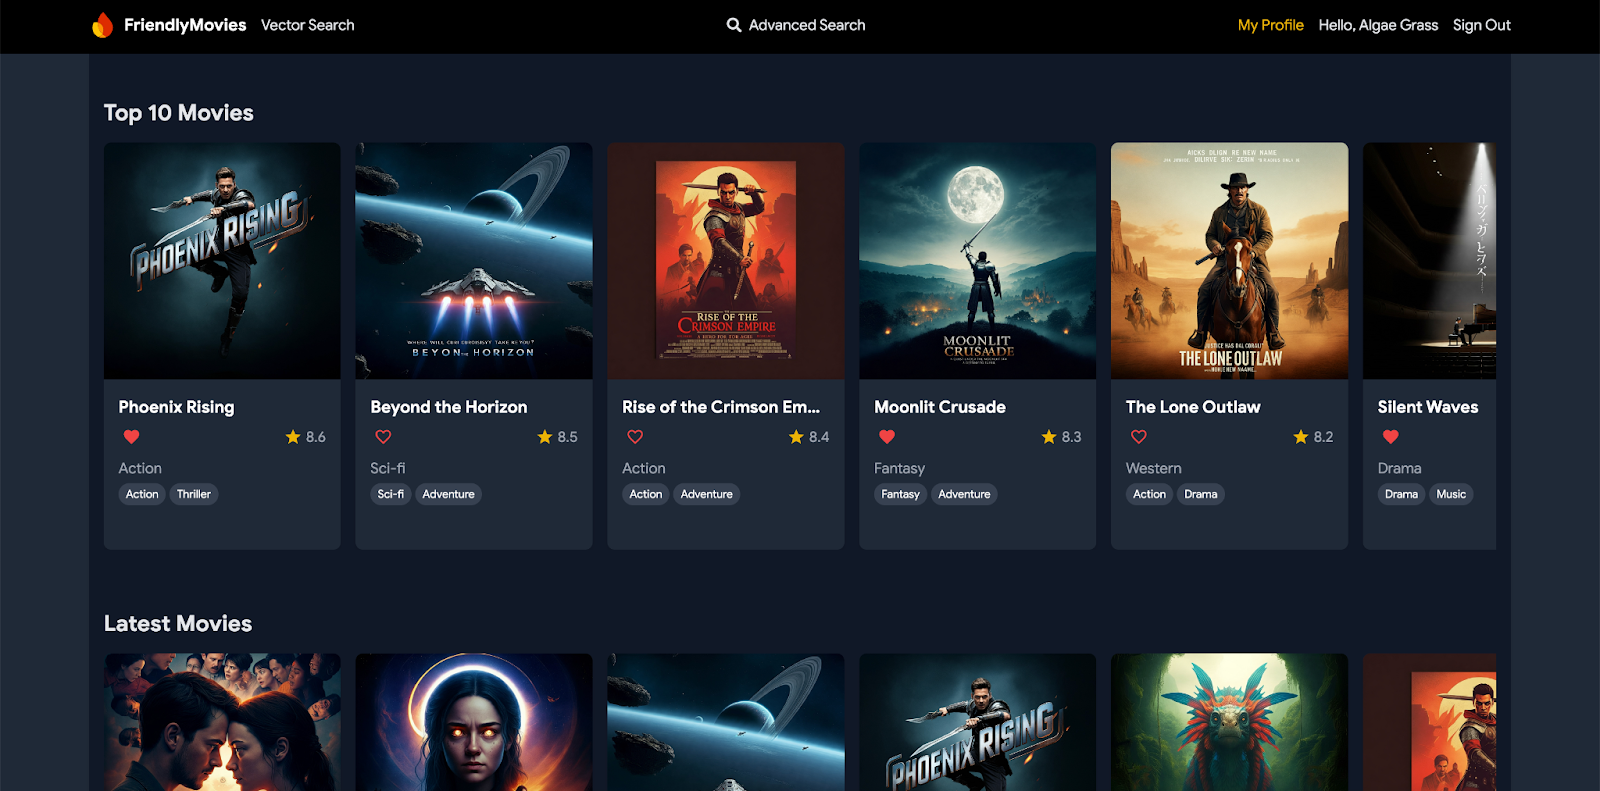
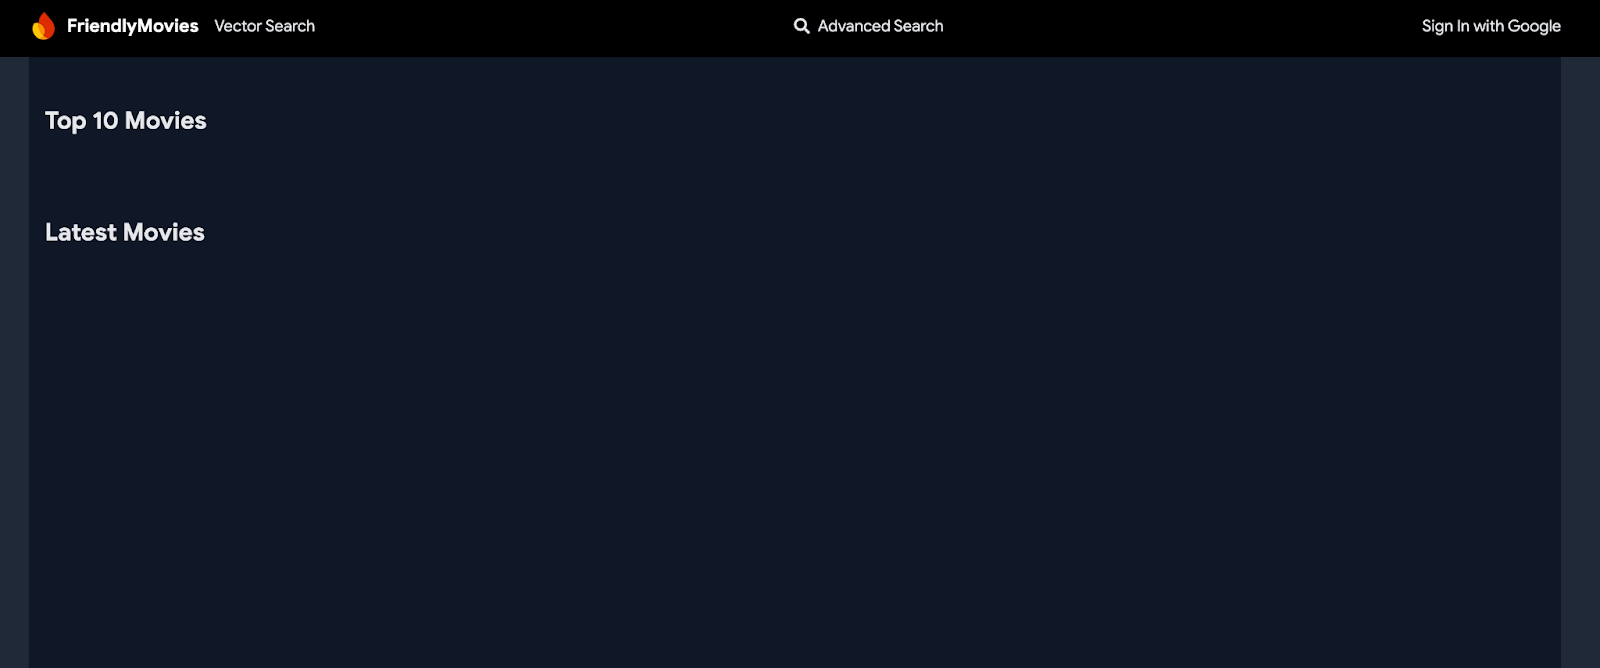
- 运行这些命令后,在浏览器中打开 http://localhost:5173,即可查看在本地运行的 Web 应用。这可作为您构建电影评论应用并与其功能互动的前端。
- 使用 Visual Studio Code 打开克隆的
codelab-dataconnect-web文件夹。您可以在此处定义架构、编写查询并测试应用的功能。 - 如需使用 Data Connect 功能,请安装 Firebase Data Connect Visual Studio 扩展程序。
或者,您也可以从 Visual Studio Code Marketplace 安装该扩展程序,或在 VS Code 中搜索该扩展程序。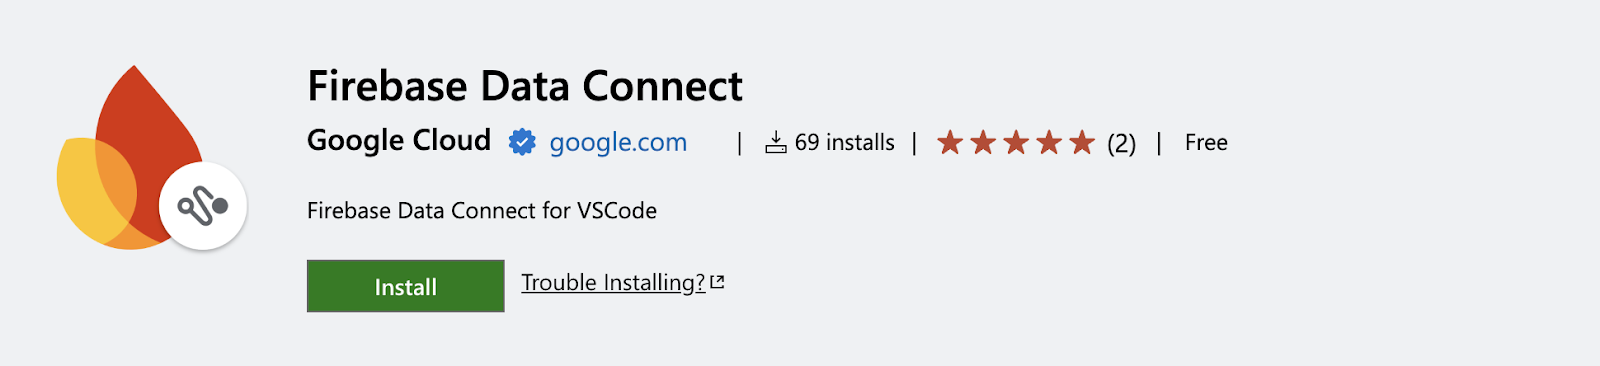
- 在 Firebase 控制台中打开或创建一个新的 Firebase 项目。
- 将 Firebase 项目连接到 Firebase Data Connect VSCode 扩展程序。在扩展程序中,执行以下操作:
- 点击登录按钮。
- 点击关联 Firebase 项目,然后选择您的 Firebase 项目。
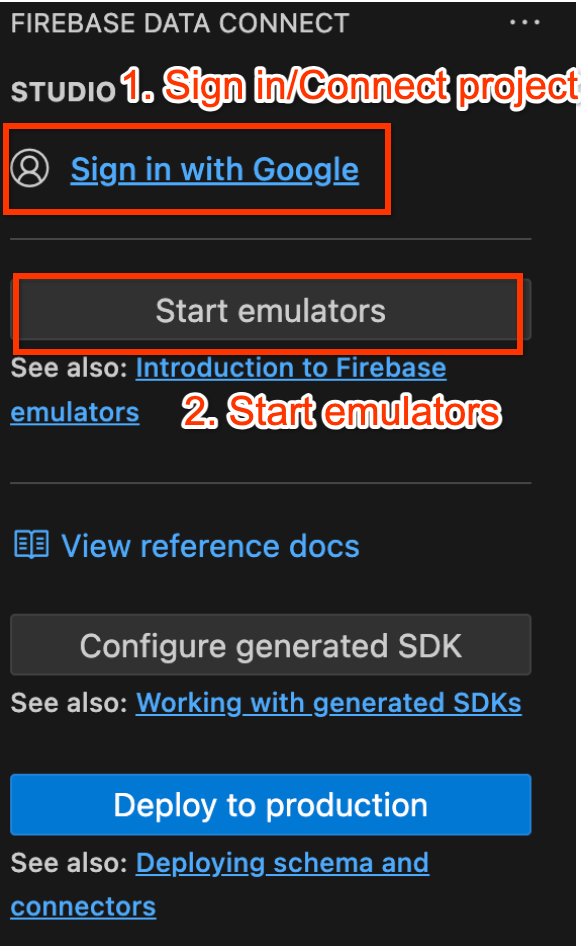
- 使用 Firebase Data Connect VS Code 扩展程序启动 Firebase 模拟器:
点击 Start Emulators,然后确认模拟器正在终端中运行。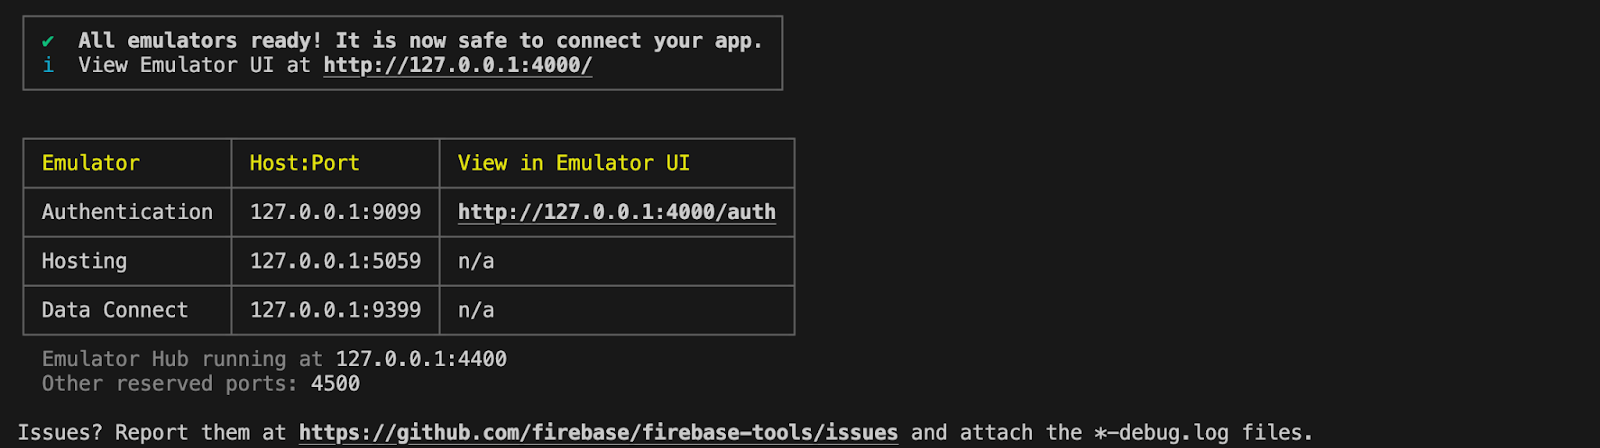
3. 查看起始代码库
在本部分中,您将探索应用起始代码库的关键区域。虽然该应用缺少一些功能,但了解其总体结构还是很有帮助的。
文件夹和文件结构
以下子部分简要介绍了应用的文件夹和文件结构。
dataconnect/ 目录
包含 Firebase Data Connect 配置、连接器(用于定义查询和变更)和架构文件。
schema/schema.gql:定义 GraphQL 架构connector/queries.gql:应用中所需的查询connector/mutations.gql:应用中需要的变异connector/connector.yaml:用于生成 SDK 的配置文件
app/src/ 目录
包含应用逻辑以及与 Firebase Data Connect 的互动。
firebase.ts:用于连接到 Firebase 项目中的 Firebase 应用的配置。lib/dataconnect-sdk/:包含生成的 SDK。您可以在connector/connector.yaml文件中修改 SDK 生成位置,并且每当您定义查询或突变时,系统都会自动生成 SDK。
4. 为电影影评定义架构
在此部分中,您将通过架构定义电影应用中关键实体之间的结构和关系。Movie、User、Actor 和 Review 等实体映射到数据库表,并使用 Firebase Data Connect 和 GraphQL 架构指令建立关系。设置完成后,您的应用将能够处理各种任务,包括搜索高分电影、按类型过滤、让用户撰写评价、标记喜爱项、探索类似电影,或通过向量搜索根据文本输入查找推荐电影。
核心实体和关系
Movie 类型包含标题、流派和标记等关键详细信息,应用会使用这些信息进行搜索和创建电影个人资料。User 类型用于跟踪用户互动,例如评价和收藏。Reviews 将用户与电影相关联,让应用显示用户生成的评分和反馈。
电影、演员和用户之间的关系使应用更具动态性。MovieActor 联接表有助于显示演员详情和演员作品目录。FavoriteMovie 类型允许用户将电影添加到收藏夹,以便应用显示个性化的收藏夹列表并突出显示热门精选内容。
设置 Movie 表格
Movie 类型定义了电影实体的主要结构,包括 title、genre、releaseYear 和 rating 等字段。
复制并粘贴代码段到您的 dataconnect/schema/schema.gql 文件中:
type Movie
  @table {
  id: UUID! @default(expr: "uuidV4()")
  title: String!
  imageUrl: String!
  releaseYear: Int
  genre: String
  rating: Float
  description: String
  tags: [String]
}
重点小结:
- id:每部电影的唯一 UUID,使用
@default(expr: "uuidV4()")生成。
设置 MovieMetadata 表格
MovieMetadata 类型与 Movie 类型建立一对一关系。其中包含其他数据,例如电影的导演。
复制并粘贴代码段到您的 dataconnect/schema/schema.gql 文件中:
type MovieMetadata
  @table {
  # @ref creates a field in the current table (MovieMetadata)
  # It is a reference that holds the primary key of the referenced type
  # In this case, @ref(fields: "movieId", references: "id") is implied
  movie: Movie! @ref
  # movieId: UUID <- this is created by the above @ref
  director: String
}
重点小结:
- 电影!@ref: 引用
Movie类型,建立外键关系。
设置 Actor 表格
复制并粘贴代码段到您的 dataconnect/schema/schema.gql 文件中:
type Actor @table {
  id: UUID!
  imageUrl: String!
  name: String! @col(name: "name", dataType: "varchar(30)")
}
Actor 类型表示电影数据库中的演员,其中每位演员都可以参演多部电影,从而形成多对多关系。
设置 MovieActor 表格
复制并粘贴代码段到您的 dataconnect/schema/schema.gql 文件中:
type MovieActor @table(key: ["movie", "actor"]) {
  # @ref creates a field in the current table (MovieActor) that holds the primary key of the referenced type
  # In this case, @ref(fields: "id") is implied
  movie: Movie!
  # movieId: UUID! <- this is created by the implied @ref, see: implicit.gql

  actor: Actor!
  # actorId: UUID! <- this is created by the implied  @ref, see: implicit.gql

  role: String! # "main" or "supporting"
}
重点小结:
- 电影:引用电影类型,隐式生成外键 movieId:UUID!
- actor: 引用 Actor 类型,隐式生成外键 actorId: UUID!。
- role:定义演员在电影中的角色(例如,“主角”或“配角”)。
设置 User 表格
User 类型定义了通过撰写评价或将电影标记为喜爱来与电影互动的用户实体。
复制并粘贴代码段到您的 dataconnect/schema/schema.gql 文件中:
type User
  @table {
  id: String! @col
  username: String! @col(dataType: "varchar(50)")
  # The following are generated from the @ref in the Review table
  # reviews_on_user
  # movies_via_Review
}
设置 FavoriteMovie 表格
FavoriteMovie 类型是一个联接表,用于处理用户与其喜爱的电影之间的多对多关系。每个表格都将 User 关联到 Movie。
复制并粘贴代码段到您的 dataconnect/schema/schema.gql 文件中:
type FavoriteMovie
  @table(name: "FavoriteMovies", singular: "favorite_movie", plural: "favorite_movies", key: ["user", "movie"]) {
  # @ref is implicit
  user: User!
  movie: Movie!
}
重点小结:
- movie:引用 Movie 类型,隐式生成外键
movieId: UUID!。 - user: 引用用户类型,隐式生成外键
userId: UUID!。
设置 Review 表格
Review 类型表示评价实体,并以多对多关系将 User 和 Movie 类型关联起来(一位用户可以发表多条评价,每部电影也可以有多条评价)。
复制并粘贴代码段到您的 dataconnect/schema/schema.gql 文件中:
type Review @table(name: "Reviews", key: ["movie", "user"]) {
  id: UUID! @default(expr: "uuidV4()")
  user: User!
  movie: Movie!
  rating: Int
  reviewText: String
  reviewDate: Date! @default(expr: "request.time")
}
重点小结:
- user:引用撰写评价的用户。
- movie:引用正在评价的电影。
- reviewDate:使用
@default(expr: "request.time")自动设置为创建评价的时间。
自动生成的字段和默认值
该架构使用 @default(expr: "uuidV4()") 等表达式自动生成唯一 ID 和时间戳。例如,在创建新记录时,Movie 和 Review 类型中的 id 字段会自动填充 UUID。
现在,架构已定义完毕,您的电影应用已为数据结构和关系奠定了坚实的基础!
5. 检索热门电影和最新电影
在此部分中,您将向本地模拟器插入模拟电影数据,然后实现连接器(查询)和 TypeScript 代码,以在 Web 应用中调用这些连接器。完成本教程后,您的应用将能够直接从数据库中动态提取并显示评分最高和最新的电影。
插入模拟电影、演员和评价数据
- 在 VSCode 中,打开
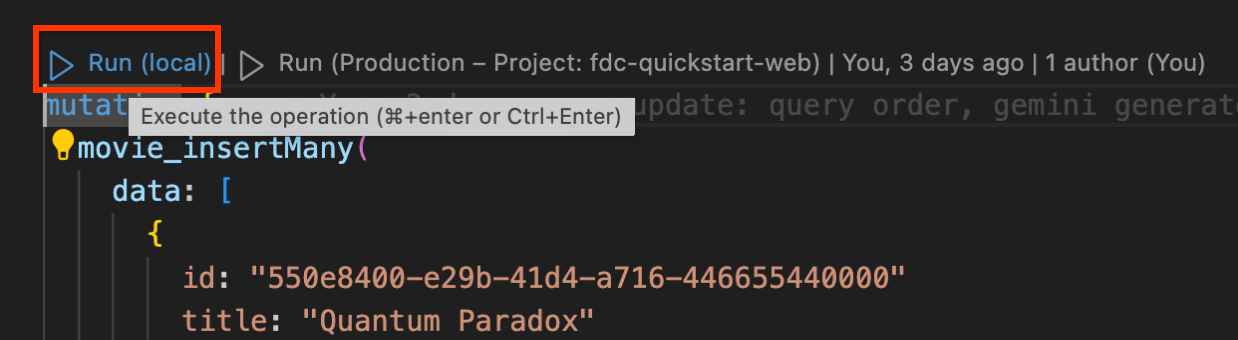
dataconnect/moviedata_insert.gql。确保 Firebase Data Connect 扩展程序中的模拟器正在运行。 - 您应该会在文件顶部看到一个运行(本地)按钮。点击此按钮可将模拟电影数据插入到数据库中。
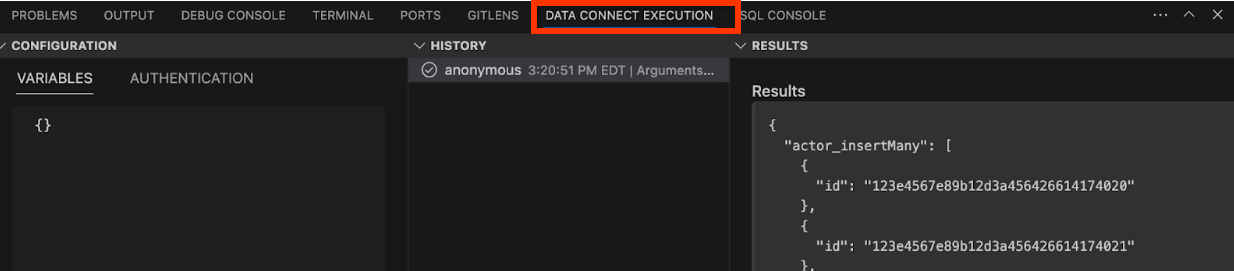
- 检查 Data Connect Execution 终端,确认数据已成功添加。
实现连接器
- 打开
dataconnect/movie-connector/queries.gql。您会在注释中找到一个基本的ListMovies查询:query ListMovies @auth(level: PUBLIC) { movies { id title imageUrl releaseYear genre rating tags description } }id、title、releaseYear)。不过,它不会对电影进行排序。 - 替换现有
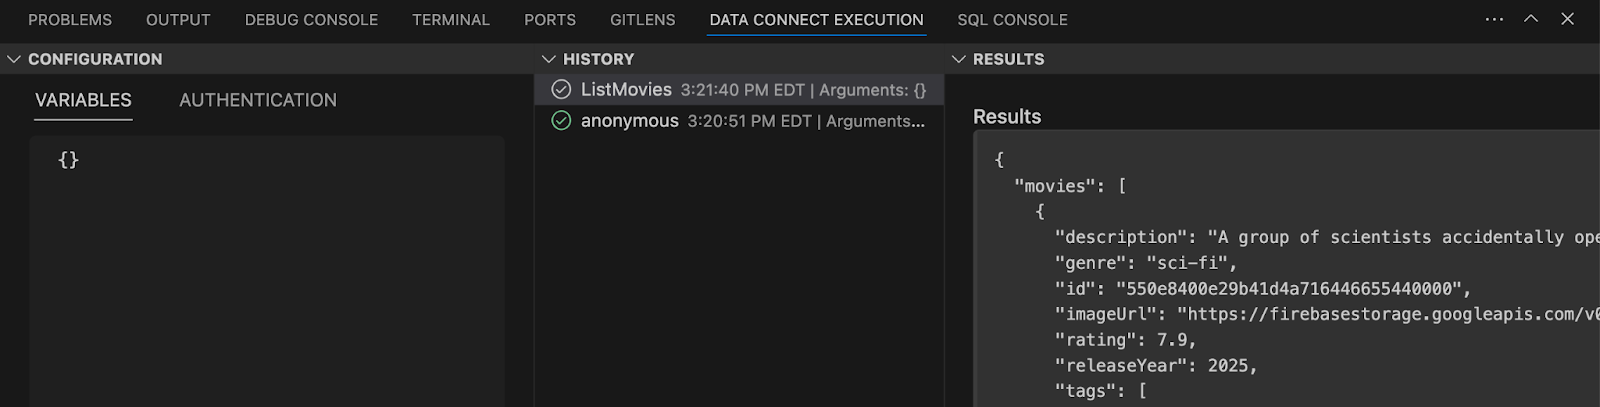
ListMovies查询,添加排序和限制选项:# List subset of fields for movies query ListMovies($orderByRating: OrderDirection, $orderByReleaseYear: OrderDirection, $limit: Int) @auth(level: PUBLIC) { movies( orderBy: [ { rating: $orderByRating }, { releaseYear: $orderByReleaseYear } ] limit: $limit ) { id title imageUrl releaseYear genre rating tags description } } - 点击 Run (local) 按钮,针对本地数据库执行查询。您还可以在运行之前在配置窗格中输入查询变量。
重点小结:
movies():用于从数据库中提取电影数据的 GraphQL 查询字段。orderByRating:按评分(升序/降序)对电影进行排序的参数。orderByReleaseYear:按电影上映年份(升序/降序)排序的参数。limit:限制返回的电影数量。
在 Web 应用中集成查询
在此 Codelab 部分中,您将在 Web 应用中使用上一部分中定义的查询。Firebase Data Connect 模拟器会根据 .gql 文件(尤其是 schema.gql、queries.gql、mutations.gql)和 connector.yaml 文件中的信息生成 SDK。这些 SDK 可在您的应用中直接调用。
- 在
MovieService(app/src/lib/MovieService.tsx) 中,取消注释顶部 import 语句:import { listMovies, ListMoviesData, OrderDirection } from "@movie/dataconnect";listMovies、响应类型ListMoviesData和枚举OrderDirection都是由 Firebase Data Connect 模拟器根据您之前定义的架构和查询生成的 SDK。 - 将
handleGetTopMovies和handleGetLatestMovies函数替换为以下代码:// Fetch top-rated movies export const handleGetTopMovies = async ( limit: number ): Promise<ListMoviesData["movies"] | null> => { try { const response = await listMovies({ orderByRating: OrderDirection.DESC, limit, }); return response.data.movies; } catch (error) { console.error("Error fetching top movies:", error); return null; } }; // Fetch latest movies export const handleGetLatestMovies = async ( limit: number ): Promise<ListMoviesData["movies"] | null> => { try { const response = await listMovies({ orderByReleaseYear: OrderDirection.DESC, limit, }); return response.data.movies; } catch (error) { console.error("Error fetching latest movies:", error); return null; } };
重点小结:
listMovies:一个自动生成的函数,用于调用listMovies查询来检索电影列表。它包含按评分或发布年份排序以及限制结果数量的选项。ListMoviesData:用于在应用首页上显示热门电影和最新电影的结果类型。
看看实际运用情况
重新加载 Web 应用,查看查询的实际效果。首页现在会动态显示电影列表,直接从本地数据库中提取数据。您会看到系统无缝显示高评分电影和最新电影,反映您刚刚设置的数据。
6. 显示电影和演员详情
在本部分中,您将实现相应功能,以使用电影或演员的唯一 ID 检索其详细信息。这不仅涉及从各自的表中提取数据,还涉及联接相关表以显示全面的详细信息,例如电影评论和演员作品目录。
实现连接器
- 在项目中打开
dataconnect/movie-connector/queries.gql。 - 添加以下查询以检索电影和演员详细信息:
# Get movie by id query GetMovieById($id: UUID!) @auth(level: PUBLIC) { movie(id: $id) { id title imageUrl releaseYear genre rating description tags metadata: movieMetadatas_on_movie { director } mainActors: actors_via_MovieActor(where: { role: { eq: "main" } }) { id name imageUrl } supportingActors: actors_via_MovieActor( where: { role: { eq: "supporting" } } ) { id name imageUrl } reviews: reviews_on_movie { id reviewText reviewDate rating user { id username } } } } # Get actor by id query GetActorById($id: UUID!) @auth(level: PUBLIC) { actor(id: $id) { id name imageUrl mainActors: movies_via_MovieActor(where: { role: { eq: "main" } }) { id title genre tags imageUrl } supportingActors: movies_via_MovieActor( where: { role: { eq: "supporting" } } ) { id title genre tags imageUrl } } } - 保存更改并查看查询。
重点小结:
movie()/actor():用于从Movies或Actors表中提取单个电影或演员的 GraphQL 查询字段。_on_:这允许直接访问具有外键关系的相关类型中的字段。例如,reviews_on_movie会提取与特定电影相关的所有评价。_via_:用于通过联接表导航多对多关系。例如,actors_via_MovieActor通过MovieActor联接表访问Actor类型,而where条件则根据演员的角色(例如“主角”或“配角”)过滤演员。
通过输入模拟数据测试查询
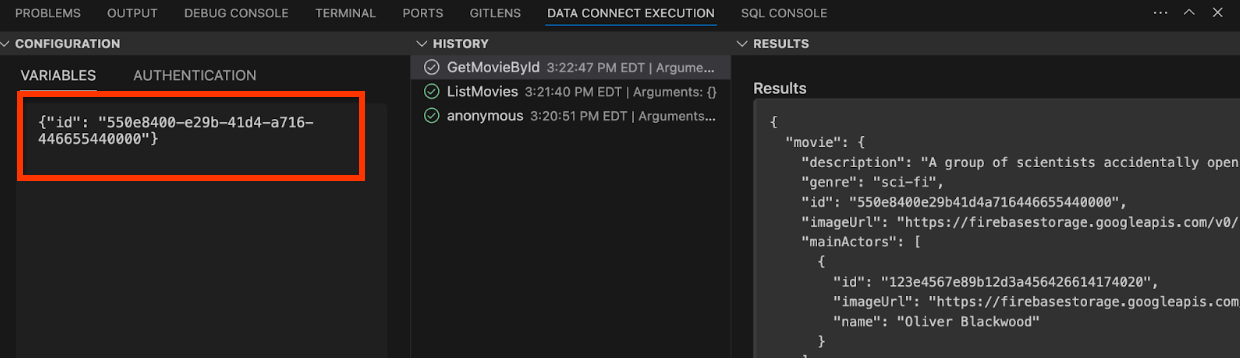
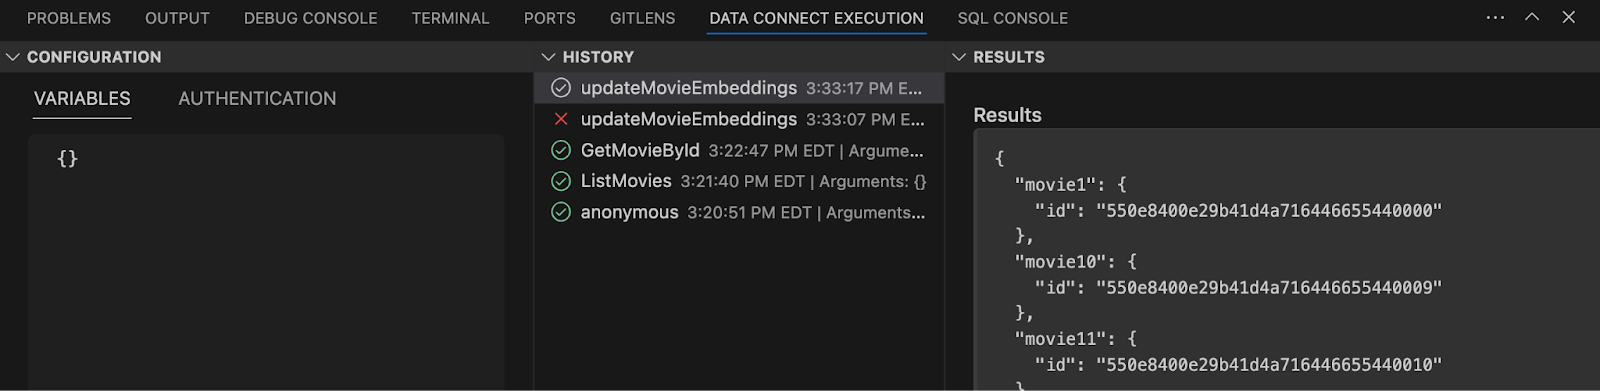
- 在 Data Connect 执行窗格中,您可以通过输入模拟 ID(例如以下 ID)来测试查询:
{"id": "550e8400-e29b-41d4-a716-446655440000"} - 点击
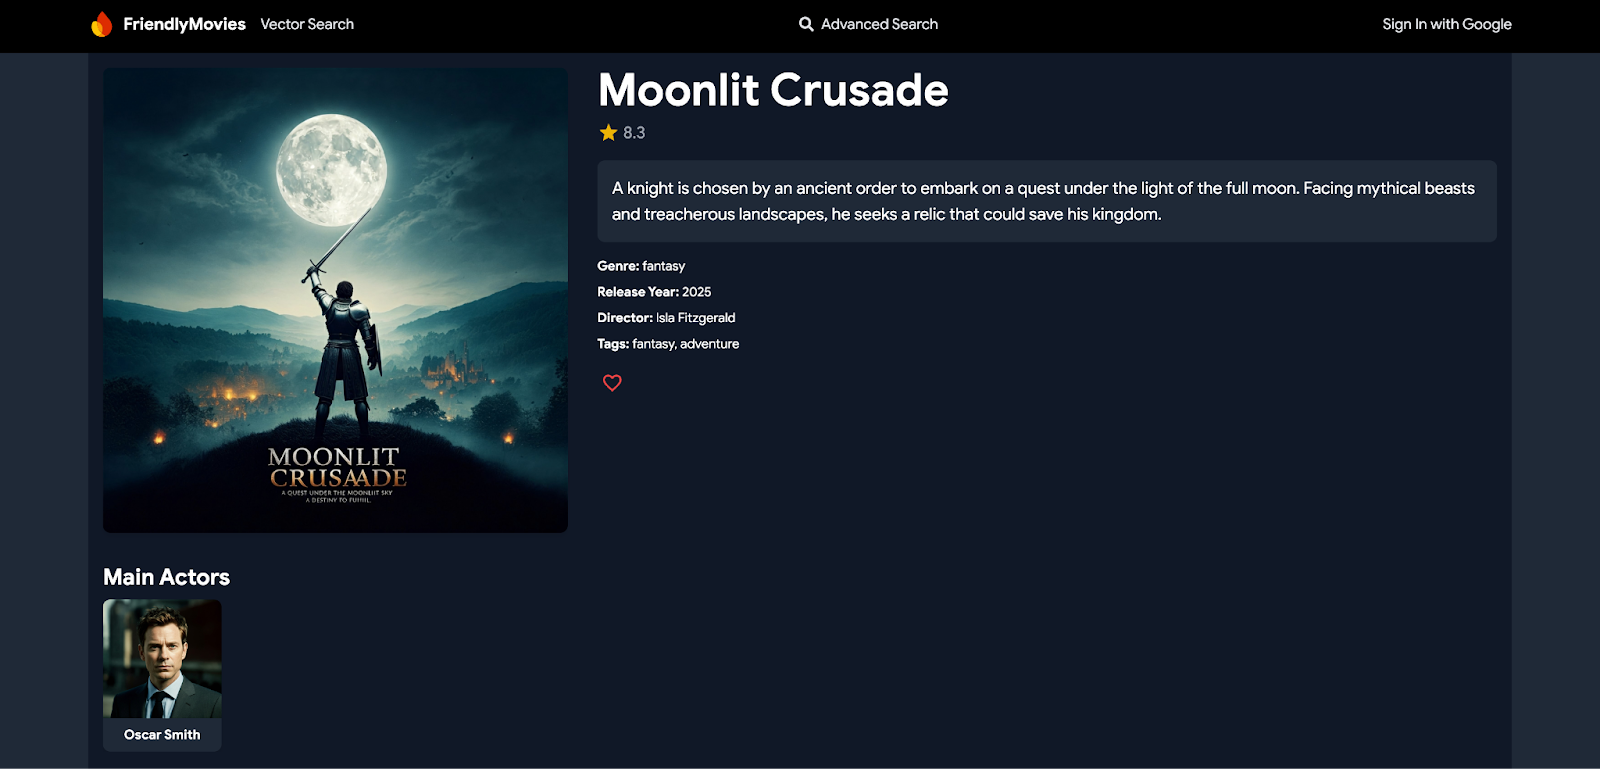
GetMovieById的 Run (local) 以检索与上述 ID 相关的模拟电影“Quantum Paradox”的详细信息。
在 Web 应用中集成查询
- 在
MovieService(app/src/lib/MovieService.tsx) 中,取消注释以下导入:import { getMovieById, GetMovieByIdData } from "@movie/dataconnect"; import { GetActorByIdData, getActorById } from "@movie/dataconnect"; - 替换
handleGetMovieById和handleGetActorById函数,改为使用以下代码:// Fetch movie details by ID export const handleGetMovieById = async ( movieId: string ) => { try { const response = await getMovieById({ id: movieId }); if (response.data.movie) { return response.data.movie; } return null; } catch (error) { console.error("Error fetching movie:", error); return null; } }; // Calling generated SDK for GetActorById export const handleGetActorById = async ( actorId: string ): Promise<GetActorByIdData["actor"] | null> => { try { const response = await getActorById({ id: actorId }); if (response.data.actor) { return response.data.actor; } return null; } catch (error) { console.error("Error fetching actor:", error); return null; } };
重点小结:
getMovieById/getActorById:这些是自动生成的函数,用于调用您定义的查询,以检索特定电影或演员的详细信息。GetMovieByIdData/GetActorByIdData:这些是结果类型,用于在应用中显示电影和演员详细信息。
看看实际运用情况
现在,前往 Web 应用的首页。点击某部电影后,您将能够查看其所有详细信息,包括演员和评价(这些信息是从相关表格中提取的)。同样,点击演员会显示他们参演的电影。
7. 处理用户身份验证
在本部分中,您将使用 Firebase Authentication 实现用户登录和退出功能。您还将使用 Firebase Authentication 数据直接在 Firebase DataConnect 中检索或 upsert 用户数据,确保在应用内安全地管理用户。
实现连接器
- 在
dataconnect/movie-connector/中打开mutations.gql。 - 添加以下突变以创建或更新当前经过身份验证的用户:
# Create or update the current authenticated user
mutation UpsertUser($username: String!) @auth(level: USER) {
  user_upsert(
    data: {
      id_expr: "auth.uid"
      username: $username
    }
  )
}
重点小结:
id_expr: "auth.uid":此方法使用auth.uid,该 ID 由 Firebase Authentication 直接提供,而不是由用户或应用提供,通过确保安全自动地处理用户 ID 来增加一层额外的安全性。
获取当前用户
- 在
dataconnect/movie-connector/中打开queries.gql。 - 添加以下查询以获取当前用户:
# Get user by ID
query GetCurrentUser @auth(level: USER) {
  user(key: { id_expr: "auth.uid" }) {
    id
    username
    reviews: reviews_on_user {
      id
      rating
      reviewDate
      reviewText
      movie {
        id
        title
      }
    }
    favoriteMovies: favorite_movies_on_user {
      movie {
        id
        title
        genre
        imageUrl
        releaseYear
        rating
        description
        tags
        metadata: movieMetadatas_on_movie {
          director
        }
      }
    }
  }
}
重点小结:
auth.uid:此信息直接从 Firebase Authentication 检索,可确保安全访问特定于用户的数据。_on_字段:这些字段表示联接表:reviews_on_user:提取与用户相关的所有评价,包括电影的id和title。favorite_movies_on_user:检索用户标记为收藏的所有电影,包括genre、releaseYear、rating和metadata等详细信息。
在 Web 应用中集成查询
- 在
MovieService(app/src/lib/MovieService.tsx) 中,取消注释以下导入:import { upsertUser } from "@movie/dataconnect"; import { getCurrentUser, GetCurrentUserData } from "@movie/dataconnect"; - 将
handleAuthStateChange和handleGetCurrentUser函数替换为以下代码:// Handle user authentication state changes and upsert user export const handleAuthStateChange = ( auth: any, setUser: (user: User | null) => void ) => { return onAuthStateChanged(auth, async (user) => { if (user) { setUser(user); const username = user.email?.split("@")[0] || "anon"; await upsertUser({ username }); } else { setUser(null); } }); }; // Fetch current user profile export const handleGetCurrentUser = async (): Promise< GetCurrentUserData["user"] | null > => { try { const response = await getCurrentUser(); return response.data.user; } catch (error) { console.error("Error fetching user profile:", error); return null; } };
重点小结:
handleAuthStateChange:此函数用于监听身份验证状态变化。当用户登录时,它会设置用户的数据并调用upsertUser突变,以在数据库中创建或更新用户信息。handleGetCurrentUser:使用getCurrentUser查询获取当前用户的个人资料,该查询会检索用户的评价和喜爱的电影。
看看实际运用情况
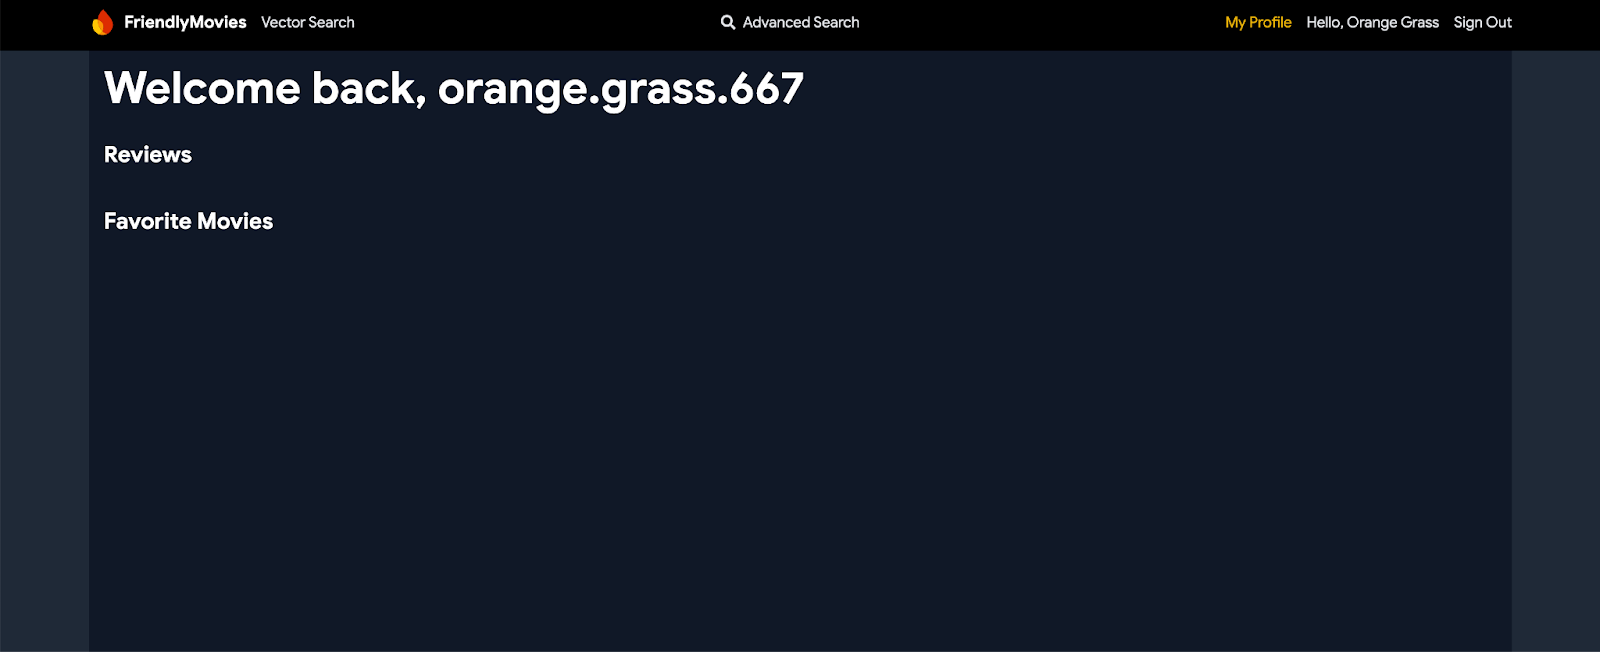
现在,点击导航栏中的“使用 Google 账号登录”按钮。您可以使用 Firebase Authentication 模拟器登录。登录后,点击“我的个人资料”。目前,此变量将为空,但您已为应用中特定于用户的数据处理奠定了基础。
8. 实现用户互动
在此 Codelab 的这一部分中,您将在影评应用中实现用户互动,具体来说,就是让用户管理自己喜爱的电影以及撰写或删除影评。
允许用户将电影标记为喜爱
在本部分中,您将设置数据库,以允许用户将电影标记为喜爱。
实现连接器
- 在
dataconnect/movie-connector/中打开mutations.gql。 - 添加以下突变来处理将电影标记为喜爱的操作:
# Add a movie to the user's favorites list
mutation AddFavoritedMovie($movieId: UUID!) @auth(level: USER) {
  favorite_movie_upsert(data: { userId_expr: "auth.uid", movieId: $movieId })
}

# Remove a movie from the user's favorites list
mutation DeleteFavoritedMovie($movieId: UUID!) @auth(level: USER) {
  favorite_movie_delete(key: { userId_expr: "auth.uid", movieId: $movieId })
}
重点小结:
userId_expr: "auth.uid":使用由 Firebase Authentication 直接提供的auth.uid,确保只有经过身份验证的用户才能访问或修改数据。
检查电影是否已添加到收藏夹
- 在
dataconnect/movie-connector/中打开queries.gql。 - 添加以下查询以检查某部电影是否已添加到收藏夹:
query GetIfFavoritedMovie($movieId: UUID!) @auth(level: USER) {
  favorite_movie(key: { userId_expr: "auth.uid", movieId: $movieId }) {
    movieId
  }
}
重点小结:
auth.uid:使用 Firebase Authentication 确保对用户特定数据的安全访问。favorite_movie:检查favorite_movies联接表,以查看当前用户是否将特定电影标记为喜爱。
在 Web 应用中集成查询
- 在
MovieService(app/src/lib/MovieService.tsx) 中,取消注释以下导入:import { addFavoritedMovie, deleteFavoritedMovie, getIfFavoritedMovie } from "@movie/dataconnect"; - 将
handleAddFavoritedMovie、handleDeleteFavoritedMovie和handleGetIfFavoritedMovie函数替换为以下代码:// Add a movie to user's favorites export const handleAddFavoritedMovie = async ( movieId: string ): Promise<void> => { try { await addFavoritedMovie({ movieId }); } catch (error) { console.error("Error adding movie to favorites:", error); throw error; } }; // Remove a movie from user's favorites export const handleDeleteFavoritedMovie = async ( movieId: string ): Promise<void> => { try { await deleteFavoritedMovie({ movieId }); } catch (error) { console.error("Error removing movie from favorites:", error); throw error; } }; // Check if the movie is favorited by the user export const handleGetIfFavoritedMovie = async ( movieId: string ): Promise<boolean> => { try { const response = await getIfFavoritedMovie({ movieId }); return !!response.data.favorite_movie; } catch (error) { console.error("Error checking if movie is favorited:", error); return false; } };
重点小结:
handleAddFavoritedMovie和handleDeleteFavoritedMovie:使用这些突变安全地添加或移除用户收藏的电影。handleGetIfFavoritedMovie:使用getIfFavoritedMovie查询来检查用户是否将某部电影标记为喜爱。
看看实际运用情况
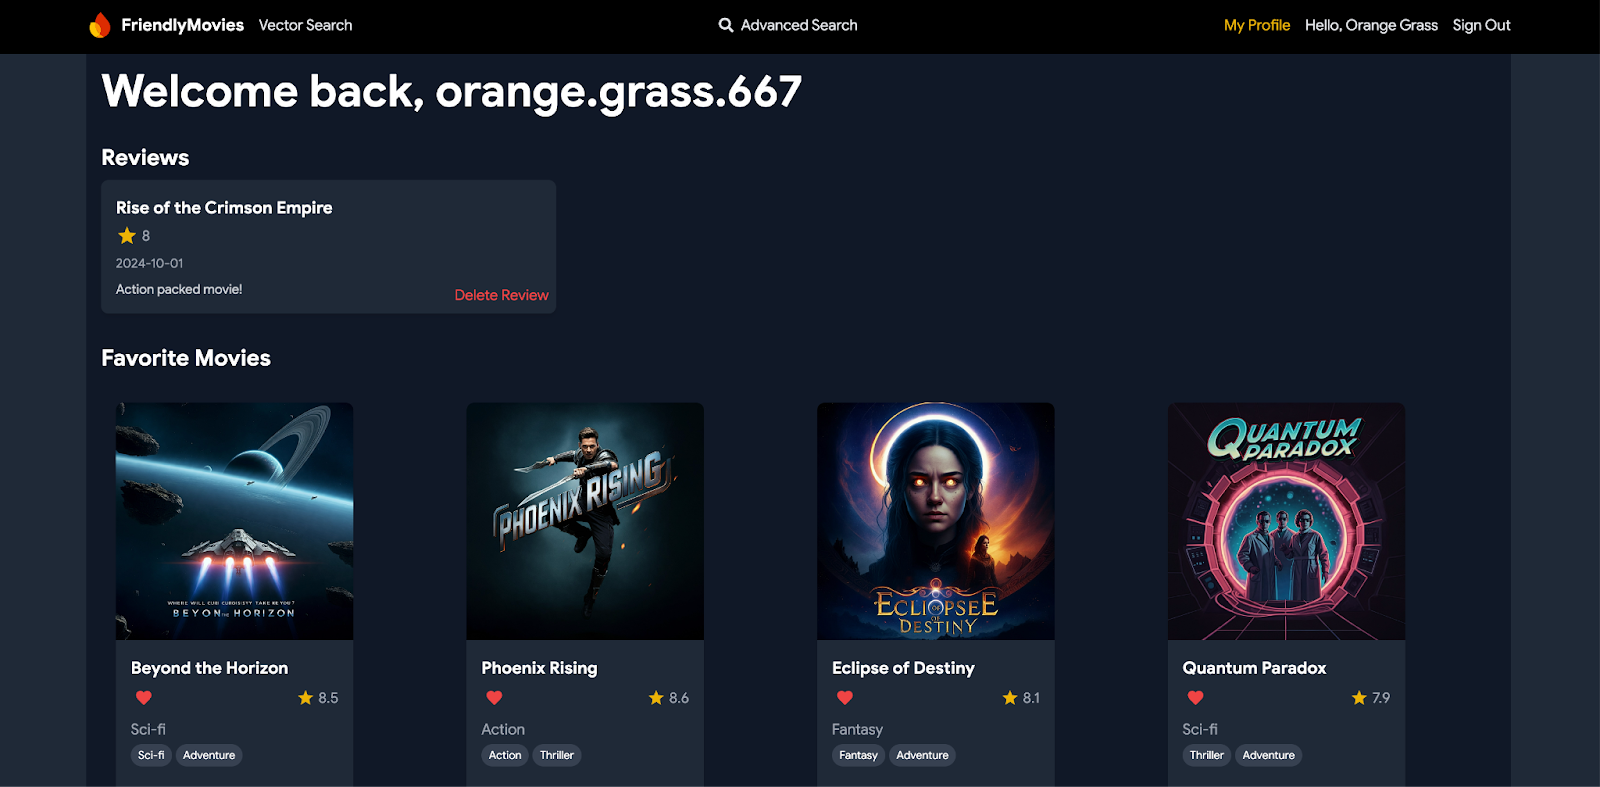
现在,您可以通过点击电影卡片和电影详情页面上的心形图标来收藏或取消收藏电影。此外,您还可以在个人资料页面上查看自己喜欢的电影。
允许用户留下或删除评价
接下来,您将在应用中实现用于管理用户评价的部分。
实现连接器
在 mutations.gql (dataconnect/movie-connector/mutations.gql) 中:添加以下突变:
# Add a review for a movie
mutation AddReview($movieId: UUID!, $rating: Int!, $reviewText: String!)
@auth(level: USER) {
  review_insert(
    data: {
      userId_expr: "auth.uid"
      movieId: $movieId
      rating: $rating
      reviewText: $reviewText
      reviewDate_date: { today: true }
    }
  )
}

# Delete a user's review for a movie
mutation DeleteReview($movieId: UUID!) @auth(level: USER) {
  review_delete(key: { userId_expr: "auth.uid", movieId: $movieId })
}
重点小结:
userId_expr: "auth.uid":确保评价与经过身份验证的用户相关联。reviewDate_date: { today: true }:使用 DataConnect 自动生成评价的当前日期,无需手动输入。
在 Web 应用中集成查询
- 在
MovieService(app/src/lib/MovieService.tsx) 中,取消注释以下导入:import { addReview, deleteReview } from "@movie/dataconnect"; - 替换
handleAddReview和handleDeleteReview函数,改为使用以下代码:// Add a review to a movie export const handleAddReview = async ( movieId: string, rating: number, reviewText: string ): Promise<void> => { try { await addReview({ movieId, rating, reviewText }); } catch (error) { console.error("Error adding review:", error); throw error; } }; // Delete a review from a movie export const handleDeleteReview = async (movieId: string): Promise<void> => { try { await deleteReview({ movieId }); } catch (error) { console.error("Error deleting review:", error); throw error; } };
重点小结:
handleAddReview:调用addReview突变来为指定电影添加评价,并将其安全地关联到经过身份验证的用户。handleDeleteReview:使用deleteReview突变来移除经过身份验证的用户对电影的评价。
看看实际运用情况
用户现在可以在电影详情页面上为电影留下评价。他们还可以在个人资料页面上查看和删除自己的评价,从而完全掌控自己与应用的互动。
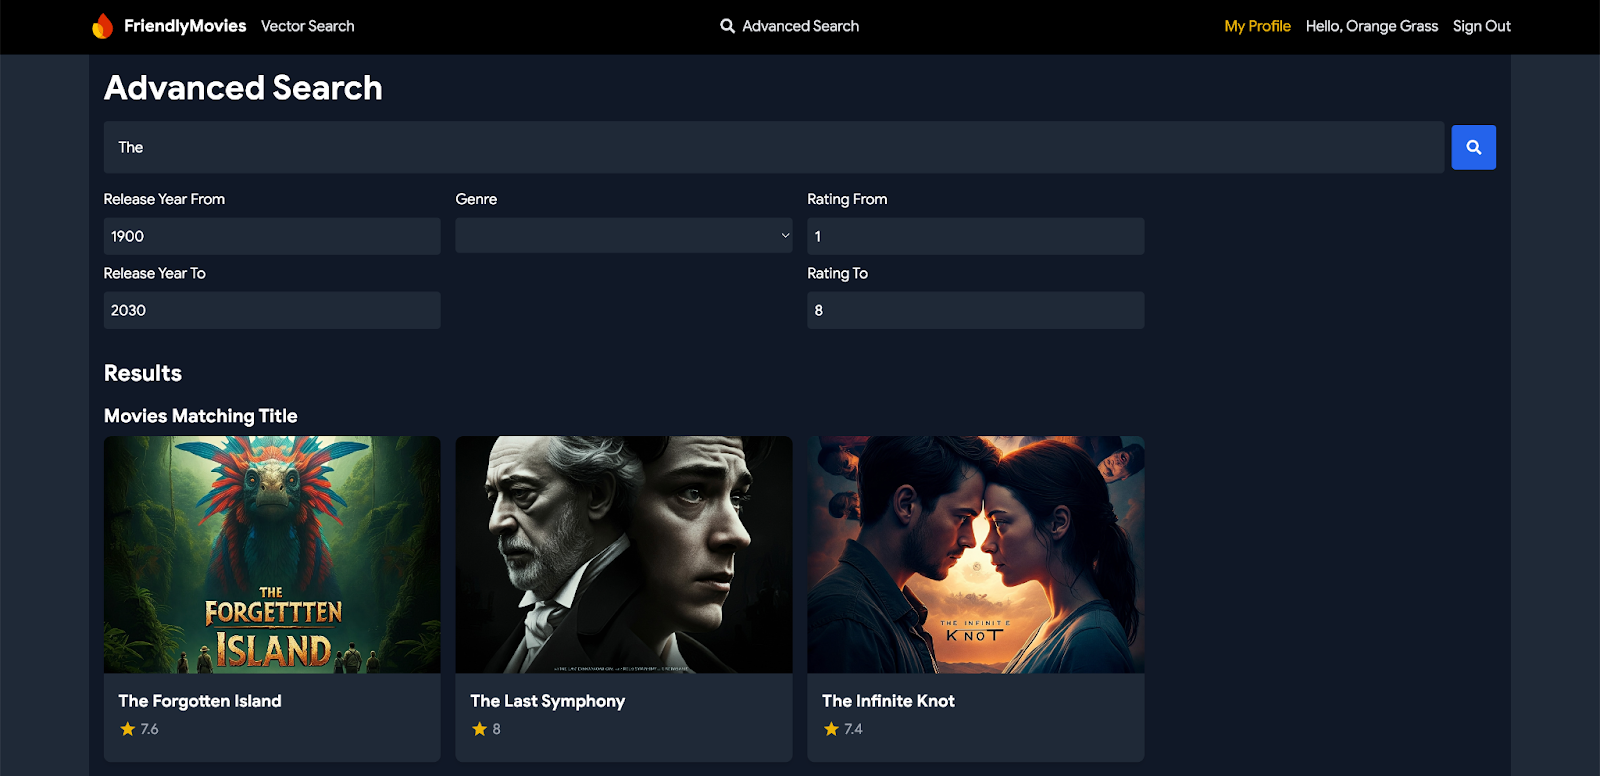
9. 高级过滤条件和部分文字匹配
在本部分中,您将实现高级搜索功能,让用户能够根据一系列评分和发布年份搜索电影,按类型和标签进行过滤,在电影标题或说明中执行部分文本匹配,甚至组合多个过滤条件以获得更精确的结果。
实现连接器
- 在
dataconnect/movie-connector/中打开queries.gql。 - 添加以下查询以支持各种搜索功能:
# Search for movies, actors, and reviews
query SearchAll(
  $input: String
  $minYear: Int!
  $maxYear: Int!
  $minRating: Float!
  $maxRating: Float!
  $genre: String!
) @auth(level: PUBLIC) {
  moviesMatchingTitle: movies(
    where: {
      _and: [
        { releaseYear: { ge: $minYear } }
        { releaseYear: { le: $maxYear } }
        { rating: { ge: $minRating } }
        { rating: { le: $maxRating } }
        { genre: { contains: $genre } }
        { title: { contains: $input } }
      ]
    }
  ) {
    id
    title
    genre
    rating
    imageUrl
  }
  moviesMatchingDescription: movies(
    where: {
      _and: [
        { releaseYear: { ge: $minYear } }
        { releaseYear: { le: $maxYear } }
        { rating: { ge: $minRating } }
        { rating: { le: $maxRating } }
        { genre: { contains: $genre } }
        { description: { contains: $input } }
      ]
    }
  ) {
    id
    title
    genre
    rating
    imageUrl
  }
  actorsMatchingName: actors(where: { name: { contains: $input } }) {
    id
    name
    imageUrl
  }
  reviewsMatchingText: reviews(where: { reviewText: { contains: $input } }) {
    id
    rating
    reviewText
    reviewDate
    movie {
      id
      title
    }
    user {
      id
      username
    }
  }
}
重点小结:
_and运算符:在单个查询中组合多个条件,从而允许按多个字段(例如releaseYear、rating和genre)过滤搜索结果。contains运算符:搜索字段中的部分文本匹配项。在此查询中,系统会在title、description、name或reviewText中查找匹配项。where子句:指定过滤数据的条件。每个部分(电影、演员、影评)都使用where子句来定义搜索的具体条件。
在 Web 应用中集成查询
- 在
MovieService(app/src/lib/MovieService.tsx) 中,取消注释以下导入:import { searchAll, SearchAllData } from "@movie/dataconnect"; - 将
handleSearchAll函数替换为以下代码:// Function to perform the search using the query and filters export const handleSearchAll = async ( searchQuery: string, minYear: number, maxYear: number, minRating: number, maxRating: number, genre: string ): Promise<SearchAllData | null> => { try { const response = await searchAll({ input: searchQuery, minYear, maxYear, minRating, maxRating, genre, }); return response.data; } catch (error) { console.error("Error performing search:", error); return null; } };
重点小结:
handleSearchAll:此函数使用searchAll查询根据用户输入执行搜索,并按年份、评分、类型和部分文本匹配等参数过滤结果。
看看实际运用情况
通过 Web 应用中的导航栏前往“高级搜索”页面。现在,您可以使用各种过滤条件和输入内容搜索电影、演员和评价,获得详细且量身定制的搜索结果。
10. 可选:部署到 Cloud(需要结算信息)
完成本地开发迭代后,现在可以将架构、数据和查询部署到服务器了。您可以使用 Firebase Data Connect VS Code 扩展程序或 Firebase CLI 来完成此操作。
升级您的 Firebase 定价方案
如需将 Firebase Data Connect 与 Cloud SQL for PostgreSQL 集成,您的 Firebase 项目必须采用随用随付 (Blaze) 定价方案,这意味着该项目需要与一个 Cloud Billing 账号相关联。
- Cloud Billing 账号要求提供付款方式,例如信用卡。
- 如果您刚开始接触 Firebase 和 Google Cloud,请确认您是否有资格获得 $300 赠金和免费试用 Cloud Billing 账号。
- 如果您是在活动中完成此 Codelab,请询问活动组织者是否有可用的 Cloud 积分。
如需将项目升级到 Blaze 方案,请按以下步骤操作:
- 在 Firebase 控制台中,选择升级您的方案。
- 选择 Blaze 方案。按照屏幕上的说明将 Cloud Billing 账号与您的项目相关联。
如果您需要在此升级过程中创建 Cloud Billing 账号,则可能需要返回 Firebase 控制台中的升级流程以完成升级。
将您的 Web 应用与 Firebase 项目相关联
- 使用 Firebase 控制台在 Firebase 项目中注册您的 Web 应用:
- 打开项目,然后点击添加应用。
- 暂时忽略 SDK 设置和配置设置,但请务必复制生成的
firebaseConfig对象。

- 将
app/src/lib/firebase.tsx中现有的firebaseConfig替换为您刚刚从 Firebase 控制台中复制的配置。const firebaseConfig = { apiKey: "API_KEY", authDomain: "PROJECT_ID.firebaseapp.com", projectId: "PROJECT_ID", storageBucket: "PROJECT_ID.firebasestorage.app", messagingSenderId: "SENDER_ID", appId: "APP_ID" }; - 构建 Web 应用:返回到 VS Code,在
app文件夹中,使用 Vite 构建 Web 应用以进行托管部署:cd app npm run build
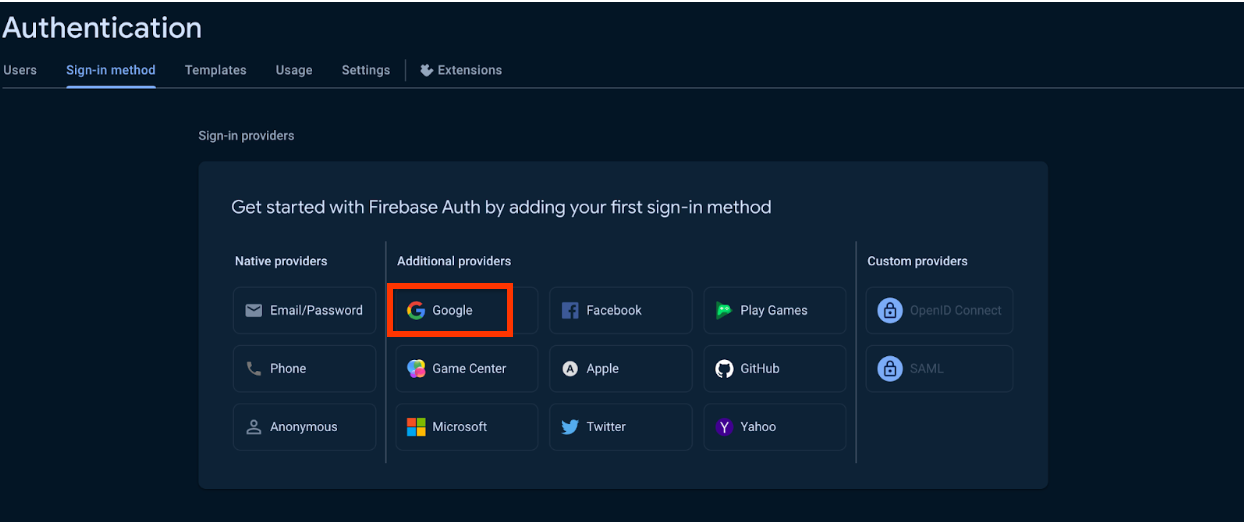
在 Firebase 项目中设置 Firebase Authentication
- 设置使用 Google 登录的 Firebase Authentication。
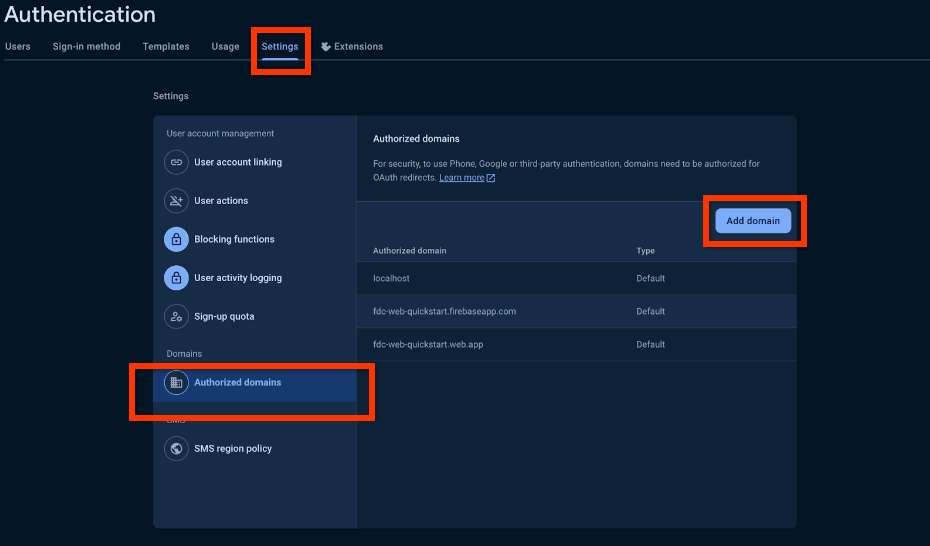
- (可选)使用 Firebase 控制台为 Firebase Authentication 允许网域(例如
http://127.0.0.1)。- 在身份验证设置中,前往已获授权的网域。
- 点击“添加网域”,并将本地网域添加到列表中。
使用 Firebase CLI 进行部署
- 在
dataconnect/dataconnect.yaml中,确保您的实例 ID、数据库和服务 ID 与您的项目一致:specVersion: "v1alpha" serviceId: "your-service-id" location: "us-central1" schema: source: "./schema" datasource: postgresql: database: "your-database-id" cloudSql: instanceId: "your-instance-id" connectorDirs: ["./movie-connector"] - 确保您已为项目设置 Firebase CLI:
npm i -g firebase-tools
firebase login --reauth
firebase use --add
- 在终端中,运行以下命令以进行部署:
firebase deploy --only dataconnect,hosting
- 运行以下命令以比较您的架构更改:
firebase dataconnect:sql:diff
- 如果这些更改可以接受,请使用以下命令应用它们:
firebase dataconnect:sql:migrate
您的 Cloud SQL for PostgreSQL 实例将使用最终部署的架构和数据进行更新。您可以在 Firebase 控制台中监控状态。
现在,您应该可以在 your-project.web.app/ 看到您的应用。此外,您还可以像使用本地模拟器一样,在 Firebase Data Connect 面板中点击 Run (Production),以将数据添加到生产环境。
11. 可选:使用 Firebase Data Connect 进行向量搜索(需要启用结算功能)
在本部分中,您将使用 Firebase Data Connect 在电影评论应用中启用向量搜索。此功能支持基于内容的搜索,例如使用向量嵌入查找具有类似说明的电影。
此步骤要求您已完成本 Codelab 的最后一步,即部署到 Google Cloud。
更新架构以包含字段的嵌入内容
在 dataconnect/schema/schema.gql 中,将 descriptionEmbedding 字段添加到 Movie 表中:
type Movie
  # The below parameter values are generated by default with @table, and can be edited manually.
  @table {
  # implicitly calls @col to generates a column name. ex: @col(name: "movie_id")
  id: UUID! @default(expr: "uuidV4()")
  title: String!
  imageUrl: String!
  releaseYear: Int
  genre: String
  rating: Float
  description: String
  tags: [String]
  descriptionEmbedding: Vector @col(size:768) # Enables vector search
}
重点小结:
descriptionEmbedding: Vector @col(size:768):此字段存储电影说明的语义嵌入,可在您的应用中实现基于向量的内容搜索。
启用 Vertex AI
- 按照前提条件指南从 Google Cloud 设置 Vertex AI API。此步骤对于支持嵌入生成和矢量搜索功能至关重要。
- 使用 Firebase Data Connect VS Code 扩展程序点击“部署到生产环境”,重新部署架构,以激活
pgvector和向量搜索。
使用嵌入填充数据库
- 在 VS Code 中打开
dataconnect文件夹。 - 点击
optional_vector_embed.gql中的 Run(local),以使用电影的嵌入内容填充数据库。
添加向量搜索查询
在 dataconnect/movie-connector/queries.gql 中,添加以下查询以执行向量搜索:
# Search movie descriptions using L2 similarity with Vertex AI
query SearchMovieDescriptionUsingL2Similarity($query: String!)
@auth(level: PUBLIC) {
  movies_descriptionEmbedding_similarity(
    compare_embed: { model: "textembedding-gecko@003", text: $query }
    method: L2
    within: 2
    limit: 5
  ) {
    id
    title
    description
    tags
    rating
    imageUrl
  }
}
重点小结:
compare_embed:指定用于比较的嵌入模型 (textembedding-gecko@003) 和输入文本 ($query)。method:指定相似度方法 (L2),表示欧几里得距离。within:将搜索范围限定为 L2 距离为 2 或更小的电影,重点是内容接近的匹配项。limit:将返回的结果数限制为 5。
在应用中实现向量搜索功能
现在,架构和查询已设置完毕,接下来将向量搜索集成到应用的服务层中。此步骤允许您从 Web 应用中调用搜索查询。
- 在
app/src/lib/MovieService.ts中,取消注释 SDK 中的以下导入,这将像任何其他查询一样工作。import { searchMovieDescriptionUsingL2similarity, SearchMovieDescriptionUsingL2similarityData, } from "@movie/dataconnect"; - 添加以下函数,以将基于向量的搜索集成到应用中:
// Perform vector-based search for movies based on description
export const searchMoviesByDescription = async (
  query: string
): Promise<
  | SearchMovieDescriptionUsingL2similarityData["movies_descriptionEmbedding_similarity"]
  | null
> => {
  try {
    const response = await searchMovieDescriptionUsingL2similarity({ query });
    return response.data.movies_descriptionEmbedding_similarity;
  } catch (error) {
    console.error("Error fetching movie descriptions:", error);
    return null;
  }
};
重点小结:
searchMoviesByDescription:此函数会调用searchMovieDescriptionUsingL2similarity查询,传递输入文本以执行基于向量的内容搜索。
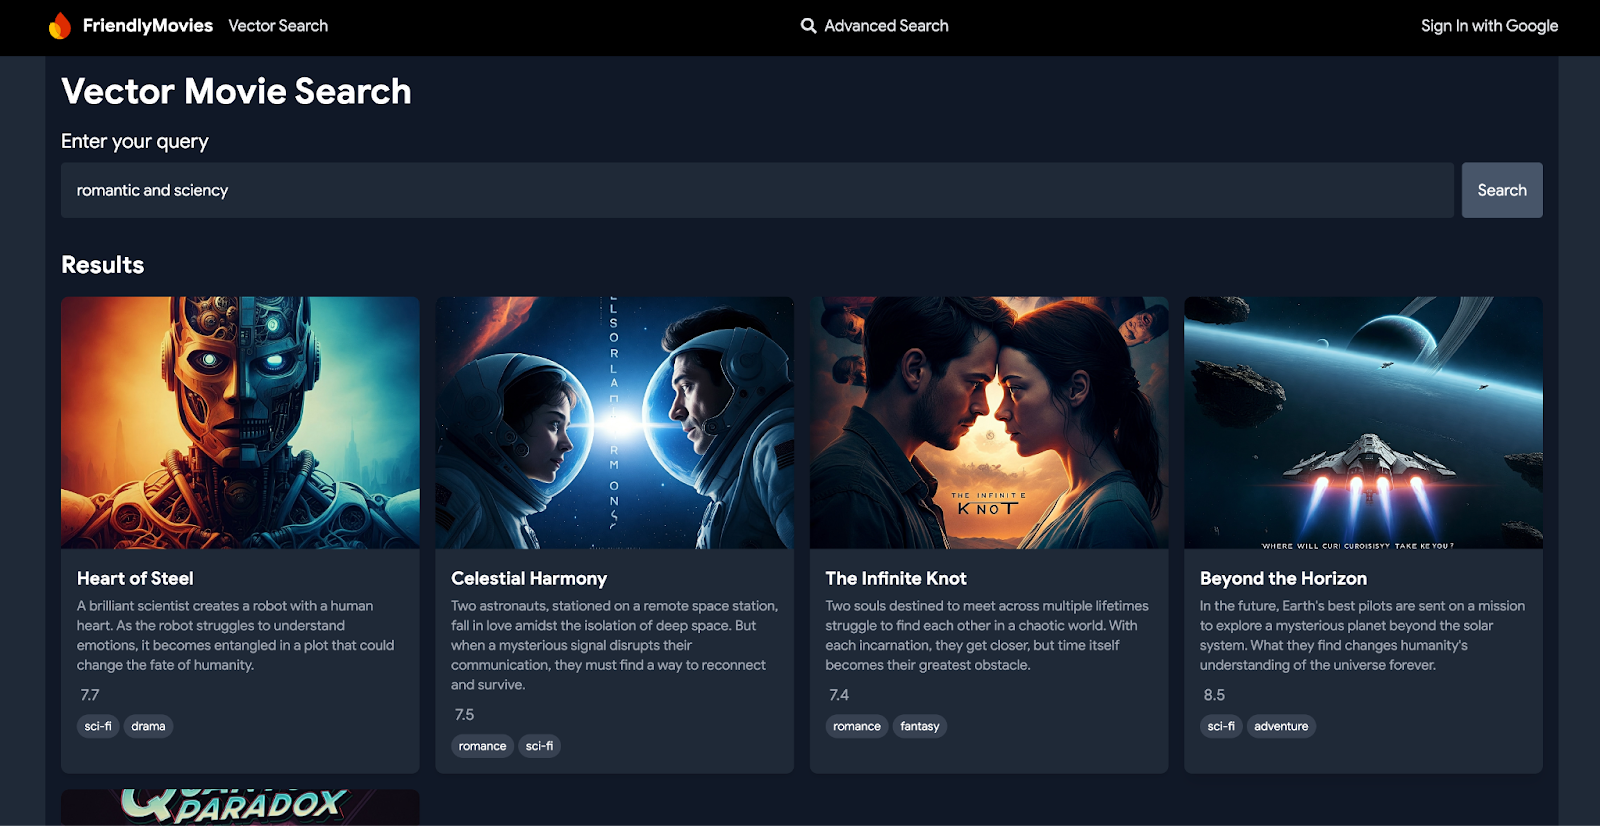
看看实际运用情况
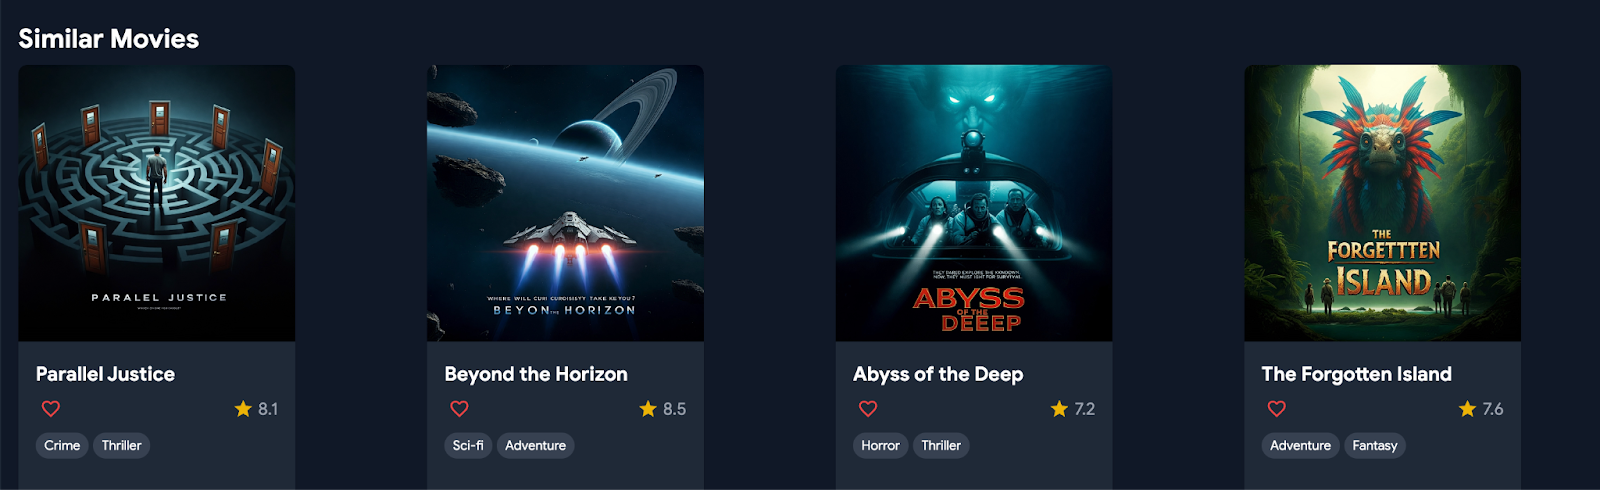
前往导航栏中的“Vector Search”(矢量搜索)部分,然后输入“romantic and modern”(浪漫而现代)之类的短语。您会看到与搜索内容匹配的电影列表,也可以进入任意电影的详情页面,查看页面底部的“类似电影”部分。
12. 总结
恭喜,您应该可以使用 Web 应用了!如果您想使用自己的电影数据,请放心,您可以使用 Firebase Data Connect 扩展程序插入自己的数据,方法是模仿 _insert.gql 文件,或者通过 VS Code 中的 Data Connect 执行窗格添加数据。