
1. 總覽
在本程式碼研究室中,您將瞭解如何使用 AngularFire 建立網頁應用程式,方法是使用 Firebase 產品和服務實作及部署即時通訊用戶端。

課程內容
- 使用 Angular 和 Firebase 建構網頁應用程式。
- 使用 Cloud Firestore 和 Cloud Storage for Firebase 同步處理資料。
- 使用 Firebase 驗證服務驗證使用者。
- 在 Firebase App Hosting 上部署網頁應用程式。
- 使用 Firebase 雲端通訊傳送通知。
- 收集網頁應用程式的成效資料。
事前準備
2. 取得程式碼範例
建立 GitHub 存放區
您可以在 https://github.com/firebase/codelab-friendlychat-web 找到本程式碼研究室的原始碼。這個存放區包含多個平台的範例專案。不過,本程式碼研究室只會使用 angularfire-start 目錄。
將 angularfire-start 資料夾複製到自己的存放區:
- 使用終端機在電腦上建立新資料夾,然後切換到新目錄:
mkdir codelab-friendlyeats-web cd codelab-friendlyeats-web - 使用 giget npm 套件,只擷取
angularfire-start資料夾:npx giget@latest gh:firebase/codelab-friendlychat-web/angularfire-start#master . --install - 使用 Git 在本機追蹤變更:
git init git add . git commit -m "codelab starting point" git branch -M main - 建立新的 GitHub 存放區:https://github.com/new。命名方式不限。
- GitHub 會提供新的存放區網址,看起來像是
https://github.com/[user-name]/[repository-name].git或git@github.com:[user-name]/[repository-name].git。複製這個網址。
- GitHub 會提供新的存放區網址,看起來像是
- 將本機變更推送至新的 GitHub 存放區。執行下列指令,並將
your-repository-url預留位置替換為存放區網址。git remote add origin your-repository-url git push -u origin main - 現在 GitHub 存放區中應該會顯示範例程式碼。
3. 建立及設定 Firebase 專案
建立 Firebase 專案
- 使用 Google 帳戶登入 Firebase 控制台。
- 按一下按鈕建立新專案,然後輸入專案名稱 (例如
FriendlyChat)。
- 按一下「繼續」。
- 如果系統提示,請詳閱並接受 Firebase 條款,然後按一下「繼續」。
- (選用) 在 Firebase 控制台中啟用 AI 輔助功能 (稱為「Gemini in Firebase」)。
- 本程式碼研究室不需要 Google Analytics,因此請關閉 Google Analytics 選項。
- 按一下「建立專案」,等待專案佈建完成,然後按一下「繼續」。
升級 Firebase 定價方案
如要使用 Firebase App Hosting 和 Cloud Storage for Firebase,Firebase 專案必須採用即付即用 (Blaze) 定價方案,也就是連結至 Cloud Billing 帳戶。
- Cloud Billing 帳戶需要付款方式,例如信用卡。
- 如果您剛開始使用 Firebase 和 Google Cloud,請確認是否符合 $300 美元抵免額和免費試用 Cloud Billing 帳戶的資格。
- 如果您是在活動中進行這項程式碼研究室,請詢問主辦單位是否有可用的 Cloud 抵免額。
如要將專案升級至 Blaze 方案,請按照下列步驟操作:
- 在 Firebase 控制台中,選取「升級方案」。
- 選取 Blaze 方案。按照畫面上的指示,將 Cloud Billing 帳戶連結至專案。
如果你在升級過程中需要建立 Cloud Billing 帳戶,可能需要返回 Firebase 控制台的升級流程,才能完成升級。
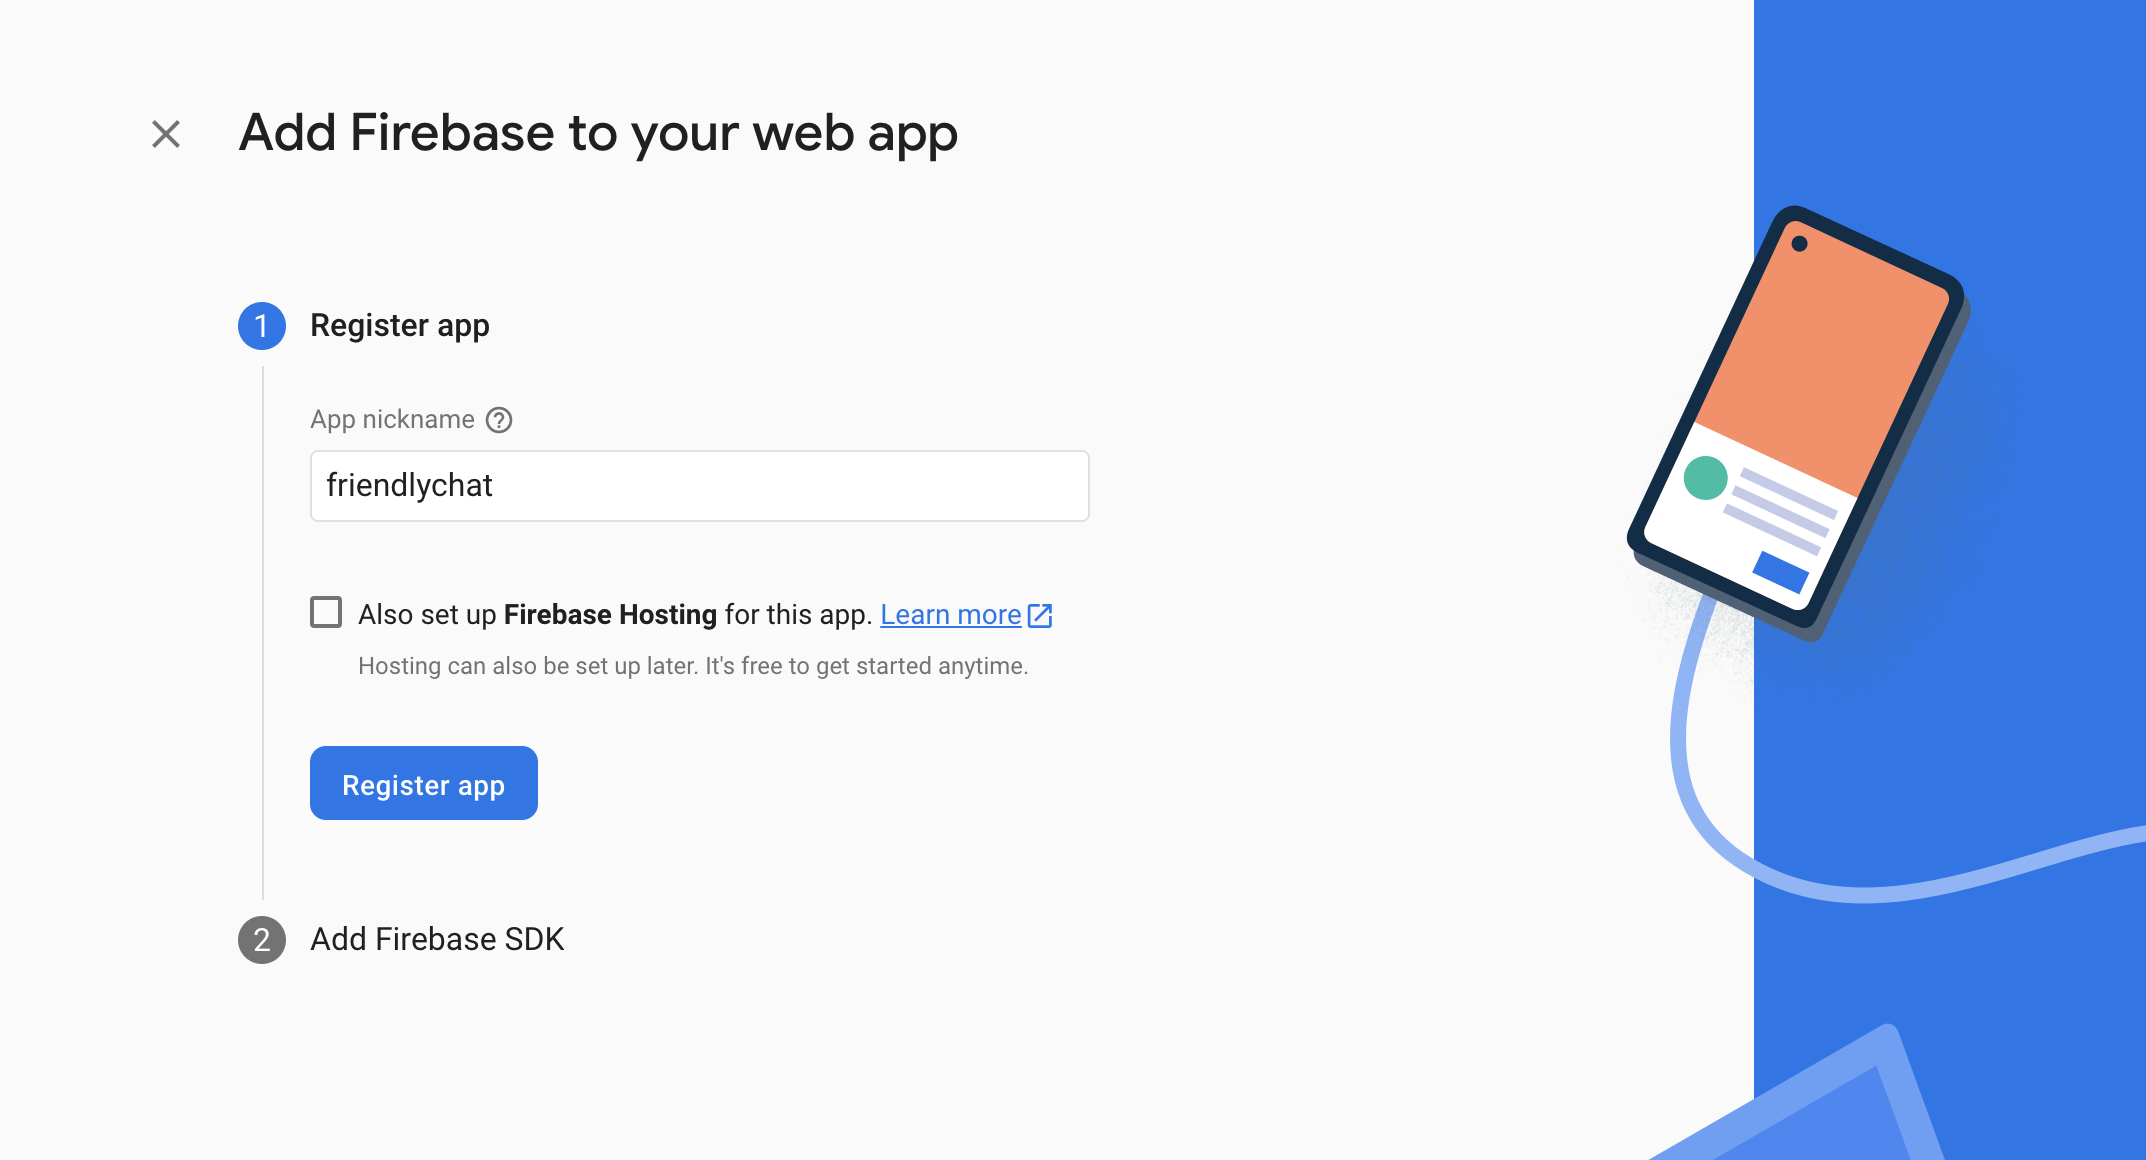
將 Firebase 網頁應用程式新增至專案
- 按一下網頁圖示
 ,建立新的 Firebase 網頁應用程式。
 - 使用「Friendly Chat」這個暱稱註冊應用程式。請勿勾選「一併為此應用程式設定 Firebase 託管」旁的方塊,然後按一下「註冊應用程式」。
- 在下一個步驟中,您會看到設定物件。你目前不需要這項功能。按一下 [Continue to console] (前往主控台)。
設定 Firebase 產品
您要建構的應用程式會使用幾項 Firebase 產品,這些產品都可用於網頁應用程式:
- Firebase 驗證:可讓使用者輕鬆登入您的應用程式。
- Cloud Firestore:在雲端儲存結構化資料,並在資料變更時收到即時通知。
- Cloud Storage for Firebase,將檔案儲存到雲端。
- Firebase App Hosting,用於建構、託管及提供應用程式。
- Firebase 雲端通訊,用於傳送推播通知及顯示瀏覽器彈出式通知。
- Firebase 效能監控,收集應用程式的使用者效能資料。
部分產品需要特殊設定或透過 Firebase 控制台啟用。
設定驗證
如要讓使用者透過 Google 帳戶登入網頁應用程式,請使用 Google 登入方式。
- 前往 Firebase 控制台的「驗證」。
- 按一下「開始使用」。
- 在「其他供應商」欄中,依序點選「Google」>「啟用」。
- 在「專案的公開名稱」文字方塊中,輸入容易記住的名稱,例如
My Next.js app。 - 從「專案支援電子郵件」下拉式選單中,選取您的電子郵件地址。
- 按一下 [儲存]。
設定 Cloud Firestore
這個網路應用程式使用 Cloud Firestore 儲存及接收即時通訊訊息。
如要在 Firebase 專案中設定 Cloud Firestore,請按照下列步驟操作:
- 在 Firebase 控制台的左側面板中,展開「Build」,然後選取「Firestore database」。
- 按一下 [Create database] (建立資料庫)。
- 將「資料庫 ID」保留為
(default)。 - 選取資料庫位置,然後按一下「下一步」。
如果是實際應用程式,建議選擇靠近使用者的位置。 - 按一下「以測試模式啟動」。請詳閱安全性規則免責事項。
在本程式碼研究室的後續步驟中,您將新增安全性規則,確保資料安全。請勿在未為資料庫新增安全性規則的情況下,公開發布或公開應用程式。 - 點選「建立」。
設定 Cloud Storage for Firebase
網頁應用程式會使用 Cloud Storage for Firebase 儲存、上傳及分享圖片。
如要在 Firebase 專案中設定 Cloud Storage for Firebase,請按照下列步驟操作:
- 在 Firebase 主控台的左側面板中,展開「Build」,然後選取「Storage」。
- 按一下「開始使用」。
- 選取預設 Storage bucket 的位置。
位於US-WEST1、US-CENTRAL1和US-EAST1的 bucket 可享有 Google Cloud Storage 的「一律免費」方案。其他所有位置的值區均適用 Google Cloud Storage 定價和用量。 - 按一下「以測試模式啟動」。請詳閱安全性規則免責事項。
在本程式碼研究室稍後的步驟中,您將新增安全性規則來保護資料。請勿在未為儲存空間 bucket 新增安全規則的情況下,公開發布或公開應用程式。 - 點選「建立」。
4. 安裝 Firebase 指令列介面
透過 Firebase 指令列介面 (CLI),您可以使用 Firebase 託管功能在本地提供 Web 應用程式,以及將 Web 應用程式部署至 Firebase 專案。
- 執行下列 npm 指令來安裝 CLI:
npm -g install firebase-tools@latest
- 執行下列指令,確認 CLI 是否已正確安裝:
firebase --version
確認 Firebase CLI 版本為 13.9.0 以上。
- 執行下列指令,授權 Firebase CLI:
firebase login
您已設定網頁應用程式範本,從應用程式的本機目錄 (您在程式碼研究室中複製的存放區),為 Firebase Hosting 提取應用程式的設定。但如要擷取設定,您必須將應用程式與 Firebase 專案建立關聯。
- 請確認指令列正在存取應用程式的本機
angularfire-start目錄。 - 執行下列指令,將應用程式與 Firebase 專案建立關聯:
firebase use --add
- 系統顯示提示訊息時,請選取「專案 ID」,然後為 Firebase 專案提供別名。
如果您有多個環境 (正式版、預先發布版等),別名就非常實用。不過,在本程式碼研究室中,我們只會使用 default 的別名。
- 按照指令列中的其餘指示操作。
5. 安裝 AngularFire
執行專案前,請確認已設定 Angular CLI 和 AngularFire。
- 在控制台中執行下列指令:
npm install -g @angular/cli
- 接著,在
angularfire-start目錄的控制台中,執行下列 Angular CLI 指令:
ng add @angular/fire
這會為專案安裝所有必要的依附元件。
- 系統顯示提示時,按空格鍵取消勾選
ng deploy -- hosting。使用方向鍵和空格鍵選取下列功能:AuthenticationFirestoreCloud MessagingCloud Storage
- 按下
enter,然後按照其餘提示操作。 - 建立含有「Install AngularFire」提交訊息的提交內容,並推送至 GitHub 存放區。
6. 建立 App Hosting 後端
在本節中,您將設定 App Hosting 後端,監控 Git 存放區中的分支。
在本節結束時,您將擁有連線至 GitHub 存放區的 App Hosting 後端,每當您將新修訂版本推送至 main 分支版本時,系統就會自動重建及推出新版應用程式。
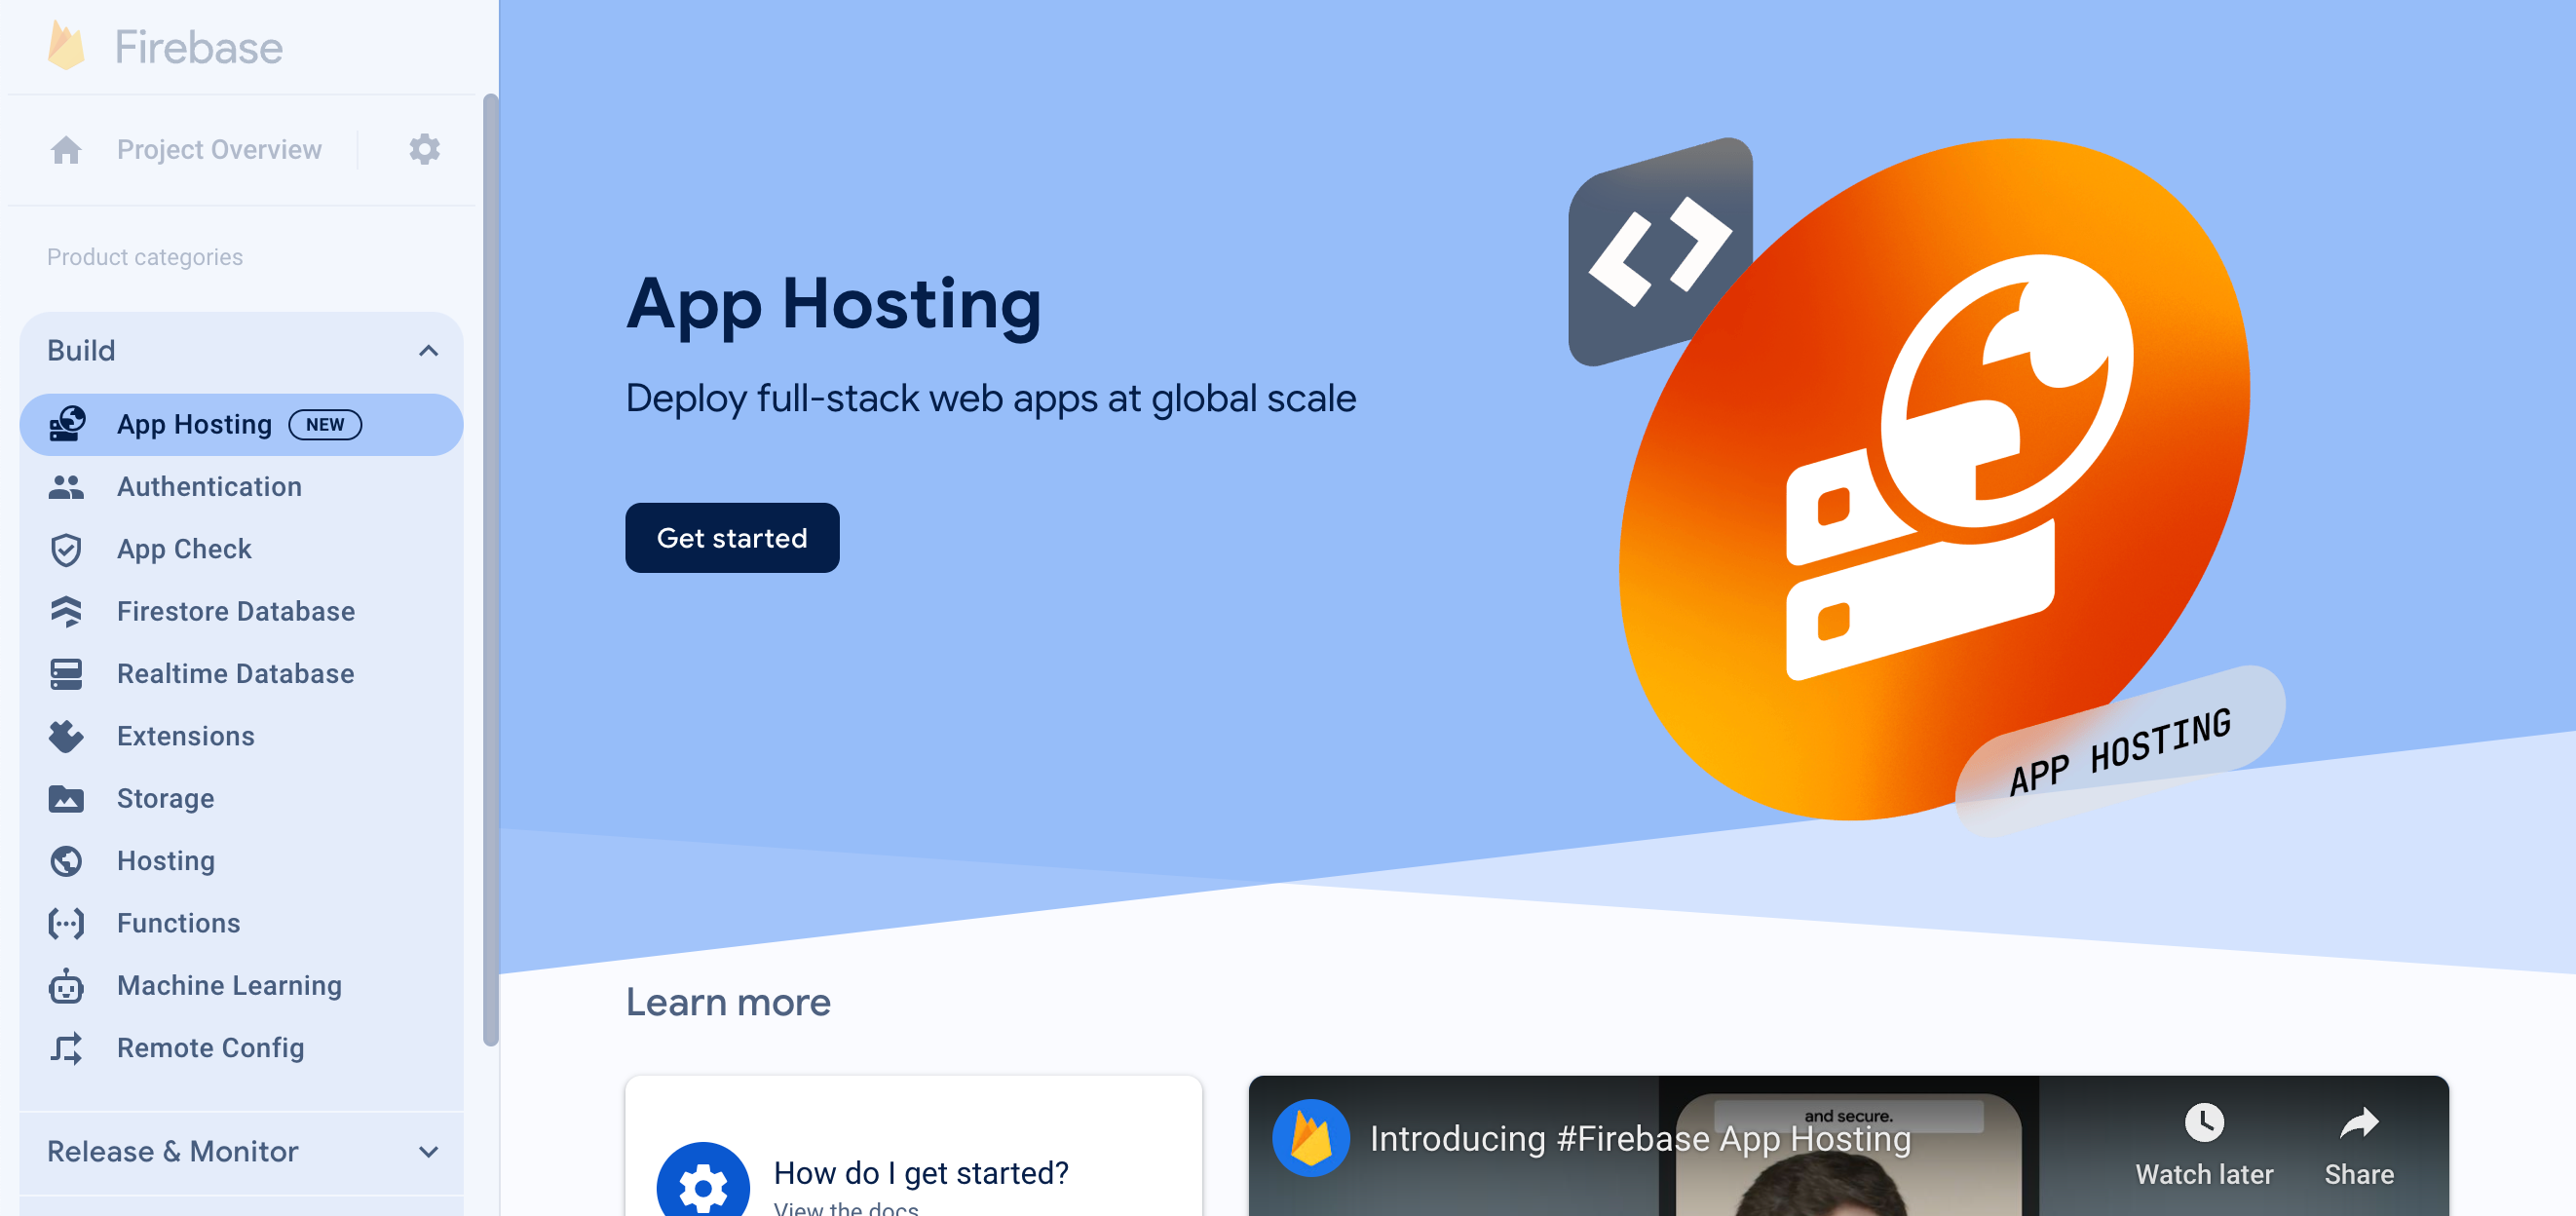
- 按一下「開始使用」,即可啟動後端建立流程。請按下列方式設定後端:
- 按照第一個步驟中的提示,連結您稍早建立的 GitHub 存放區。
- 設定部署設定:
- 將根目錄保留為
/ - 將即時分支設為
main - 啟用自動推出功能
- 將根目錄保留為
- 為後端
friendlychat-codelab命名。 - 在「建立或連結 Firebase 網頁應用程式」中,從「選取現有的 Firebase 網頁應用程式」下拉式選單中,挑選您先前設定的網頁應用程式。
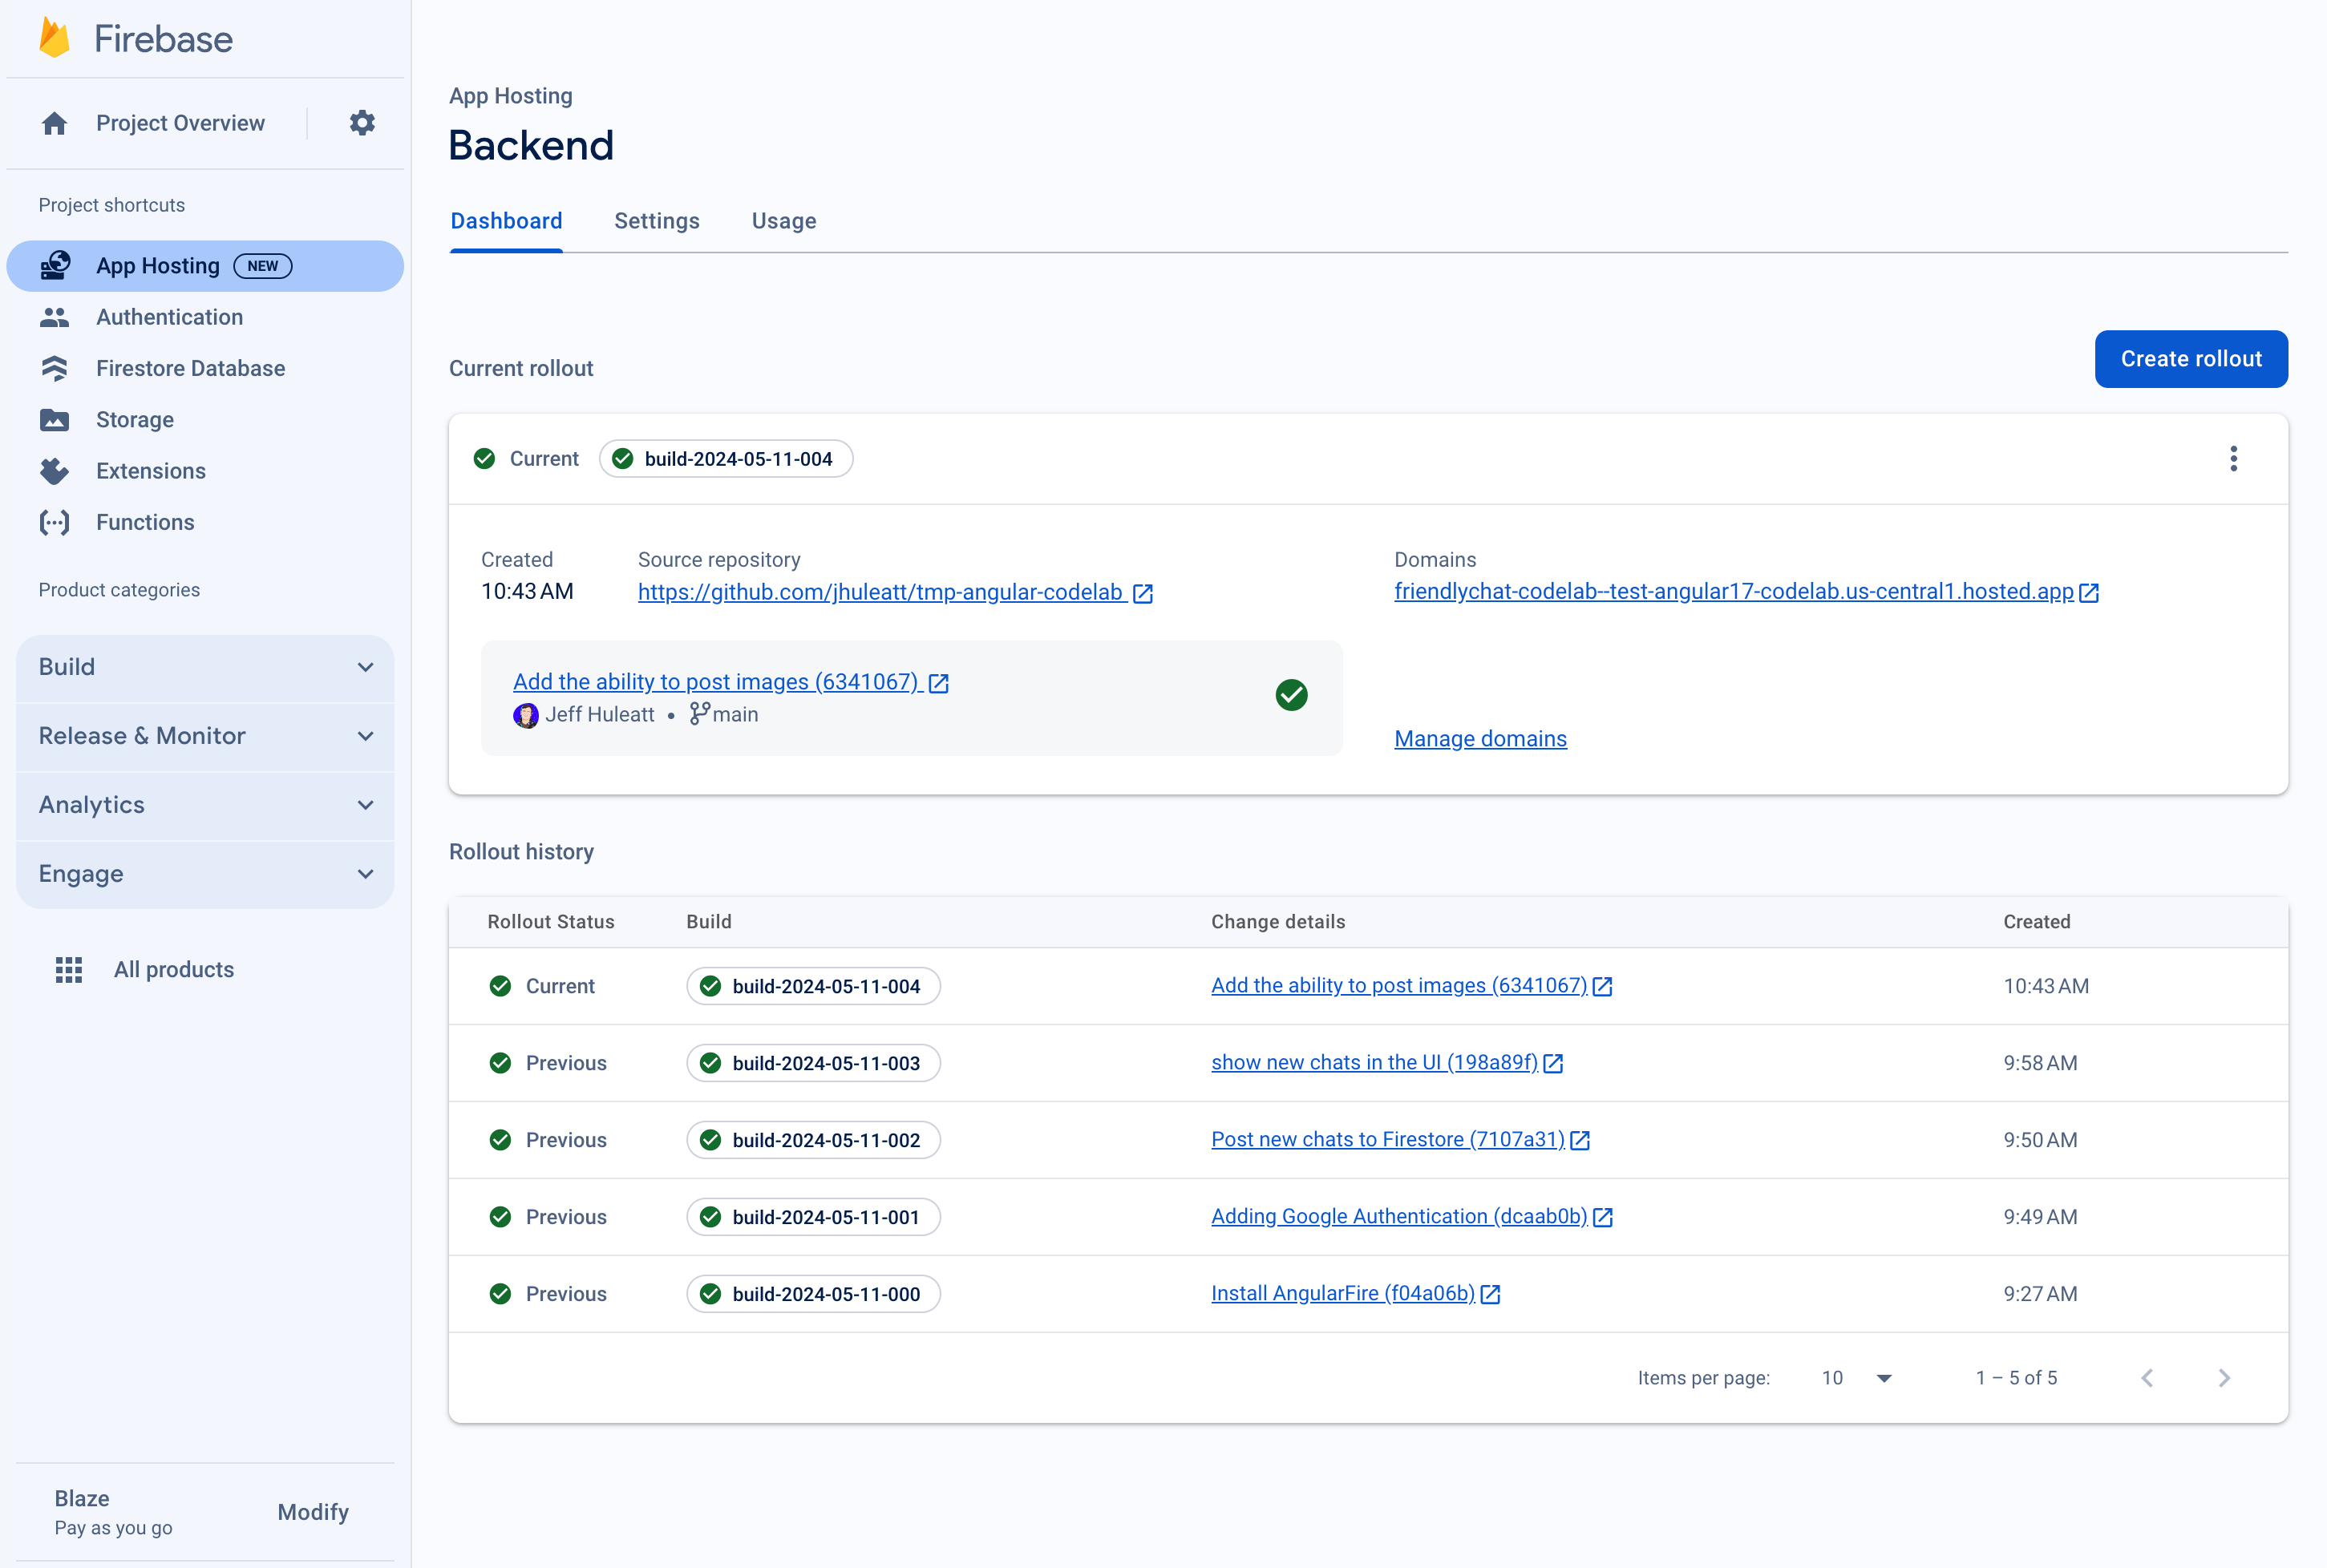
- 按一下「完成並部署」。稍待片刻,系統會將您導向新頁面,您可以在該頁面查看新 App Hosting 後端的狀態!
- 推出完成後,請按一下「網域」下方的免費網域。由於 DNS 傳播需要時間,這項作業可能要過幾分鐘才會開始運作。
您已部署初始網頁應用程式!每當您將新的修訂版本推送至 GitHub 存放區的 main 分支版本時,Firebase 主控台就會開始新的建構和推出作業,並在推出作業完成後自動更新網站。
您應該會看到 FriendlyChat 應用程式的登入畫面,但目前還無法運作。
目前應用程式無法執行任何操作,但只要有你的協助,很快就能派上用場!
接著,我們來建構即時通訊應用程式。
7. 匯入及設定 Firebase
設定 Firebase
您需要設定 Firebase SDK,說明要使用的 Firebase 專案。
- 前往 Firebase 控制台中的專案設定
- 在「您的應用程式」資訊卡中,選取需要設定物件的應用程式暱稱。
- 從 Firebase SDK 程式碼片段窗格中選取「Config」。
您會發現系統已為您產生環境檔案 /angularfire-start/src/environments/environment.ts。
- 複製設定物件程式碼片段,然後加進
angularfire-start/src/firebase-config.js。
environment.ts
export const environment = {
  firebase: {
    apiKey: "API_KEY",
    authDomain: "PROJECT_ID.firebaseapp.com",
    projectId: "PROJECT_ID",
    storageBucket: "PROJECT_ID.firebasestorage.app",
    messagingSenderId: "SENDER_ID",
    appId: "APP_ID",
  },
};
查看 AngularFire 設定
您會發現,在控制台中選取的功能已自動新增至 /angularfire-start/src/app/app.config.ts 檔案。這樣應用程式就能使用 Firebase 功能。
8. 設定使用者登入
AngularFire 已在 app.config.ts 中匯入並初始化,現在應該可以使用了。您現在要使用 Firebase 驗證實作使用者登入功能。
新增授權網域
Firebase 驗證只允許您控管的一組網域登入。將免費的 App Hosting 網域新增至網域清單:
使用 Google 登入功能驗證使用者
在應用程式中,使用者點選「使用 Google 帳戶登入」按鈕時,系統會觸發 login 函式。在本程式碼研究室中,您要授權 Firebase 使用 Google 做為身分識別提供者。您會使用彈出式視窗,但 Firebase 提供其他幾種方法。
- 在
/src/app/services/子目錄中,開啟chat.service.ts。 - 找出
login函式。 - 將整個函式替換為下列程式碼。
chat.service.ts
// Signs-in Friendly Chat.
login() {
    signInWithPopup(this.auth, this.provider).then((result) => {
        const credential = GoogleAuthProvider.credentialFromResult(result);
        this.router.navigate(['/', 'chat']);
        return credential;
    })
}
使用者點選「登出」按鈕時,系統會觸發 logout 函式。
- 返回
src/app/services/chat.service.ts檔案。 - 找出
logout函式。 - 將整個函式替換為下列程式碼。
chat.service.ts
// Logout of Friendly Chat.
logout() {
    signOut(this.auth).then(() => {
        this.router.navigate(['/', 'login'])
        console.log('signed out');
    }).catch((error) => {
        console.log('sign out error: ' + error);
    })
}
追蹤驗證狀態
如要據此更新 UI,您需要檢查使用者是否已登入或登出。AngularFire 提供函式,可取得每次驗證狀態變更時更新的可觀測物件。這項功能已實作,但仍值得一覽。
- 返回
src/app/services/chat.service.ts檔案。 - 找出變數指派
user$。
chat.service.ts
// observable that is updated when the auth state changes
user$ = user(this.auth);
上述程式碼會呼叫 AngularFire 函式 user,該函式會傳回可觀察的使用者。每當驗證狀態變更 (使用者登入或登出時),系統就會觸發這項事件。FriendlyChat 中的 Angular 範本元件會使用這個可觀測物件更新 UI,以重新導向、在標題導覽中顯示使用者等。
測試登入應用程式
- 建立修訂版本,並將修訂訊息設為「Adding Google Authentication」,然後推送至 GitHub 存放區。
- 在 Firebase 控制台中開啟 App Hosting 頁面,等待新的推出作業完成。
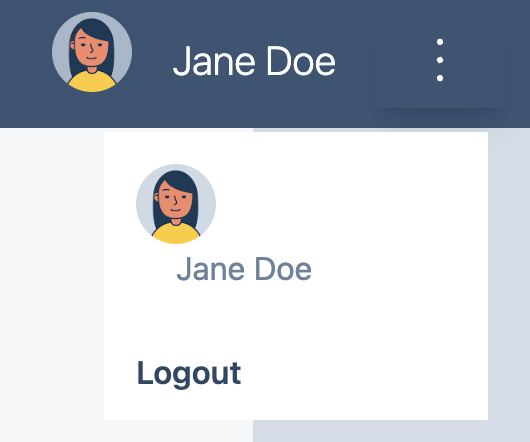
- 在網頁應用程式中,重新整理頁面,然後使用登入按鈕和 Google 帳戶登入應用程式。如果看到
auth/operation-not-allowed錯誤訊息,請檢查是否已在 Firebase 主控台中啟用 Google 登入做為驗證供應商。 - 登入後,系統應會顯示你的個人資料相片和使用者名稱:
9. 將訊息寫入 Cloud Firestore
在本節中,您將一些資料寫入 Cloud Firestore,以便填入應用程式的 UI。您可以使用 Firebase 控制台手動執行這項操作,但為了示範基本的 Cloud Firestore 寫入作業,您會在應用程式中執行這項操作。
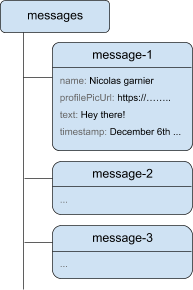
資料模型
Cloud Firestore 資料會分成集合、文件、欄位和子集合。您會將對話中的每則訊息儲存為文件,並放在名為 messages 的頂層集合中。
將訊息新增至 Cloud Firestore
如要儲存使用者撰寫的即時通訊訊息,請使用 Cloud Firestore。
在本節中,您將新增功能,讓使用者能將新訊息寫入資料庫。使用者點選「傳送」按鈕時,系統會觸發下列程式碼片段。這項擴充功能會將訊息欄位的內容新增至 messages 集合中的 Cloud Firestore 執行個體,做為訊息物件。add() 方法會將 ID 自動產生的新文件新增至集合。
- 返回
src/app/services/chat.service.ts檔案。 - 找出
addMessage函式。 - 將整個函式替換為下列程式碼。
chat.service.ts
// Adds a text or image message to Cloud Firestore.
addMessage = async (
  textMessage: string | null,
  imageUrl: string | null,
): Promise<void | DocumentReference<DocumentData>> => {
  // ignore empty messages
  if (!textMessage && !imageUrl) {
    console.log(
      "addMessage was called without a message",
      textMessage,
      imageUrl,
    );
    return;
  }

  if (this.currentUser === null) {
    console.log("addMessage requires a signed-in user");
    return;
  }

  const message: ChatMessage = {
    name: this.currentUser.displayName,
    profilePicUrl: this.currentUser.photoURL,
    timestamp: serverTimestamp(),
    uid: this.currentUser?.uid,
  };

  textMessage && (message.text = textMessage);
  imageUrl && (message.imageUrl = imageUrl);

  try {
    const newMessageRef = await addDoc(
      collection(this.firestore, "messages"),
      message,
    );
    return newMessageRef;
  } catch (error) {
    console.error("Error writing new message to Firebase Database", error);
    return;
  }
};
測試傳送訊息
- 建立修訂版本,並附上「Post new chats to Firestore」的修訂訊息,然後推送到 GitHub 存放區。
- 在 Firebase 控制台中開啟 App Hosting 頁面,等待新的推出作業完成。
- 重新整理 FriendlyChat。登入後,輸入訊息 (例如「你好!」),然後按一下「SEND」(傳送)。這會將訊息寫入 Cloud Firestore。不過,您還不會在實際的網頁應用程式中看到資料,因為您仍需實作擷取資料 (程式碼研究室的下一節)。
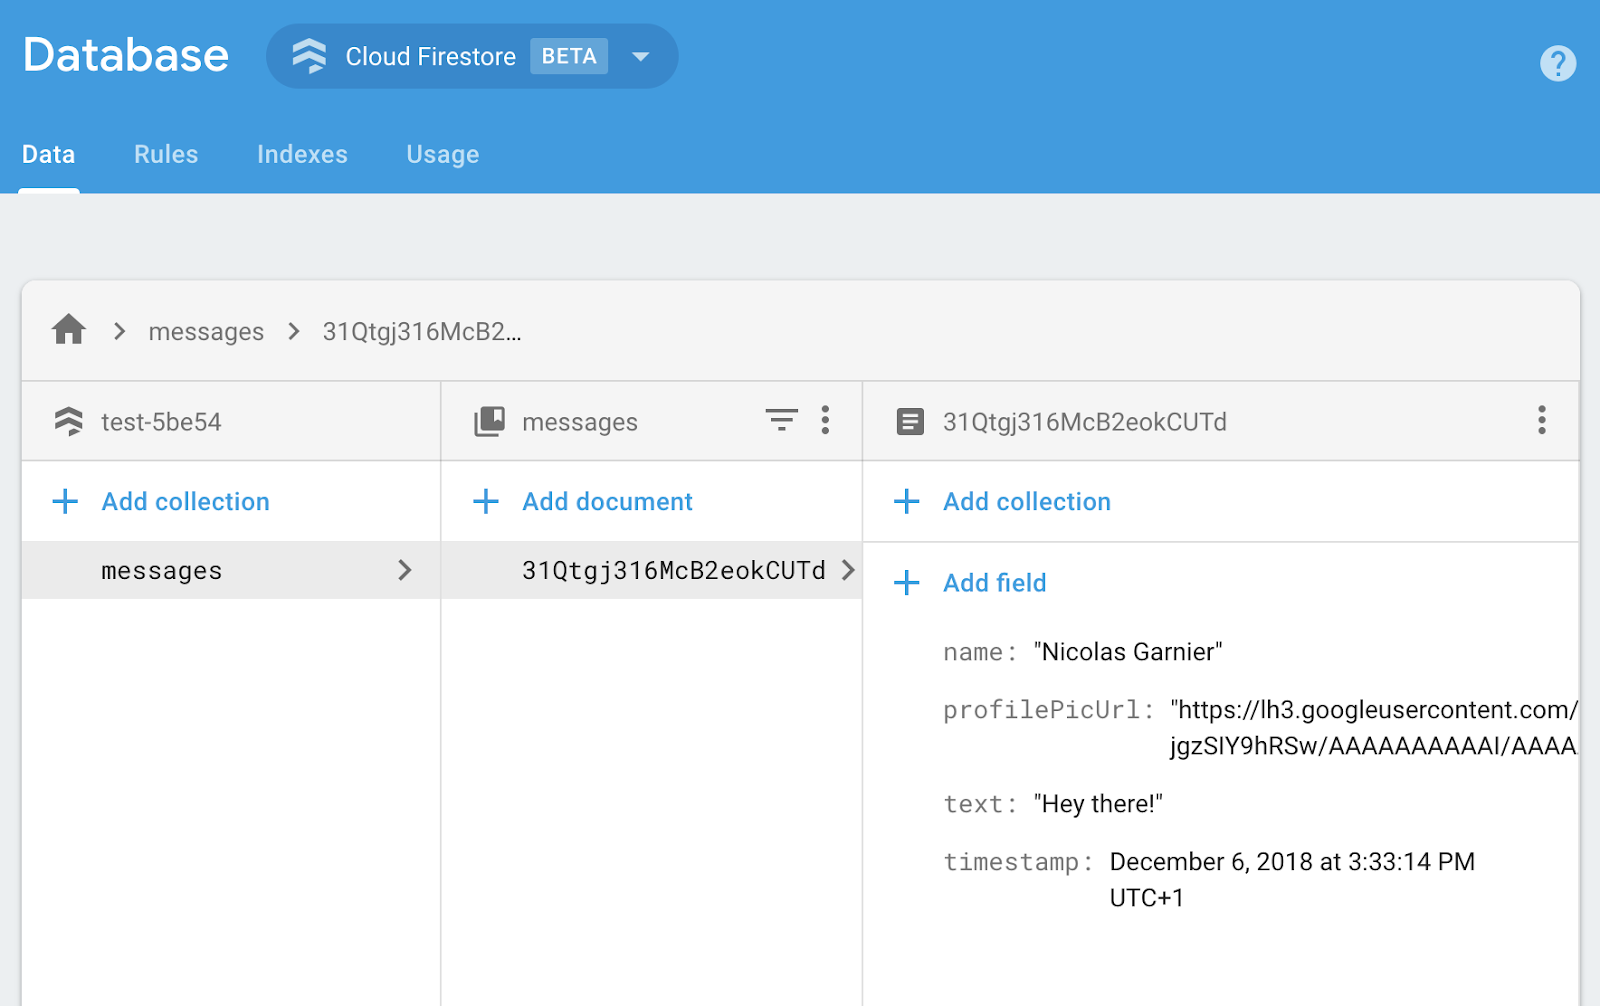
- 您可以在 Firebase 控制台中看到新增的訊息。開啟模擬器套件 UI。在「Build」部分下方,按一下「Firestore Database」 (或按一下這裡),您應該會看到「messages」集合,其中包含您新加入的訊息:
10. 朗讀訊息
同步處理訊息
如要在應用程式中讀取訊息,您需要新增可觀察的項目,在資料變更時觸發,然後建立顯示新訊息的 UI 元素。
您將新增程式碼,監聽應用程式中新加入的訊息。在這段程式碼中,您會擷取 messages 集合的快照。您只會顯示對話的最後 12 則訊息,避免載入時顯示過長的記錄。
- 返回
src/app/services/chat.service.ts檔案。 - 找出
loadMessages函式。 - 將整個函式替換為下列程式碼。
chat.service.ts
// Loads chat message history and listens for upcoming ones.
loadMessages = () => {
  // Create the query to load the last 12 messages and listen for new ones.
  const recentMessagesQuery = query(collection(this.firestore, 'messages'), orderBy('timestamp', 'desc'), limit(12));
  // Start listening to the query.
  return collectionData(recentMessagesQuery);
}
如要監聽資料庫中的訊息,請使用 collection 函式在集合上建立查詢,指定要監聽資料的集合。在上述程式碼中,您正在監聽 messages 集合中的變更,這是儲存即時通訊訊息的位置。此外,你也可以使用 limit(12) 只聽取最後 12 則訊息,並使用 orderBy('timestamp', 'desc') 依日期排序訊息,取得最新的 12 則訊息。
collectionData 函式會在內部使用快照。當有任何符合查詢條件的文件變更時,系統就會觸發回呼函式。例如刪除、修改或新增訊息。詳情請參閱 Cloud Firestore 說明文件。
測試訊息同步
- 建立修訂版本,並將修訂訊息設為「Show new chats in the UI」,然後推送至 GitHub 存放區。
- 在 Firebase 控制台開啟 App Hosting 頁面,等待新的推出作業完成。
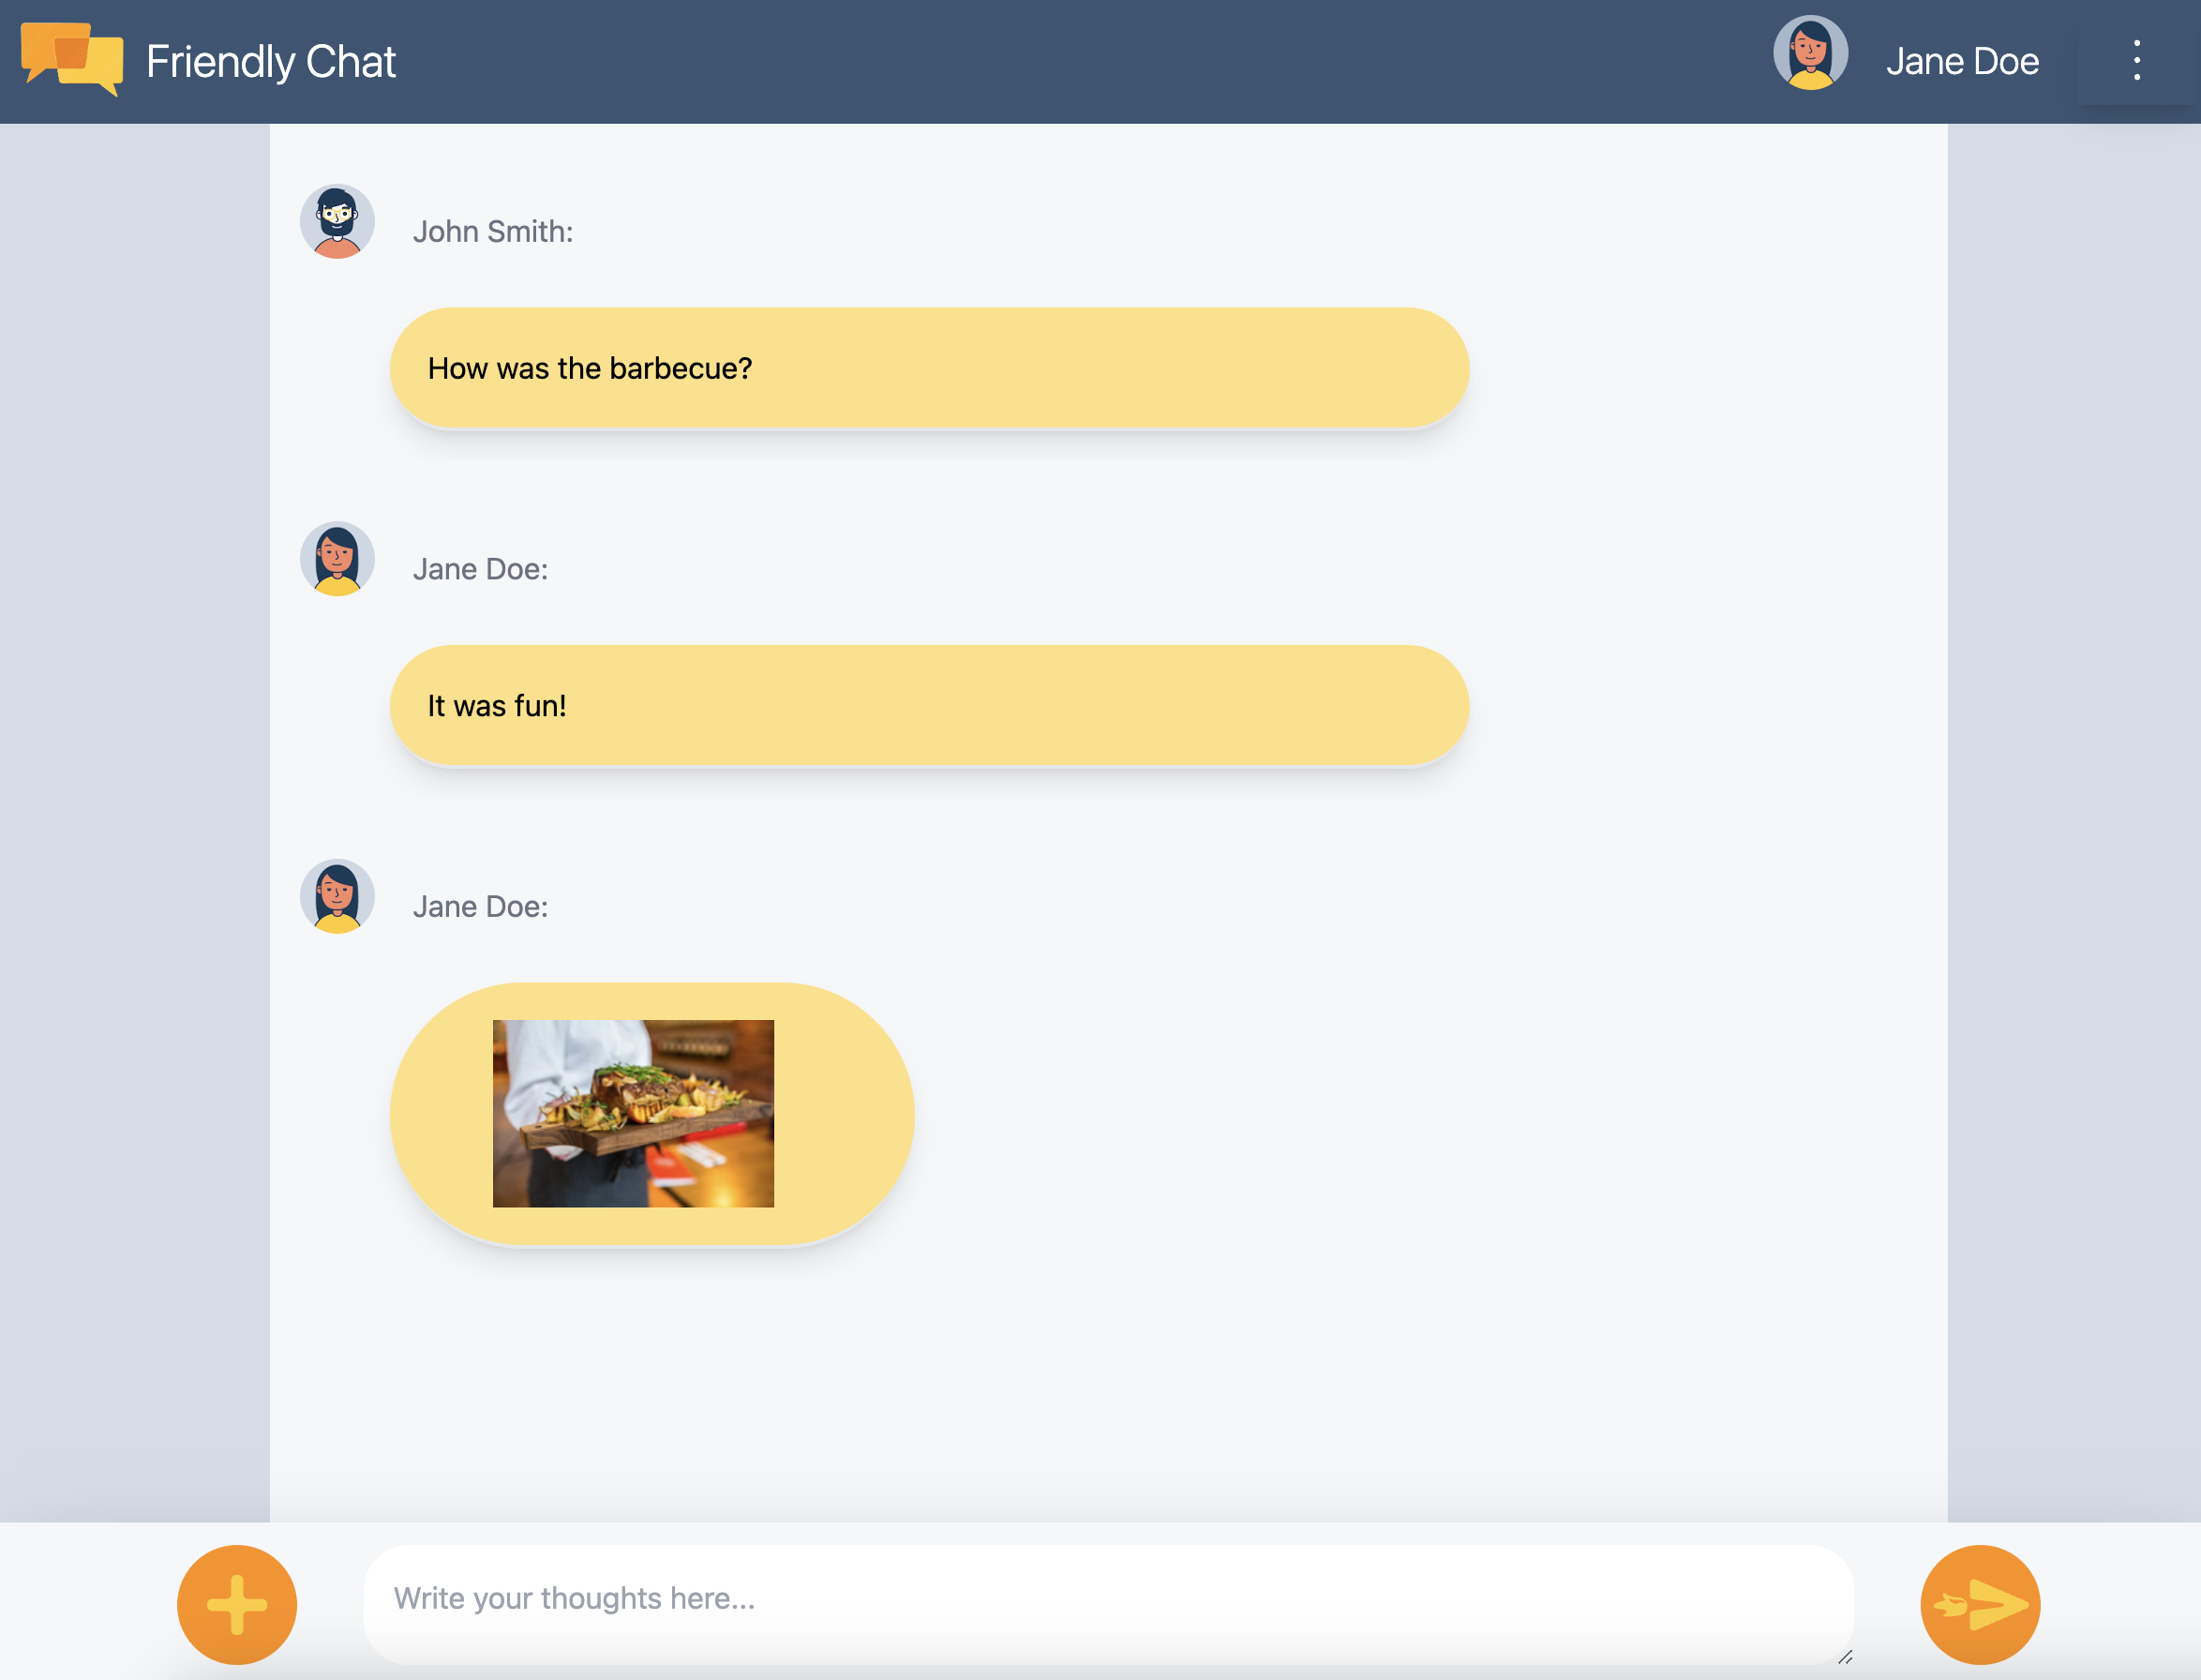
- 重新整理 FriendlyChat。您先前在資料庫中建立的訊息應會顯示在 FriendlyChat UI 中 (如下所示)。請隨意撰寫新訊息,系統應會立即顯示。
- (選用) 你可以嘗試直接在 Emulator Suite 的 Firestore 專區中手動刪除、修改或新增訊息,任何變更都應會反映在 UI 中。
恭喜!您正在應用程式中讀取 Cloud Firestore 文件!
11. 新增 AI 功能
您可以使用 Google AI,在即時通訊應用程式中新增實用的輔助功能。
取得 Google AI API 金鑰
- 前往 Google AI Studio,然後按一下「建立 API 金鑰」
- 選取您在本程式碼研究室建立的 Firebase 專案。系統會提示您輸入 Google Cloud 專案,但每個 Firebase 專案都是 Google Cloud 專案。
- 按一下「在現有專案中建立 API 金鑰」
- 複製產生的 API 金鑰
安裝擴充功能
這項擴充功能會部署 Cloud 函式,每當有新文件新增至 Firestore 的 messages 集合時,就會觸發該函式。這項函式會呼叫 Gemini,並將回覆內容寫回文件中的 response 欄位。
- 在「透過 Gemini API 打造聊天機器人」擴充功能頁面,按一下「在 Firebase 控制台中安裝」。
- 請依照系統的提示操作。到達「設定擴充功能」步驟後,請設定下列參數值:
- Gemini API 供應商:
Google AI - Google AI API 金鑰:貼上您先前建立的金鑰,然後按一下「建立密鑰」。
- Firestore 集合路徑:
messages - 提示欄位:
text - 回應欄位:
response - 排序欄位:
timestamp - 背景資訊:
Keep your answers short, informal, and helpful. Use emojis when possible.
- Gemini API 供應商:
- 按一下「安裝擴充功能」
- 等待擴充功能安裝完成
測試 AI 功能
FriendlyChat 已經有程式碼可從 AI 擴充功能讀取回覆。你只需要傳送新的即時通訊訊息,即可測試這項功能!
- 開啟 FriendlyChat 並傳送訊息。
- 稍後,訊息旁會顯示回覆內容。結尾附有
✨ ai generated附註,清楚說明這是以生成式 AI 建立,而非真人撰寫。
12. 傳送圖片
現在要新增分享圖片的功能。
Cloud Firestore 適合儲存結構化資料,但 Cloud Storage 更適合儲存檔案。Cloud Storage for Firebase 是檔案/大型物件儲存服務,您將使用這項服務儲存使用者透過應用程式分享的圖片。
將圖片儲存至 Cloud Storage
在本程式碼研究室中,您已新增一個按鈕,可觸發檔案挑選器對話方塊。選取檔案後,系統會呼叫 saveImageMessage 函式,您就能取得所選檔案的參照。saveImageMessage 函式會執行下列作業:
- 在聊天室訊息串中建立「預留位置」聊天室訊息,讓使用者在您上傳圖片時看到「載入中」動畫。
- 將圖片檔上傳至 Cloud Storage 的這個路徑:
/<uid>/<file_name> - 為圖片檔案產生可公開讀取的網址。
- 以新上傳圖片檔案的網址更新即時通訊訊息,取代暫時載入的圖片。
現在,您要新增傳送圖片的功能:
- 返回
src/chat.service.ts檔案。 - 找出
saveImageMessage函式。 - 將整個函式替換為下列程式碼。
chat.service.ts
// Saves a new message containing an image in Firestore.
// This first saves the image in Firebase storage.
saveImageMessage = async(file: any) => {
  try {
    // 1 - Add a message with a loading icon that will get updated with the shared image.
    const messageRef = await this.addMessage(null, this.LOADING_IMAGE_URL);

    // 2 - Upload the image to Cloud Storage.
    const filePath = `${this.auth.currentUser?.uid}/${file.name}`;
    const newImageRef = ref(this.storage, filePath);
    const fileSnapshot = await uploadBytesResumable(newImageRef, file);

    // 3 - Generate a public URL for the file.
    const publicImageUrl = await getDownloadURL(newImageRef);

    // 4 - Update the chat message placeholder with the image's URL.
    messageRef ?
    await updateDoc(messageRef, {
      imageUrl: publicImageUrl,
      storageUri: fileSnapshot.metadata.fullPath
    }): null;
  } catch (error) {
    console.error('There was an error uploading a file to Cloud Storage:', error);
  }
}
測試傳送圖片
- 建立修訂版本,並加上「Add the ability to post images」修訂訊息,然後推送至 GitHub 存放區。
- 在 Firebase 控制台中開啟 App Hosting 頁面,等待新的推出作業完成。
- 重新整理 FriendlyChat。登入後,按一下左下方的圖片上傳按鈕
 ,然後使用檔案挑選器選取圖片檔。如果您需要圖片,歡迎使用這張咖啡杯的精美圖片。
 - 應用程式的 UI 應會顯示新訊息和您選取的圖片:
如果未登入就嘗試新增圖片,系統會顯示錯誤訊息,指出必須登入才能新增圖片。
13. 顯示通知
現在要新增瀏覽器通知的支援功能。應用程式會在聊天室中張貼新訊息時通知使用者。Firebase 雲端通訊 (FCM) 是跨平台的訊息傳遞解決方案,可穩定傳送訊息和通知。
新增 FCM 服務工作人員
網頁應用程式需要服務工作人員接收及顯示網頁通知。
新增 AngularFire 時,應該已設定訊息服務供應商,請確認 /angularfire-start/src/app/app.config.ts 的 imports 區段中是否包含下列程式碼:
provideMessaging(() => {
    return getMessaging();
}),
app/app.config.ts
服務工作站只需要載入並初始化 Firebase Cloud Messaging SDK,即可顯示通知。
取得 FCM 裝置權杖
在裝置或瀏覽器上啟用通知後,系統會提供裝置權杖。您可以使用這個裝置權杖,將通知傳送至特定裝置或瀏覽器。
使用者登入時,您會呼叫 saveMessagingDeviceToken 函式。您將從瀏覽器取得 FCM 裝置權杖,並儲存至 Cloud Firestore。
chat.service.ts
- 找出
saveMessagingDeviceToken函式。 - 將整個函式替換為下列程式碼。
chat.service.ts
// Saves the messaging device token to Cloud Firestore.
saveMessagingDeviceToken= async () => {
    try {
      const currentToken = await getToken(this.messaging);
      if (currentToken) {
        console.log('Got FCM device token:', currentToken);
        // Saving the Device Token to Cloud Firestore.
        const tokenRef = doc(this.firestore, 'fcmTokens', currentToken);
        await setDoc(tokenRef, { uid: this.auth.currentUser?.uid });

        // This will fire when a message is received while the app is in the foreground.
        // When the app is in the background, firebase-messaging-sw.js will receive the message instead.
        onMessage(this.messaging, (message) => {
          console.log(
            'New foreground notification from Firebase Messaging!',
            message.notification
          );
        });
      } else {
        // Need to request permissions to show notifications.
        this.requestNotificationsPermissions();
      }
    } catch(error) {
      console.error('Unable to get messaging token.', error);
    };
}
不過,這個程式碼一開始不會運作。如要讓應用程式能夠擷取裝置權杖,使用者必須授予應用程式顯示通知的權限 (程式碼研究室的下一個步驟)。
要求顯示通知的權限
如果使用者尚未授予應用程式顯示通知的權限,您就不會收到裝置權杖。在這種情況下,您會呼叫 requestPermission() 方法,系統會顯示瀏覽器對話方塊,要求這項權限 ( 在支援的瀏覽器中)。
- 返回
src/app/services/chat.service.ts檔案。 - 找出
requestNotificationsPermissions函式。 - 將整個函式替換為下列程式碼。
chat.service.ts
// Requests permissions to show notifications.
requestNotificationsPermissions = async () => {
    console.log('Requesting notifications permission...');
    const permission = await Notification.requestPermission();

    if (permission === 'granted') {
      console.log('Notification permission granted.');
      // Notification permission granted.
      await this.saveMessagingDeviceToken();
    } else {
      console.log('Unable to get permission to notify.');
    }
}
取得裝置權杖
- 建立修訂版本,並加上「Add the ability to post images」修訂訊息,然後推送至 GitHub 存放區。
- 在 Firebase 控制台開啟 App Hosting 頁面,等待新的推出作業完成。
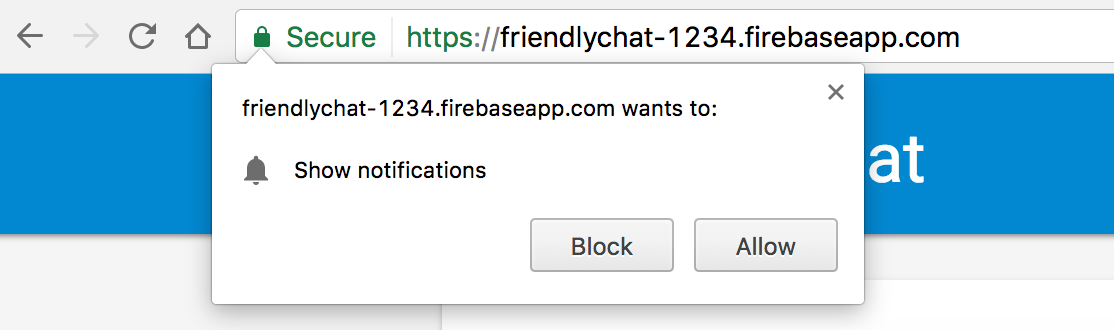
- 重新整理 FriendlyChat。登入後,系統應會顯示通知權限對話方塊:
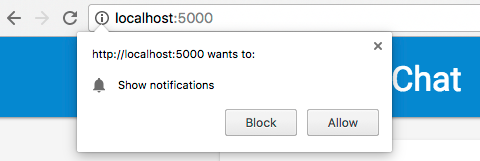
- 按一下「允許」。
- 開啟瀏覽器的 JavaScript 控制台。您應該會看到以下訊息:
Got FCM device token: cWL6w:APA91bHP...4jDPL_A-wPP06GJp1OuekTaTZI5K2Tu - 複製裝置權杖。您會在程式碼研究室的下一個階段中使用。
傳送通知到裝置
取得裝置權杖後,即可傳送通知。
- 開啟 Firebase 控制台的「Cloud Messaging」分頁。
- 按一下「新增通知」
- 輸入通知標題和通知文字。
- 按一下畫面右側的「傳送測試訊息」
- 輸入從瀏覽器 JavaScript 控制台複製的裝置權杖,然後按一下加號「+」
- 按一下「測試」
如果應用程式在前台執行,您會在 JavaScript 控制台中看到通知。
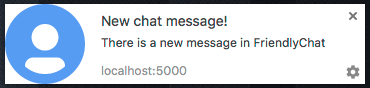
如果應用程式在背景執行,瀏覽器中應會顯示通知,如下例所示:
14. Cloud Firestore 安全性規則
查看資料庫安全規則
Cloud Firestore 使用特定的規則語言定義存取權、安全性和資料驗證。
在本程式碼研究室一開始設定 Firebase 專案時,您選擇使用「測試模式」預設安全性規則,因此未限制對資料存放區的存取權。您可以在 Firebase 控制台的「資料庫」區段中,查看及修改「規則」分頁中的規則。
現在您應該會看到預設規則,這些規則不會限制資料儲存區的存取權。也就是說,任何使用者都能讀取及寫入資料存放區中的任何集合。
您將更新規則,使用下列規則限制項目:
firestore.rules
rules_version = '2';

service cloud.firestore {
  match /databases/{database}/documents {
    // Messages:
    //   - Anyone can read.
    //   - Authenticated users can add and edit messages.
    //   - Validation: Check name is same as auth token and text length below 300 char or that imageUrl is a URL.
    //   - Deletes are not allowed.
    match /messages/{messageId} {
      allow read;
      allow create, update: if request.auth != null
                    && request.resource.data.name == request.auth.token.name
                    && (request.resource.data.text is string
                      && request.resource.data.text.size() <= 300
                      || request.resource.data.imageUrl is string
                      && request.resource.data.imageUrl.matches('https?://.*'));
      allow delete: if false;
    }
    // FCM Tokens:
    //   - Anyone can write their token.
    //   - Reading list of tokens is not allowed.
    match /fcmTokens/{token} {
      allow read: if false;
      allow write;
    }
  }
}
安全性規則應該會自動更新至模擬器套件。
查看 Cloud Storage 安全性規則
Firebase 適用的 Cloud Storage 使用特定的規則語言定義存取權、安全性和資料驗證。
在本程式碼研究室一開始設定 Firebase 專案時,您選擇使用預設的 Cloud Storage 安全性規則,只允許已驗證的使用者使用 Cloud Storage。在 Firebase 控制台的「Storage」(儲存空間) 區段中,您可以在「Rules」(規則) 分頁中查看及修改規則。您應該會看到預設規則,允許任何登入的使用者讀取及寫入儲存空間值區中的任何檔案。
您將更新規則,以執行下列操作:
- 允許每位使用者只能寫入自己的特定資料夾
- 允許任何人從 Cloud Storage 讀取資料
- 確認上傳的檔案是圖片
- 限制圖片大小,上傳的圖片不得超過 5 MB
您可以透過下列規則實作這項功能:
storage.rules
rules_version = '2';

// Returns true if the uploaded file is an image and its size is below the given number of MB.
function isImageBelowMaxSize(maxSizeMB) {
  return request.resource.size < maxSizeMB * 1024 * 1024
      && request.resource.contentType.matches('image/.*');
}

service firebase.storage {
  match /b/{bucket}/o {
    match /{userId}/{messageId}/{fileName} {
      allow write: if request.auth != null && request.auth.uid == userId && isImageBelowMaxSize(5);
      allow read;
    }
  }
}
15. 恭喜!
您已使用 Firebase 建構即時通訊網頁應用程式!
涵蓋內容
- Firebase App Hosting
- Firebase 驗證
- Cloud Firestore
- Cloud Storage 專用的 Firebase SDK
- Firebase 雲端通訊
- Firebase Performance Monitoring
後續步驟
瞭解詳情
16. [選用] 使用 App Check 強制執行
Firebase App Check 可防止服務遭到惡意流量攻擊,並保護後端免於濫用。在這個步驟中,您將使用 App Check 和 reCAPTCHA Enterprise 新增憑證驗證,並封鎖未經授權的用戶端。
首先,您需要啟用 App Check 和 reCaptcha。
啟用 reCAPTCHA Enterprise
- 在 Cloud 控制台中,找出並選取「安全性」下方的「reCAPTCHA Enterprise」。
- 按照提示啟用服務,然後按一下「建立金鑰」。
- 按照提示輸入顯示名稱,然後選取「網站」做為平台類型。
- 將已部署的網址新增至「網域清單」,並確認「使用核取方塊驗證」選項未選取。
- 按一下「建立金鑰」,然後將產生的金鑰存放在安全的地方。稍後會用到。
啟用 App Check
- 在 Firebase 控制台中,找出左側面板的「Build」部分。
- 按一下「App Check」,然後點選「登入方式」分頁標籤,前往 App Check。
- 按一下「Register」(註冊),在系統顯示提示時輸入 reCaptcha Enterprise 金鑰,然後按一下「Save」(儲存)。
- 在 API 檢視畫面中,選取「儲存空間」,然後按一下「強制執行」。對 Cloud Firestore 執行相同操作。
App Check 現在應該會強制執行!請重新整理應用程式,然後嘗試查看或傳送即時通訊訊息。您應該會收到下列錯誤訊息:
Uncaught Error in snapshot listener: FirebaseError: [code=permission-denied]: Missing or insufficient permissions.
也就是說,App Check 預設會封鎖未驗證的要求。現在,讓我們為應用程式新增驗證。
前往 environment.ts 檔案,並將 reCAPTCHAEnterpriseKey 新增至 environment 物件。
export const environment = {
  firebase: {
    apiKey: 'API_KEY',
    authDomain: 'PROJECT_ID.firebaseapp.com',
    databaseURL: 'https://PROJECT_ID.firebaseio.com',
    projectId: 'PROJECT_ID',
    storageBucket: 'PROJECT_ID.firebasestorage.app',
    messagingSenderId: 'SENDER_ID',
    appId: 'APP_ID',
    measurementId: 'G-MEASUREMENT_ID',
  },
  reCAPTCHAEnterpriseKey: {
    key: "Replace with your recaptcha enterprise site key"
  },
};
將 key 的值替換成 reCaptcha Enterprise 權杖。
接著,前往 app.config.ts 檔案並新增下列匯入項目:
import { getApp } from '@angular/fire/app';
import {
  ReCaptchaEnterpriseProvider,
  initializeAppCheck,
  provideAppCheck,
} from '@angular/fire/app-check';
在同一個 app.config.ts 檔案中,新增下列全域變數宣告:
declare global {
  var FIREBASE_APPCHECK_DEBUG_TOKEN: boolean;
}

@NgModule({ ...
在匯入作業中,使用 ReCaptchaEnterpriseProvider 新增 App Check 的初始化作業,並將 isTokenAutoRefreshEnabled 設為 true,允許權杖自動重新整理。
imports: [
BrowserModule,
AppRoutingModule,
CommonModule,
FormsModule,
provideFirebaseApp(() => initializeApp(environment.firebase)),
provideAppCheck(() => {
const appCheck = initializeAppCheck(getApp(), {
  provider: new ReCaptchaEnterpriseProvider(
  environment.reCAPTCHAEnterpriseKey.key
  ),
  isTokenAutoRefreshEnabled: true,
  });
  if (location.hostname === 'localhost') {
    self.FIREBASE_APPCHECK_DEBUG_TOKEN = true;
  }
  return appCheck;
}),
如要允許本機測試,請將 self.FIREBASE_APPCHECK_DEBUG_TOKEN 設為 true。在 localhost 中重新整理應用程式時,系統會在控制台中記錄偵錯權杖,類似於:
App Check debug token: CEFC0C76-7891-494B-B764-349BDFD00D00. You will need to add it to your app's App Check settings in the Firebase console for it to work.
現在,請前往 Firebase 控制台的 App Check「應用程式檢視畫面」。
按一下溢位選單,然後選取「管理偵錯權杖」。
然後按一下「新增偵錯權杖」,並按照提示從控制台貼上偵錯權杖。
前往 chat.service.ts 檔案,並新增下列匯入項目:
import { AppCheck } from '@angular/fire/app-check';
在同一個 chat.service.ts 檔案中,連同其他 Firebase 服務一併注入 App Check。
export class ChatService {
appCheck: AppCheck = inject(AppCheck);
...
- 建立含有「Block unauthorized clients with App Check」提交訊息的提交內容,並推送至 GitHub 存放區。
- 在 Firebase 控制台開啟 App Hosting 頁面,等待新的推出作業完成。
恭喜!應用程式現在應可使用 App Check。